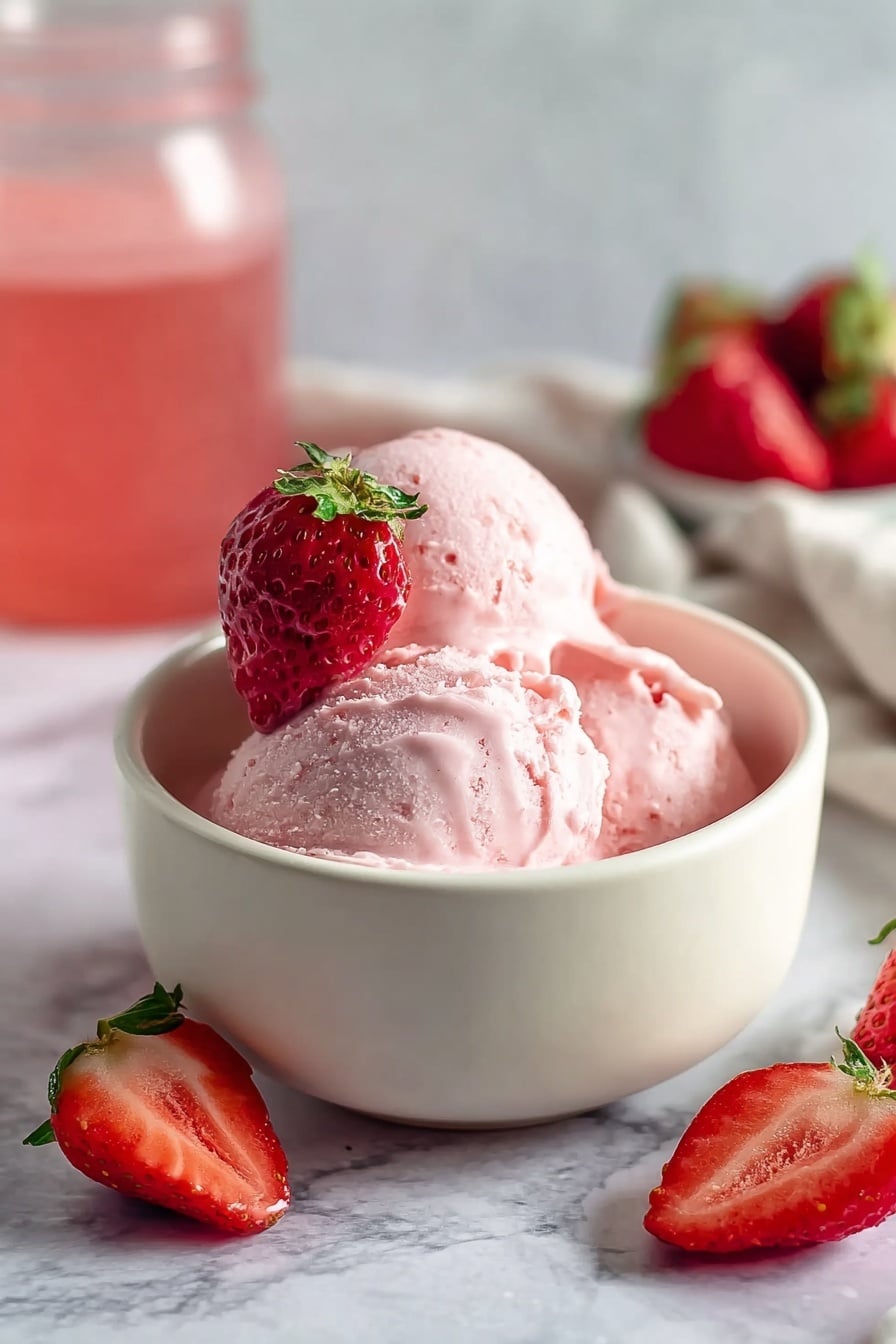
If you’re looking for a fresh, healthy twist on dessert, you’ve got to try my Strawberry Cottage Cheese Ice Cream Recipe. This one is a game-changer — it’s creamy, naturally sweet, and packed with protein, making it a guilt-free treat you’ll want again and again. Trust me, once you make this, your freezer will be your new favorite spot!
Why You’ll Love This Recipe
- Protein-Packed: Using cottage cheese gives this ice cream an impressive boost of protein, perfect for a post-workout snack or a filling dessert.
- Simple, Clean Ingredients: Just a handful of wholesome ingredients that you can pronounce and feel good about.
- Made in Ninja Creami: This recipe is specially crafted for the Ninja Creami, which delivers that creamy, rich texture without the heavy cream.
- Customizable Flavor: You can easily swap strawberries for other fruits or add mix-ins, so it never gets boring.

Ingredients You’ll Need
The magic of this Strawberry Cottage Cheese Ice Cream Recipe lies in the simplicity of its ingredients. Each one plays a role in balancing creaminess, sweetness, and fresh fruit flavor. For the best taste, pick ripe, fragrant strawberries and a creamy cottage cheese with 1% or 2% fat content — it really makes a difference.

- Cottage cheese: Look for a smooth, low-fat variety to keep the ice cream creamy yet light.
- Chopped strawberries: Fresh and sweet strawberries work best; frozen can be used but might add extra moisture.
- Honey: Adds natural sweetness; feel free to adjust based on your taste preference.
- Vanilla bean paste or extract: Brings out the flavors and adds a lovely hint of warmth.
Variations
I love making this Strawberry Cottage Cheese Ice Cream Recipe my own by mixing things up. Don’t be shy about trying different fruits or flavor boosters — it’s your treat, after all!
- Berry Medley: Swap strawberries with blueberries or raspberries for a different flavor nuance — my family especially enjoys a mixed berry swirl.
- Chocolate Twist: Add a tablespoon of cocoa powder or fold in mini dark chocolate chips after the Re-Spin cycle for a rich, indulgent version.
- Honey Alternatives: Maple syrup or agave nectar work wonderfully too, especially if you’re avoiding honey.
- Dairy-Free Option: Substitute cottage cheese with a thick plant-based alternative, though texture may differ slightly.
How to Make Strawberry Cottage Cheese Ice Cream Recipe
Step 1: Puree your ingredients into a smooth base
Start by combining the cottage cheese, chopped strawberries, honey, and vanilla bean paste right in your Ninja Creami pint. I usually grab my immersion blender for this—it’s super easy to control and keeps everything contained. Blend until the mixture is silky smooth, with no lumps of cottage cheese or big chunks of strawberries. If you don’t have an immersion blender, a regular blender works perfectly fine — just pour it back into the pint container when you’re done.
Step 2: Freeze it overnight
Once your mix is ready, slap the lid on tight and pop the pint into the freezer for at least 24 hours. This ensures it’s fully frozen and ready for churning. I’ve learned that rushing this step usually means a grainy texture, so patience here pays off big time.
Step 3: Cream it with the Ninja Creami
After freezing, place the pint in your Ninja Creami machine and run the “Lite Ice Cream” cycle. At first, the texture might seem a little powdery or crumbly — don’t worry, that’s normal with cottage cheese as the base. Simply run the “Re-Spin” cycle to smooth it out. Sometimes, adding a tablespoon of milk or cream helps the texture, especially if you’re using fat-free cottage cheese. But if your cottage cheese is 1% or 2% fat, I often skip the extra liquid and still get wonderfully creamy ice cream.
Step 4: Add mix-ins and serve!
This is where you can have fun! Toss in fresh strawberries, chopped nuts, or a sprinkle of dark chocolate chips. Give it one final gentle stir and scoop it into bowls. Then get ready for those satisfied, “Wow, this is amazing!” smiles around the table.
Pro Tips for Making Strawberry Cottage Cheese Ice Cream Recipe
- Embrace the Re-Spin: I discovered that running the Re-Spin cycle is key to getting that perfectly creamy texture — don’t skip it, even if your ice cream looks good after the first spin.
- Ingredient Temperatures Matter: Make sure your strawberries aren’t too watery; blot them dry if needed to avoid excess ice crystals forming.
- Sweeten to Taste: Depending on how sweet your strawberries are, feel free to tweak the honey amount — I usually start with less, then add more after blending if needed.
- Freeze Fully: Never rush the freezing step; having a fully frozen base is where the Ninja Creami works its magic best.
How to Serve Strawberry Cottage Cheese Ice Cream Recipe

Garnishes
I’m all about adding a few fresh strawberry slices or a sprinkle of toasted coconut flakes on top. Sometimes a drizzle of extra honey or a handful of chopped pistachios adds a wonderful texture and flavor boost that elevates this simple dessert.
Side Dishes
For a little extra indulgence, I like serving it next to a warm almond biscotti or even a slice of angel food cake. The contrast between the creamy ice cream and crunchy sides is simply divine.
Creative Ways to Present
For parties or special occasions, I’ve served this ice cream in individual mason jars layered with fresh strawberries and a touch of granola — it looks gorgeous and feels like a gourmet treat but is so simple to pull together.
Make Ahead and Storage
Storing Leftovers
My best tip is to store any leftovers in an airtight container — I usually transfer the ice cream from the Ninja Creami pint to a freezer-safe glass container with a tight lid. This keeps it fresh and prevents freezer burn.
Freezing
I’ve frozen this ice cream successfully for up to 2 weeks. Just be sure to run it through the Re-Spin cycle again after thawing a bit to restore that perfect creamy texture.
Reheating
This recipe is best served cold, but if it gets too hard in the freezer, just sit it out at room temperature for 5 to 10 minutes before scooping. No microwave needed! If you do want to warm it slightly, keep it gentle — a few seconds on low power retains the creamy texture without melting it.
FAQs
-
Can I make Strawberry Cottage Cheese Ice Cream Recipe without a Ninja Creami?
While the Ninja Creami gives this recipe its signature creamy texture, you can try blending the mixture and then freezing it in a shallow container, stirring every 30 minutes for 3 hours to break up ice crystals, but results won’t be as smooth as with the Ninja Creami.
-
Is this recipe suitable for a low-fat diet?
Absolutely! Using low-fat cottage cheese keeps the calories down while offering protein. You can adjust the honey amount or substitute with a natural low-calorie sweetener to fit your dietary needs.
-
Can I use frozen strawberries instead of fresh?
Yes, but be aware that frozen strawberries may release more water during blending, which can slightly alter the texture. You might want to drain excess liquid or blot them dry before blending for the best results.
-
How long can I store this ice cream in the freezer?
Stored properly in an airtight container, the ice cream will stay fresh for up to two weeks. Beyond that, texture and flavor may start to deteriorate.
-
What if my ice cream turns out too icy or powdery?
Running the Re-Spin cycle on the Ninja Creami usually fixes this by smoothing out the texture. Adding a tablespoon of milk or cream during the Re-Spin can also help, especially if you’re using fat-free cottage cheese.
Final Thoughts
I absolutely love how this Strawberry Cottage Cheese Ice Cream Recipe brings together wholesome ingredients in such a simple, fuss-free way. It’s something I turn to when I want dessert that feels indulgent but doesn’t weigh me down. If you give it a try, I promise you’ll be just as thrilled with how creamy, fresh, and naturally sweet it turns out. Go ahead, make it your own, and enjoy the smiles when you share it with family or friends.
Print
Strawberry Cottage Cheese Ice Cream Recipe
- Prep Time: 10 minutes
- Cook Time: 0 minutes
- Total Time: 1 day 10 minutes
- Yield: 4 servings 1x
- Category: Dessert
- Method: Blending
- Cuisine: American
- Diet: Low Fat
Description
This refreshing Strawberry Cottage Cheese Ice Cream is a healthy and creamy dessert made with simple ingredients and prepared using the Ninja Creami. Combining the natural creaminess of cottage cheese with fresh strawberries, a touch of honey, and vanilla, this frozen treat is easy to make at home and perfect for a guilt-free indulgence.
Ingredients
Main Ingredients
- 2 cups cottage cheese
- 1 cup chopped strawberries
- 3 tablespoons honey
- 1 teaspoon vanilla bean paste or extract
Instructions
- Blend Ingredients: Combine the cottage cheese, chopped strawberries, honey, and vanilla bean paste in the Ninja Creami pint. Use an immersion blender to puree the mixture until it is smooth. Alternatively, use a regular blender and then pour the mixture into the pint if you don’t have an immersion blender.
- Freeze Mixture: Cover the Ninja Creami pint with its lid and place it in the freezer. Freeze the mixture solid for 24 hours to prepare it for the Ninja Creami processing.
- Process with Ninja Creami: Remove the pint from the freezer and place it into the Ninja Creami. Run the “Lite Ice Cream” cycle to churn the mixture into ice cream.
- Re-spin for Creaminess: After the first cycle, the ice cream may be a bit powdery and not fully creamy. Return the pint to the Ninja Creami and run the Re-Spin cycle to improve texture. Optional: You may add a tablespoon of liquid (such as milk or cream) to help the re-spin if using fat-free cottage cheese, but this is generally not necessary with 1% or 2% fat cottage cheese.
- Add Mix-ins and Serve: After achieving desired creaminess, add any mix-ins if you like, then serve the ice cream immediately and enjoy.
Notes
- Ensure the mixture is completely frozen for 24 hours before processing in the Ninja Creami for best texture.
- If using fat-free cottage cheese, consider adding a small amount of liquid during the Re-Spin cycle to improve creaminess.
- You can substitute vanilla bean paste with vanilla extract without affecting the overall flavor significantly.
- This recipe makes approximately 4 servings.
- Enjoy immediately after processing for the best creamy texture; leftovers can be refrozen but may require additional processing.
Nutrition
- Serving Size: 1/4 of recipe (approx. 130g)
- Calories: 120
- Sugar: 9g
- Sodium: 160mg
- Fat: 3.5g
- Saturated Fat: 1.5g
- Unsaturated Fat: 2g
- Trans Fat: 0g
- Carbohydrates: 12g
- Fiber: 1.5g
- Protein: 11g
- Cholesterol: 10mg

Your email address will not be published. Required fields are marked *