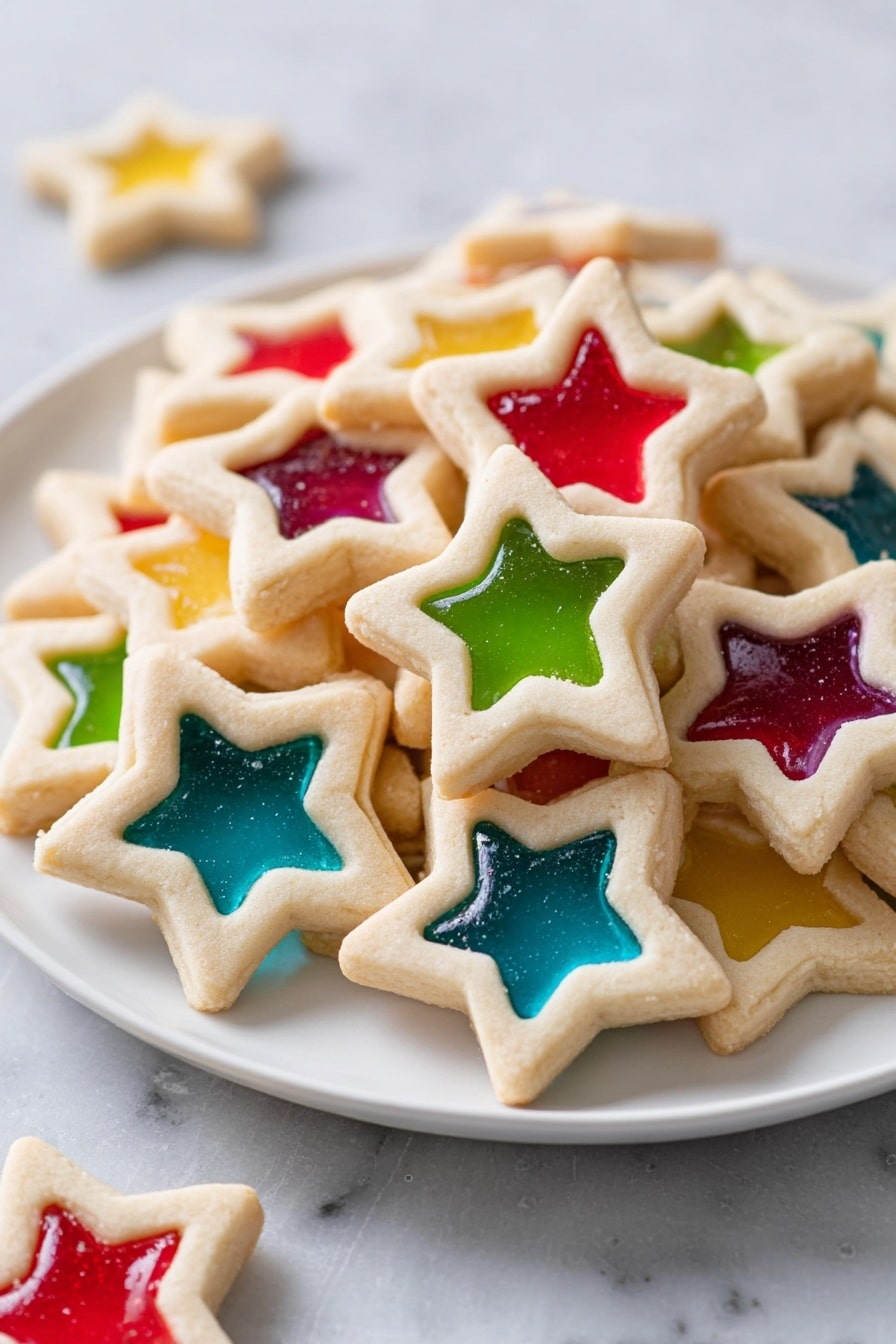
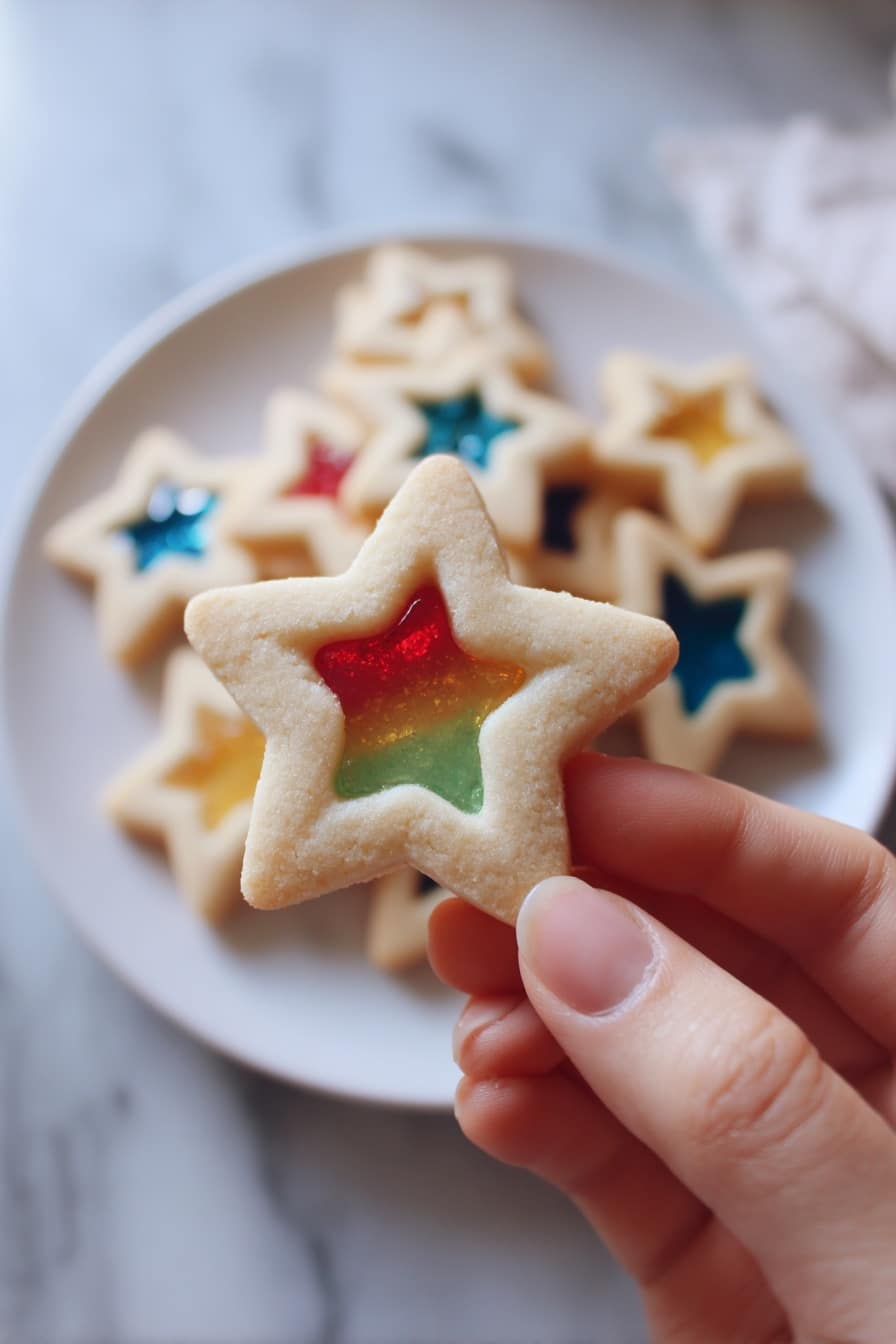
There’s something downright magical about cookies that light up like stained glass windows when you bite into them, and I’m excited to share my fan-freaking-tastic Stained Glass Cookies with Jolly Ranchers Recipe with you! Whether you’re planning a festive gathering or want a cheerful treat to brighten any day, these cookies are pure joy — colorful, crunchy, and totally satisfying. Stick with me, and I’ll walk you through how easy and rewarding it is to make these at home.
Why You’ll Love This Recipe
- Vibrant, Playful Look: The crushed Jolly Ranchers melt into colorful centers that catch the light beautifully.
- Simple Ingredients: You probably already have most of these in your pantry, plus a bag of candies for a sweet twist.
- Kid-Friendly Fun: Kids love helping unwrap candies and watching the colors melt inside the cookies.
- Perfect for Holidays & Gifting: They double as edible decorations, and everyone raves about these unique treats.

Ingredients You’ll Need
Each ingredient in this Stained Glass Cookies with Jolly Ranchers Recipe plays a crucial role in getting that perfect balance of tender cookie and glossy candy center. Let me tell you why I stick with these basics — they deliver consistent results every time.

- Jolly Ranchers hard candies: Picking a variety of colors makes your cookies literally shine like stained glass. Separate colors before crushing for a pretty mix.
- Unsalted butter: Softened butter brings richness and tenderness. Unsalted allows you to control the salt level perfectly.
- Granulated sugar: It balances sweetness and helps cookies keep their shape while baking.
- Salt: Just a pinch to amplify flavor and balance the sweet candy centers.
- Eggs: They bind everything together smoothly and add that lovely golden color.
- Vanilla extract: I always add vanilla because it adds warmth and depth to the cookie flavor.
- All-purpose flour: This is the sturdy base that keeps your cookies firm but tender; remember to spoon and level for accuracy.
Variations
I love how flexible this Stained Glass Cookies with Jolly Ranchers Recipe can be — you can easily tweak it to match your mood or dietary needs without losing any of that wow factor. Here’s what I’ve experimented with and recommend.
- Variation: Sometimes I swap Jolly Ranchers for other hard candies like Lifesavers for different flavor profiles—just check if they melt similarly.
- Gluten-Free: Using a gluten-free flour blend works well if you need it, just be mindful it might affect texture slightly.
- Vegan Adaptation: Plant-based butter substitutes and flax eggs have worked for me, though baked time may vary slightly.
- Festive Shapes: I love swapping the star cutters for hearts around Valentine’s Day or trees for Christmas to suit the season.
How to Make Stained Glass Cookies with Jolly Ranchers Recipe
Step 1: Prep and Crush Your Jolly Ranchers
Start by unwrapping your Jolly Ranchers and sorting them by color—this way, your “stained glass” centers will look vibrant and pretty. Place each color into separate resealable bags and gently crush the candies with a meat mallet or rolling pin until you have small chunks but not powder. This is key so they melt evenly and create those brilliant candy “windows.”
Step 2: Make the Cookie Dough
I like to use my stand mixer to cream together the softened butter, sugar, and salt until it’s light and fluffy—this gives your cookies the perfect tender crumb. Then, add eggs one at a time and the vanilla, mixing well. Gradually mix in the flour on low speed to avoid overworking the dough, which can make cookies tough.
Step 3: Chill and Roll the Dough
Scrape out the dough and gently shape it into a rectangle. Wrapping it in plastic wrap and chilling for about an hour helps the dough firm up — which makes rolling and cutting so much easier. I usually divide the dough into thirds so I only work with a manageable portion while the rest stays chilled.
Step 4: Cut Stars and Create Candy Centers
Roll the dough on a well-floured surface to about 1/5-inch thickness. Use your large star cookie cutter (around 3.5 inches) to cut as many stars as you can, then transfer them onto a baking sheet lined with a silicone mat (trust me, this prevents sticking issues better than parchment paper). Next, use a smaller star cutter (1.75 inches) to cut a star out of the center of each cookie and gently remove the tiny piece—you can use a toothpick if it’s stubborn.
Step 5: Fill and Chill Before Baking
Fill the cookie centers carefully about three-quarters full with the crushed Jolly Ranchers. You don’t want to overfill or they might bubble over during baking. Chill the cookies in the fridge for 15–20 minutes until firm; this step helps prevent spreading and ensures the candy melts perfectly.
Step 6: Bake and Cool
Pop your chilled tray into a 350℉ oven and bake until the dough is set and the candy centers have melted—about 12 to 14 minutes. Let the cookies cool completely on the baking sheet so the candy hardens into that glossy, stained-glass finish. Patience here is key to getting that clean look!
Pro Tips for Making Stained Glass Cookies with Jolly Ranchers Recipe
- Use Silicone Baking Mats: I’ve learned that silicone mats prevent sticking better than parchment paper, keeping your cookie bottoms perfectly smooth.
- Don’t Crush Jolly Ranchers Too Finely: Keeping them chunky helps them melt evenly without turning into a candy puddle.
- Chill Twice: Chilling the dough before rolling and the filled cookies before baking minimizes spreading and gives cleaner edges.
- Use Toothpicks to Remove Centers: If your small star cutouts get stuck, gently tease them out with a toothpick to avoid breaking the cookie shape.
How to Serve Stained Glass Cookies with Jolly Ranchers Recipe
Garnishes
While these cookies are beautiful on their own, I like to give them a little extra sparkle with edible glitter or a light dusting of powdered sugar around the edges—kind of like frosting a window frame. It adds a festive touch without competing with the candy centers.
Side Dishes
Pair these stained glass treats with a cozy cup of spiced tea, hot cocoa, or even a bright citrus punch. At holiday parties, I love serving them alongside other light desserts like fruit tarts or lemon bars to keep things balanced.
Creative Ways to Present
I’ve had great success turning these cookies into edible ornaments for Christmas by poking a small hole near the top with a straw before baking and threading a ribbon through after. Displaying them on a pretty plate with seasonal greenery instantly makes your dessert table the star of the show.
Make Ahead and Storage
Storing Leftovers
I keep leftover stained glass cookies in an airtight container at room temperature—they stay fresh for up to a week, with that candy center staying shiny and crisp. I line the container with parchment in between layers to protect those delicate windows.
Freezing
Freezing these cookies is possible, but I recommend freezing the unbaked cut dough (without filling) wrapped tightly in plastic wrap to preserve freshness. When you’re ready, thaw, fill with crushed candies, then bake fresh for best texture and vibrant candy color.
Reheating
Since these cookies look best when candy centers are hardened, I usually serve them at room temperature. If you do warm them up, do it gently and briefly (around 10 seconds in a microwave) to renew that soft cookie texture without melting your stained glass again.
FAQs
-
Can I use other hard candies instead of Jolly Ranchers for stained glass cookies?
Yes! Other hard candies that melt smoothly like Lifesavers or Werther’s Original work well too. Just be sure to crush them into small chunks rather than a powder to get the best melting effect without burning or bubbling over.
-
Why do I need to chill the filled cookies before baking?
Chilling the cookie dough and the filled cookies helps prevent spreading during baking. It keeps the shape sharp and the candy centers from leaking out, giving you those perfect stained glass “windows” every time.
-
What if my candy centers bubble over while baking?
Filling the centers about three-quarters full and chilling the cookies before baking typically prevents bubbling over. Also, avoid crushing your candies too finely; bigger chunks melt more evenly and stay nicely contained.
-
Can I make these cookies shaped for holidays other than stars?
Absolutely! Hearts, trees, flowers—any cookie cutter with a simple center cutout works beautifully. Just adjust the size to hold enough candy and chill the cookies well before baking.
Final Thoughts
When I first made this Stained Glass Cookies with Jolly Ranchers Recipe, I felt like I’d discovered a little edible art project that everyone could enjoy. They’re surprisingly easy to make yet impressive enough to wow your friends and family. Whether you’re baking with the kids or prepping for the holidays, I promise these cookies will brighten up your kitchen and your day. Give them a try—you’ll be so glad you did!
Print
Stained Glass Cookies with Jolly Ranchers Recipe
- Prep Time: 45 minutes
- Cook Time: 30 minutes
- Total Time: 2 hours 40 minutes
- Yield: 30 cookies 1x
- Category: Dessert
- Method: Baking
- Cuisine: American
Description
These Stained Glass Cookies are delightful sugar cookies with a colorful, melted Jolly Rancher candy center that creates a beautiful stained glass effect. Perfect for festive occasions or as charming edible decorations, these cookies combine a buttery, slightly sweet dough with vibrant candy centers for a fun and delicious treat.
Ingredients
Cookies:
- 1 cup (226g) unsalted butter, softened
- 1 cup (200g) granulated sugar
- 1/4 tsp salt
- 2 large eggs
- 1 tsp vanilla extract
- 3 cups (382g) all-purpose flour, spooned and leveled, plus more for dusting
Candy Center:
- Jolly Ranchers hard candies (approx. 20), separated by color and crushed into small bits
Instructions
- Prepare the Candy: Unwrap and separate the Jolly Ranchers into each color, then place them in separate small resealable bags. Crush them into small bits using a meat mallet, being careful not to crush into powder. Set aside.
- Mix the Dough: In the bowl of an electric stand mixer, cream together softened butter, granulated sugar, and salt until well combined and fluffy. Add eggs one at a time, mixing well after each, then blend in vanilla extract.
- Add Flour: With the mixer on low speed, slowly add the flour and mix until the dough is well combined and smooth. Scrape down the sides as needed.
- Chill the Dough: Transfer the dough onto a surface, shape it into a rectangle, wrap tightly in plastic wrap, and refrigerate for 1 hour to firm up.
- Divide and Roll: Remove the dough from the refrigerator and cut into thirds. Work with one portion at a time while keeping the others chilled. On a floured surface, roll the dough out to about 1/5-inch thickness.
- Cut Out Large Stars: Use a 3.5-inch star-shaped cookie cutter to cut as many large stars as possible. Transfer them to a baking sheet lined with a silicone baking mat.
- Cut Out Small Stars: Using a 1.75-inch star cutter, cut smaller stars out from the centers of the large stars to create cookie frames. Carefully remove the small star pieces—you can use a toothpick if needed. Re-roll the scrap dough to cut more shapes.
- Fill Centers with Crushed Candy: Fill the cut-out centers about 3/4 full with the crushed Jolly Rancher bits, distributing colors as desired.
- Chill the Cookies: Place the baking sheet with cookies in the refrigerator for 15-20 minutes until the dough and candy centers are firm.
- Preheat Oven: Preheat your oven to 350°F (175°C) during the chilling time.
- Bake Cookies: Bake the cookies for 12-14 minutes, or until the cookie frames are set and the candy centers have melted completely, creating the stained glass effect.
- Cool Down: Allow the cookies to cool on the baking sheet until the candy centers have hardened and set completely.
- Repeat: Repeat the process with the remaining chilled dough portions.
- Store: Once fully cooled, store the cookies in an airtight container to keep them fresh.
Notes
- Use silicone baking mats instead of parchment paper to prevent sticking; some brands of parchment paper may cause cookies to stick.
- If the center piece is difficult to remove after cutting, use a toothpick to gently lift it out.
- To hang cookies with a ribbon, cut a small hole near the top of the cookie using a standard-sized plastic straw before chilling and baking.
Nutrition
- Serving Size: 1 cookie (approximate)
- Calories: 150
- Sugar: 12g
- Sodium: 65mg
- Fat: 8g
- Saturated Fat: 5g
- Unsaturated Fat: 3g
- Trans Fat: 0g
- Carbohydrates: 18g
- Fiber: 0.5g
- Protein: 2g
- Cholesterol: 35mg

Your email address will not be published. Required fields are marked *