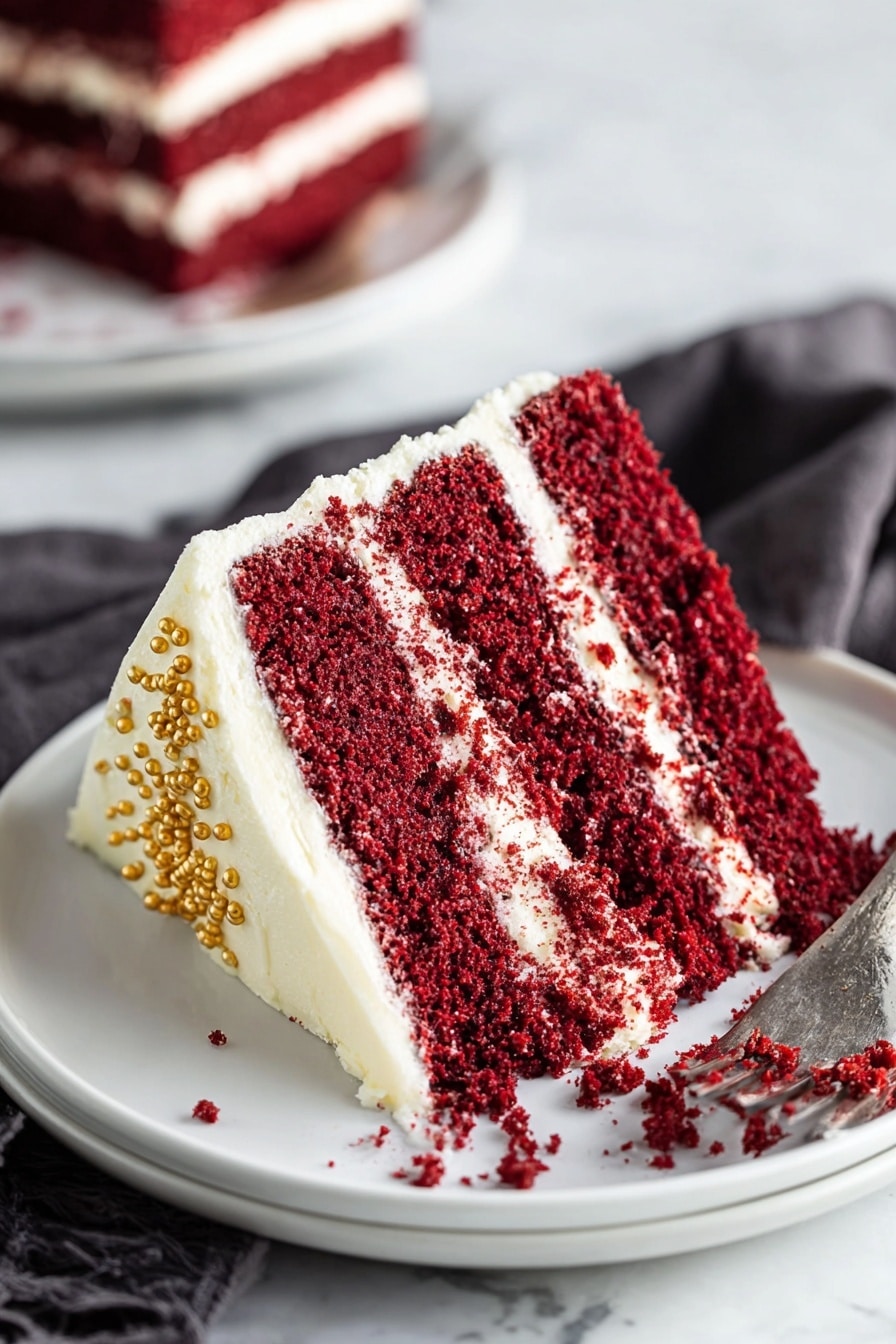
If you’ve ever craved a classic dessert that’s as stunning as it is delicious, you’re in for a treat with this Red Velvet Cake with Cream Cheese Frosting Recipe. I absolutely love how this cake turns out every single time—moist, velvety layers drenched in a luscious, tangy-sweet cream cheese frosting. When I first tried perfecting this recipe, I used to struggle with balancing the rich cocoa flavor and that iconic red hue, but this version nails it every time. You’ll find that with just a little attention to detail, you can create a showstopper cake that your family and friends will rave about.
Why You’ll Love This Recipe
- Classic Flavors Balanced Perfectly: This recipe brings together cocoa and cream cheese in that iconic red velvet combination that’s tender and flavorful.
- Moist and Velvety Texture: Trust me, the hot coffee and buttermilk magically create the soft crumb that melts in your mouth.
- Foolproof Frosting: The cream cheese frosting is silky-smooth and not too sweet, which perfectly complements the cake.
- Easy to Follow Steps: Whether you’re a baking pro or a home cook, this recipe walks you through clear steps to guarantee success.

Ingredients You’ll Need
This Red Velvet Cake with Cream Cheese Frosting Recipe combines simple pantry staples that come together beautifully. I always recommend using fresh ingredients, especially for the buttermilk and cream cheese, as they really impact the final taste and texture.

- Hot coffee or boiling water: Helps enhance the cocoa flavor; I usually brew fresh coffee but plain hot water works too.
- Unsweetened natural cocoa powder: Use natural, not Dutch-processed cocoa, to get that authentic taste and color reaction.
- All-purpose flour: Provides structure; sift it well for a lighter crumb.
- Baking powder and baking soda: Both are needed here for leavening; don’t skip the soda, it reacts with vinegar for lift and tenderness.
- Salt and cinnamon: Salt balances flavors, and cinnamon adds a subtle warmth—optional but I love it.
- Granulated sugar: Sweetens the cake; I find standard white sugar works best for classic texture.
- Vegetable oil: Keeps the cake extremely moist—don’t substitute with butter to maintain texture.
- Unsalted butter: Melted for richness, added with oil for that perfect bite.
- Eggs and egg yolk: Use at room temperature for better batter emulsification.
- Buttermilk: Adds tang and helps tenderize; make sure it’s fresh and room temp.
- Vanilla extract: For that essential depth of flavor.
- Red gel food coloring: Gel works best to get a vibrant color without watering down the batter.
- Distilled white vinegar: Reacts with baking soda creating rise and a tender crumb; lemon juice can be substituted if needed.
- Cream cheese: Full-fat and room temperature is key for smooth frosting.
- Unsalted butter (for frosting): Softened to blend perfectly with cream cheese.
- Powdered sugar: Sifted to avoid lumps for silky frosting.
Variations
I love how flexible the Red Velvet Cake with Cream Cheese Frosting Recipe is—once you’ve mastered the basic version, it’s fun to try your own twists. Here are a few of my go-to variations that have wowed family and friends.
- Chocolate lovers’ twist: Add an extra tablespoon or two of cocoa powder for a deeper chocolate flavor—I did this on a whim once and it became a new favorite.
- Less sweet frosting: Cut back on the powdered sugar slightly and add a splash of lemon juice to balance sweetness; great if you like tangier frosting.
- Gluten-free option: Sub out the flour for a gluten-free blend, making sure it includes xanthan gum to preserve texture. I had success this way for a friend’s gluten intolerance.
- Mini cupcakes: Bake the batter in cupcake liners for adorable, individual-sized treats perfect for parties.
How to Make Red Velvet Cake with Cream Cheese Frosting Recipe
Step 1: Prep and mix the cocoa coffee base
Start by preheating your oven to 325°F and lining three 8-inch cake pans with parchment rounds. Don’t forget to spray those pans well with nonstick spray—this makes removing the cakes a breeze. Next, whisk together the hot coffee (or boiling water) and your unsweetened natural cocoa powder in a glass measuring cup. Cover it and let it sit for about 5 minutes; this really unlocks the cocoa’s full flavor and deepens the color.
Step 2: Combine dry ingredients
While your cocoa coffee mixture is resting, get your dry ingredients ready. In a medium bowl, whisk together the all-purpose flour, baking powder, baking soda, salt, and cinnamon if you’re using it. Sifting these ingredients together ensures an even distribution and a light crumb.
Step 3: Mix wet ingredients
In a large bowl, whisk granulated sugar, vegetable oil, and melted butter until well combined. Then add your eggs and egg yolk—beating for about 20 seconds to get everything completely incorporated. Now pour in the buttermilk, vanilla extract, red gel food coloring, distilled white vinegar, and finally the cocoa coffee mixture you prepared earlier. Whisk until smooth and vibrant.
Step 4: Combine flour with wet ingredients
Using a fine mesh sieve, sift the dry flour mixture into your wet batter in three batches. After each addition, whisk gently but thoroughly until the batter is smooth. This method helps avoid lumps and prevents overmixing which can toughen the cake.
Step 5: Bake the cake layers
Divide the batter evenly between your prepared cake pans. I like to weigh them or eyeball equal amounts so the layers bake and stack evenly. Then gently tap the sides and bottoms of the pans against your countertop a few times to release any trapped air bubbles. Bake for about 25 to 30 minutes, or until a toothpick inserted into the center comes out clean. The tops might look a little spongy, and that’s okay.
Step 6: Cool the cakes
Once out of the oven, place the pans on cooling racks. When they’re cool enough to touch—usually after 10-15 minutes—run a thin knife around the edges to loosen the cakes. Then invert the cakes onto wire racks and let them cool completely. I usually cool them overnight in the fridge if I’m prepping ahead.
Step 7: Make the cream cheese frosting
In the bowl of a stand mixer fitted with the paddle attachment, beat room temperature cream cheese and butter on medium-high speed until very light, creamy, and smooth. Don’t rush this part—it takes a few minutes but the texture makes a huge difference. Scrape down the bowl sides and add vanilla, mixing again. Then, on low speed, gradually add sifted powdered sugar. Beat until fluffy, about 3 minutes. If the frosting feels too stiff, add a bit of milk or cream to loosen it up. Too thin? Toss in some more powdered sugar.
Step 8: Assemble and frost
Place one cake layer flat-side up on your serving plate or cake stand. To help keep your workspace tidy, tuck in strips of baking paper under the edges of the cake. Spread about one third of the frosting evenly over the top. Repeat with the second layer. Place the final cake layer flat-side up and frost the entire cake with the remaining frosting. You can smooth it out or get creative with swirls—I like a rustic look myself.
Pro Tips for Making Red Velvet Cake with Cream Cheese Frosting Recipe
- Use Gel Food Coloring: I found gel colors give the brightest red without thinning the batter, which liquid dyes sometimes do.
- Don’t Skip the Coffee: The hot coffee intensifies the cocoa flavor perfectly—I’ve tried skipping this and it just doesn’t taste quite right.
- Room Temperature Ingredients: Make sure your eggs, butter, and cream cheese aren’t cold; this prevents lumps and makes mixing easier.
- Even Layering: Weigh your batter or use a measuring cup to divide evenly, so the cake layers stack nicely without tilting.
How to Serve Red Velvet Cake with Cream Cheese Frosting Recipe

Garnishes
I usually keep the garnish simple to let the cake shine. A few fresh raspberries or strawberries on top add a pop of freshness and color contrast that I love. Sometimes, I sprinkle a little cocoa powder or finely chopped toasted pecans around the edges for a subtle crunch. You could also add edible flowers for a fancy occasion—they always amaze guests.
Side Dishes
If I’m serving the Red Velvet Cake with Cream Cheese Frosting Recipe for a special get-together, I like to pair it with fresh whipped cream and a bright berry compote. A simple espresso or robust black tea also complements the flavors wonderfully, balancing the cake’s sweetness.
Creative Ways to Present
Once, for a birthday party, I turned the red velvet cake into mini layered parfaits using the cake and frosting layered in clear glasses with fresh berries in-between. It was a crowd-pleaser and looked gorgeous! Another idea is to create a naked cake effect by lightly frosting and letting a peek of the red layers show—super trendy and delicious.
Make Ahead and Storage
Storing Leftovers
I store leftover red velvet cake in an airtight container in the refrigerator, and it stays fresh and moist for up to 4 days. I like to bring a slice to room temperature before eating because the frosting softens and the flavors bloom beautifully.
Freezing
Freezing this cake works great if you wrap each layer tightly in plastic wrap and freeze it separately. When you’re ready to assemble, thaw in the fridge overnight. You can also freeze the fully frosted cake, but I prefer frosting fresh for best texture. I’ve found the cake doesn’t lose its velvety crumb or flavor after freezing.
Reheating
If you want to warm a slice, just leave it out 30 minutes or microwave on low for about 10 seconds—be careful not to melt the frosting! This tiny step really makes the cake taste freshly baked again.
FAQs
-
Can I use Dutch-processed cocoa instead of natural cocoa?
For this Red Velvet Cake with Cream Cheese Frosting Recipe, natural cocoa is best because it reacts properly with the baking soda and vinegar to create the cake’s texture and slight rise. Dutch-processed cocoa is alkalized and won’t react the same way, which might affect the rise and flavor.
-
Why do I need to add vinegar? Can I skip it?
The vinegar reacts with the baking soda to help the cake rise and gives a tender crumb. If you skip it, the cake may be denser and less fluffy. If you don’t have vinegar on hand, lemon juice is a good substitute, but the flavor might have a slight citrus note, which is usually subtle.
-
What can I do if my frosting is too runny?
If your cream cheese frosting is too thin, add more sifted powdered sugar a little at a time until you reach the desired consistency. Alternatively, chill the frosting briefly to help it firm up before frosting the cake.
-
How do I prevent the cake layers from sticking to the pan?
Lining your pans with parchment rounds and spraying both the parchment and pan sides generously with nonstick cooking spray is my go-to method to keep the cakes from sticking. Also, letting the cakes cool slightly before attempting to remove them helps keep layers intact.
-
Can I make this cake vegan or dairy-free?
While this recipe relies on dairy and eggs for its classic texture and flavor, you can experiment by substituting plant-based milk for buttermilk (with added vinegar), vegan cream cheese, and egg replacers. However, expect some differences in texture and flavor. I haven’t perfected a vegan version myself but know there are many variations out there to explore!
Final Thoughts
This Red Velvet Cake with Cream Cheese Frosting Recipe has become one of my absolute favorites to bake for celebrations and simply to brighten an ordinary day. I love how reliably moist and tender it turns out, and the frosting is just dreamy every time. I really think you’ll enjoy making it as much as eating it—plus, it’s a fantastic way to impress guests without feeling intimidated. So grab your mixing bowl and give it a try; your taste buds and friends will thank you!
Print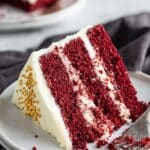
Red Velvet Cake with Cream Cheese Frosting Recipe
- Prep Time: 15 minutes
- Cook Time: 30 minutes
- Total Time: 45 minutes
- Yield: 12 servings 1x
- Category: Dessert
- Method: Baking
- Cuisine: American
Description
This classic Red Velvet Cake recipe delivers a moist, tender, and visually stunning cake with a deep red hue and subtle cocoa flavor. Paired with a smooth and creamy homemade cream cheese frosting, it is perfect for celebrations or any special occasion. The recipe balances rich ingredients like butter, buttermilk, and coffee with a subtle tang from vinegar, creating a soft, velvety crumb and luscious finish.
Ingredients
For the cake:
- ½ cup plain hot coffee or boiling water
- ¼ cup (21 grams) unsweetened natural cocoa powder
- 2 ¼ cups (279 grams) all-purpose flour
- ½ teaspoon baking powder
- 1 teaspoon baking soda
- 1 teaspoon salt
- ¼ teaspoon ground cinnamon (optional)
- 2 cups (400 grams) granulated sugar
- ½ cup (109 grams) fresh vegetable oil
- 1 stick (113 grams) unsalted butter, melted
- 2 large eggs, at room temperature
- 1 large egg yolk, at room temperature
- 1 cup buttermilk, at room temperature
- 2 teaspoons vanilla extract
- 3 teaspoons red gel food coloring, plus more if needed
- 1 teaspoon distilled white vinegar
For the cream cheese frosting:
- 16 ounces (454 grams) cream cheese, at room temperature
- 2 sticks (227 grams) unsalted butter, at room temperature
- 2 teaspoons vanilla extract
- 4 cups (500 grams) powdered sugar, sifted
Instructions
- Prepare the pans and preheat oven: Preheat the oven to 325°F (163°C). Line three 8-inch round cake pans with parchment rounds and spray the parchment and sides generously with nonstick cooking spray to ensure the cakes release easily after baking.
- Make the coffee-cocoa mixture: In a glass measuring cup, whisk together the hot coffee and cocoa powder until smooth. Cover and let it stand for 5 minutes to allow the cocoa to dissolve fully.
- Mix dry ingredients: In a medium bowl, whisk together the all-purpose flour, baking powder, baking soda, salt, and ground cinnamon (if using) to evenly distribute all leavening agents and spices.
- Combine wet ingredients: In a large mixing bowl, whisk sugar, vegetable oil, and melted butter until smooth. Add eggs and egg yolk; whisk vigorously for about 20 seconds until very well combined and slightly thickened.
- Add flavorings: Stir in buttermilk, vanilla extract, red gel food coloring, distilled white vinegar, and the cooled coffee-cocoa mixture. Whisk until the batter is fully combined and evenly colored.
- Incorporate dry ingredients: Using a fine mesh sieve, sift the flour mixture into the wet ingredients in three increments. Whisk gently but thoroughly after each addition to ensure no lumps and uniform batter texture.
- Prepare to bake: Divide the batter equally among the three prepared pans. Tap each pan gently on the counter several times to release trapped air bubbles, ensuring even baking and a smooth cake surface.
- Bake the cakes: Place the pans in the preheated oven and bake for 25 to 30 minutes, or until a toothpick or cake tester inserted in the center comes out clean. The cake tops may still look slightly spongy, which is normal.
- Cool the cakes: Remove the pans from the oven and set on cooling racks. Once they are cool enough to handle, run a thin knife around the edges to loosen the cakes, invert them onto wire racks, and cool completely before frosting.
- Make the cream cheese frosting: In the bowl of a stand mixer fitted with the paddle attachment, beat the cream cheese and butter on medium-high speed until very light, creamy, and smooth. Scrape down the sides and bottom of the bowl to ensure even mixing.
- Add vanilla and sugar: Add vanilla extract and beat until combined. On low speed, gradually add sifted powdered sugar and continue beating until the frosting is fluffy, about 3 minutes. Adjust consistency with a splash of milk or cream if too thick, or add more powdered sugar if too thin.
- Assemble the cake: Place one cake layer flat-side up on a cake plate or pedestal. Tuck strips of baking paper under the edges to keep the plate clean. Spread about one-third of the frosting evenly over this layer. Repeat with the second layer and frosting. Top with the final cake layer and use remaining frosting to ice the entire cake smoothly.
Notes
- It’s normal for the cake top to appear slightly spongy after baking; this does not indicate undercooking.
- If you don’t have distilled white vinegar, you can use an equal amount of lemon juice as a substitute. The citrus flavor is mild and usually masked by cocoa and vanilla.
- Make sure all wet ingredients are at room temperature to ensure proper mixing and texture.
- Use gel food coloring for vibrant red color without thinning the batter.
- Allow cakes to cool completely before frosting to prevent melting the cream cheese frosting.
Nutrition
- Serving Size: 1 slice (1/12th of cake)
- Calories: 420
- Sugar: 35g
- Sodium: 320mg
- Fat: 22g
- Saturated Fat: 10g
- Unsaturated Fat: 10g
- Trans Fat: 0g
- Carbohydrates: 47g
- Fiber: 1g
- Protein: 5g
- Cholesterol: 75mg

Your email address will not be published. Required fields are marked *