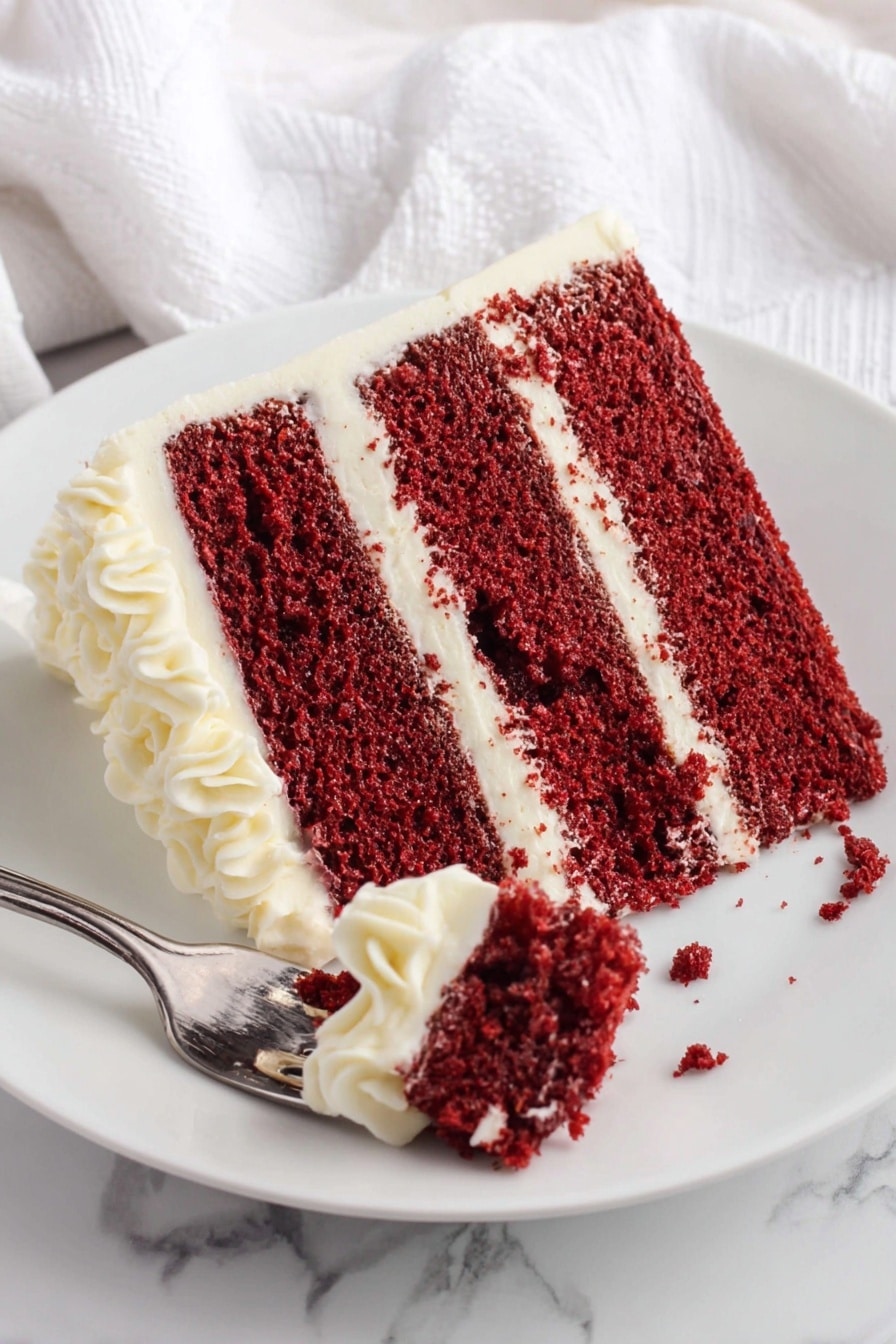
If you’re on the hunt for the perfect, classic indulgence that’ll wow anyone you serve it to, let me share my absolutely favorite Red Velvet Cake with Cream Cheese Frosting Recipe. It’s that ideal balance of moist, tender cake paired with the tangy, luscious cream cheese frosting—seriously, every time I bake this, the response is “wow, this is the best red velvet ever!” Keep reading and I’ll walk you through everything you need to nail this beautiful dessert that’s perfect for celebrations or just because you deserve a treat.
Why You’ll Love This Recipe
- Perfect Texture: The combination of buttermilk and a bit of cocoa powder gives this cake that tender crumb that’s just right.
- Classic Tangy Frosting: The cream cheese frosting balances sweetness with a lovely tang, making every bite irresistible.
- Reliable and Easy: My tried-and-true method ensures even baking and a stunning cake every time—plus, I’ll share my secrets with you.
- Versatile for Every Occasion: From birthdays to cozy afternoons, this cake wins hearts with its vibrant color and rich flavor.

Ingredients You’ll Need
The magic of this Red Velvet Cake with Cream Cheese Frosting Recipe comes from simple ingredients coming together in harmony. Each part plays a role—from the mild cocoa that adds just a whisper of chocolate to the tangy buttermilk that keeps things moist and rich. Let’s break down what you’ll want on hand before we start baking.

- Plain / All-purpose flour: The base for your cake; I like to sift it to keep things light and airy.
- Corn starch (cornflour): Adds softness to the crumb—don’t skip this!
- Unsweetened cocoa powder: I recommend high-quality cocoa for a subtle chocolate flavor that’s not overpowering.
- Baking soda: This helps with the subtle tang and rise; don’t substitute this lightly unless you know what you’re doing.
- Salt: Just a pinch to enhance all the other flavors.
- Canola oil (or other flavourless vegetable oil): Keeps the cake moist and tender without adding flavor.
- Unsalted butter: Melted and cooled, butter adds richness and depth to the cake.
- Caster / superfine sugar: For that clean, sweet flavor that dissolves beautifully.
- Eggs: They provide structure and help bind everything together.
- White vinegar: A small but crucial ingredient that works with the baking soda to give the cake its signature tang.
- Buttermilk: Essential for the moist texture and tangy flavor—trust me, subbing this won’t do justice.
- Vanilla extract: Adds depth and a lovely delicate aroma.
- Red liquid or gel food colouring: This gives the cake its gorgeous deep red hue—opt for gel if you want vibrant color without messing with the batter’s texture.
- For the frosting: Unsalted butter and cream cheese at room temperature, icing sugar for sweetness, lemon juice for a hint of brightness, and vanilla to round out the flavor.
Variations
I love making this Red Velvet Cake with Cream Cheese Frosting Recipe my own by tweaking it depending on the occasion or what I have in the pantry. You’ll find that this base recipe is forgiving enough to allow for a few fun twists, so don’t be afraid to experiment and find what works best for you.
- Gluten-Free Variation: I once swapped the flour for a mix of gluten-free flours and added a little xanthan gum—it turned out great, just be mindful of extra moisture or texture adjustments.
- Reduced Sugar: You can reduce sugar slightly if you prefer less sweetness, but keep in mind it might affect moisture and crumb.
- Vegan Version: Though I haven’t mastered a vegan version of this exact recipe, substituting buttermilk with plant-based yogurt and eggs with flaxseed can work with some trial.
- Food Coloring-Free: To skip artificial dyes, I’ve sometimes added beetroot powder for natural color, but it does change the flavor slightly.
How to Make Red Velvet Cake with Cream Cheese Frosting Recipe
Step 1: Prep Your Pans and Oven
Start by preheating your oven to 160°C (320°F) fan-forced or 180°C (355°F) standard. I like to grease two 8-inch (20 cm) cake pans, line the bottoms with baking paper, and then give them a quick spray of oil spray or butter. This little prep step has saved me from cakes sticking embarrassingly to the pan more than once!
Step 2: Combine Your Dry Ingredients
In a large bowl, sift together the flour, corn starch, cocoa powder, baking soda, and salt. Then whisk it all to ensure everything is evenly distributed. This step makes sure you don’t get any lumps of cocoa hiding in your cake, and your cakes rise nicely.
Step 3: Mix the Wet Ingredients
In a separate large bowl, whisk the canola oil and melted but slightly cooled butter until combined. Add the sugar, eggs, white vinegar, buttermilk, vanilla extract, and red food coloring next. I’m a fan of gel food coloring because it doesn’t thin the batter, but liquid works just fine too if that’s what you have. Whisk until everything is just blended—don’t overdo it or you risk a tough cake.
Step 4: Bring Wet and Dry Together
Pour the wet mix into the dry ingredients. Whisk gently until combined—it’s okay to still see a few lumps. Overmixing can be a common trap that leads to dryer, denser cake, so aim for just combined.
Step 5: Bake and Cool
Divide the batter evenly between your two pans. I find weighing each pan helps if you want perfectly even layers. Place them on the middle oven rack. At around 25 minutes, I rotate the pans front to back to make sure they bake evenly – ovens can be tricky! Bake for 35-40 minutes total. To test doneness, poke a skewer in the center: it should come out clean or with a few moist crumbs, never wet batter. Let the cakes cool in their pans for about 10 minutes before turning them out onto a wire rack to cool completely.
Step 6: Make the Cream Cheese Frosting
Using a stand or hand mixer, beat room-temperature butter and cream cheese together until pale and creamy—this usually takes about 3-4 minutes. Scrape down the bowl to keep everything well mixed. Add the icing sugar, lemon juice, and vanilla, then beat for another 4-5 minutes until the frosting is thick, pale, and fluffy. Adjust with a bit more icing sugar if too runny or lemon juice if you want a brighter zing. This frosting is my favorite part—tangy but smooth and sweet just right!
Step 7: Assemble Your Cake Masterpiece
If your cakes have domed tops, level them with a serrated knife for smooth layering. Place one cake layer on your serving plate, spread a quarter of the frosting evenly on top. Gently flip the second cake upside down over the first layer. Now, spread half of the remaining frosting on top, starting from the center and pushing outwards. Use the rest of the frosting to cover the sides of the entire cake, smoothing as you go. If you want to get fancy, crumble your leftover cake scraps and gently press them into the frosting on the sides and top for that professional crumb-coated finish. Chill your cake for 1-2 hours for the frosting to set perfectly.
Pro Tips for Making Red Velvet Cake with Cream Cheese Frosting Recipe
- Use Room Temperature Ingredients: I learned the hard way that cold butter or cream cheese results in lumpy frosting, so always let them soften fully.
- Don’t Overmix Batter: Those few lumps you see in the batter? They’re your friend and key to a tender crumb—mix just enough to combine.
- Rotate Your Cakes Mid-Bake: It makes a huge difference in even browning and texture, especially if your oven has hot spots.
- Use True Buttermilk: I once tried milk and vinegar substitute, but the cake wasn’t as moist or flavorful—stick to real buttermilk if you can.
How to Serve Red Velvet Cake with Cream Cheese Frosting Recipe

Garnishes
For garnishes, I love sprinkling some finely grated white chocolate or chopped toasted pecans around the edges to add sweet crunch and contrast. Fresh berries, like raspberries or strawberries, are gorgeous on top and add a fresh tart note that balances the richness. If you want to be extra fancy, a light dusting of edible gold dust or rose petals can make it a showstopper for a special occasion.
Side Dishes
When we serve this cake at home, I like pairing it with a simple side of fresh whipped cream or vanilla ice cream for an extra creamy touch. A cup of rich, freshly brewed coffee or a smooth espresso complements the cake’s flavors beautifully. If it’s an afternoon gathering, a lightly brewed black or herbal tea works wonderfully too.
Creative Ways to Present
I’ve found layering mini versions of this cake in clear glasses to create red velvet trifles is a big hit at parties—just alternate cake pieces with frosting and berries. For birthdays, I sometimes make a naked cake, frosting just the top and leaving the sides partially exposed for a rustic look. And if you want to get creative, try piping rosettes or patterns with the frosting for a stunning finish that looks way more complicated than it really is.
Make Ahead and Storage
Storing Leftovers
I usually store the frosted Red Velvet Cake covered in the fridge, either wrapped loosely in plastic wrap or inside an airtight cake container. It keeps perfectly for up to four days without drying out. When you’re ready to eat, just slice it straight from the fridge or let it warm up for 10-15 minutes if you like it softer.
Freezing
Freezing the unfrosted cake layers separately by wrapping each one tightly in clingfilm and then placing in a zip-loc bag has been a lifesaver for me when I want to bake in advance. They stay good for up to six months. When you’re ready, thaw them at room temperature for about 6 hours or overnight before frosting.
Reheating
Reheating leftover cake? I usually just enjoy it cold or at room temp, but if you want to warm a slice, pop it in the microwave for 10-15 seconds. Just be careful not to overheat or you’ll melt that lovely cream cheese frosting. Warming briefly brings out the soft, velvety texture beautifully.
FAQs
-
Can I use baking powder instead of baking soda in this Red Velvet Cake with Cream Cheese Frosting Recipe?
Great question! Baking soda is important because it reacts with the acidic ingredients (like buttermilk and vinegar) to give the cake its texture and slight tang. If you only have baking powder, you can substitute 1 teaspoon of baking soda with 3 teaspoons of baking powder, but expect a slightly different texture and less tang. I recommend sticking with baking soda if you can.
-
What can I substitute for buttermilk?
While some recipes suggest mixing milk and vinegar as a buttermilk substitute, for this recipe I strongly recommend using real buttermilk. It contributes a key moisture and tang that make this red velvet cake stand out. Using substitutes can lead to a drier, less flavorful cake.
-
How do I get the perfect red color without affecting taste?
I prefer using a high-quality gel food coloring because it delivers vibrant color with minimal effect on texture or flavor. Red liquid coloring works well too but avoid using too much or it might thin your batter. Natural alternatives like beetroot powder can work but will change the flavor slightly.
-
Can I make this cake ahead of time?
Absolutely! You can bake the cake layers ahead and store them unfrosted in the freezer for up to six months. Thaw completely before frosting. The frosted cake can also be made a day ahead and chilled until serving, which actually helps the flavors meld beautifully.
Final Thoughts
This Red Velvet Cake with Cream Cheese Frosting Recipe has earned a permanent spot in my baking repertoire, and honestly, it’s become a go-to celebration cake for my family and friends. I love how it feels both nostalgic and special, and the compliments never get old. If you give it a try, I promise you’ll find it easier than it seems and absolutely worth every step. So grab your mixing bowls, get that oven ready, and let’s bake a little love into your kitchen. Trust me, everyone will be asking for seconds!
Print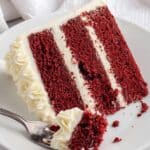
Red Velvet Cake with Cream Cheese Frosting Recipe
- Prep Time: 30 minutes
- Cook Time: 40 minutes
- Total Time: 1 hour 10 minutes
- Yield: 12 servings 1x
- Category: Dessert
- Method: Baking
- Cuisine: American
Description
A classic Red Velvet Cake recipe featuring moist, tender layers with a hint of cocoa, beautifully balanced with tangy buttermilk and vinegar. Finished with a luscious, creamy homemade cream cheese frosting, this cake is perfect for celebrations and special occasions.
Ingredients
For the Red Velvet Cakes
- 2 ¼ cups (338 g) plain / all-purpose flour
- ¼ cup (35 g) corn starch / cornflour
- 2 tbsp (16 g) unsweetened cocoa powder
- 1 tsp (5 g) baking soda / bicarbonate of soda
- ½ tsp (3 g) salt
- 1 cup (250 mL) canola oil (or any other flavourless vegetable or cooking oil)
- 125 g (½ cup) unsalted butter, melted and cooled slightly
- 1 ½ cups (360 g) caster / superfine sugar
- 2 large eggs
- 1 tsp (5 mL) white vinegar
- 1 cup (250 mL) buttermilk
- 2 tsp (10 g) vanilla extract
- 2 tbsp (40 mL) red liquid food colouring OR 1 tbsp (10 g) high-quality gel food colouring
For the Cream Cheese Frosting
- 125 g (½ cup) unsalted butter, at room temperature
- 250 g (8.8 oz / 1 cup) block cream cheese, at room temperature
- 4 cups (560 g) icing / powdered sugar
- 2 tbsp (40 mL) lemon juice
- 1 tsp (5 g) vanilla extract
Instructions
- Preheat oven and prepare pans: Preheat the oven to 160°C/320°F fan-forced/convection or 180°C/355°F standard. Grease and line two 20 cm (8 inch) cake pans with baking paper to ensure cakes don’t stick.
- Mix dry ingredients: In a large bowl, sift together the all-purpose flour, corn starch, cocoa powder, baking soda, and salt. Whisk these together until well combined to ensure even distribution of leavening agents and cocoa.
- Combine wet ingredients: In a separate large bowl, whisk together the canola oil and melted butter until combined. Add sugar, eggs, white vinegar, buttermilk, vanilla extract, and red food colouring. Whisk this mixture until fully combined and smooth.
- Incorporate wet into dry: Pour the wet ingredients into the dry ingredients bowl and whisk gently to combine. It’s okay if there are a few lumps; avoid overmixing to keep the cake tender.
- Divide and bake: Evenly divide the batter between the two prepared pans. Bake for 35-40 minutes, or until the edges are lightly browned and a skewer inserted into the center comes out clean.
- Cool the cakes: Let the cakes cool in the pans for 10 minutes, then turn them out onto wire racks to cool completely before frosting.
- Prepare the cream cheese frosting: In a mixing bowl with an electric or hand mixer, beat together the room temperature butter and cream cheese until thick, pale, and creamy, about 3-4 minutes.
- Add sugar and flavorings: Add the icing sugar, lemon juice, and vanilla extract to the butter and cream cheese mixture. Beat for about 5 minutes until the frosting is very pale, thick, and spreadable. Adjust consistency with extra icing sugar or lemon juice if necessary.
- Level cakes and assemble: If the cake tops have domed, level them with a serrated knife. Place one cake layer on a plate, spread one quarter of the frosting evenly on top.
- Add second layer and frost: Place the second cake layer upside down on the first. Spread half of the remaining frosting evenly over the top.
- Cover sides and decorate: Use the final frosting to cover the sides of the cake smoothly with a palette knife. Optionally crumble cake offcuts and press them on the sides and top for decoration.
- Chill before serving: Refrigerate the assembled cake for 1-2 hours until the frosting is firm. Keep refrigerated until serving.
Notes
- Store frosted cake covered in the refrigerator for up to 4 days to maintain freshness.
- To freeze unfrosted cakes, wrap each cake tightly in clingfilm and place in a freezer bag. Freeze for up to 6 months. Thaw at room temperature for 6 hours or overnight before frosting.
- Baking soda is essential for the right tangy flavor typical of red velvet cake. If substituting, use 3 tsp baking powder for 1 tsp baking soda.
- Use flavorless oils like canola for best results; avoid strongly flavored oils like coconut, olive, or avocado.
- Buttermilk is vital for moisture and tang; do not substitute with milk plus vinegar in this recipe.
- White vinegar can be substituted with apple cider, brown, or malt vinegar. Avoid balsamic vinegar as it can affect flavor and color.
- To bake evenly, place both cake pans on one rack and rotate them halfway through baking at about 25 minutes, or bake separately for more uniform results.
Nutrition
- Serving Size: 1 slice (1/12 of cake)
- Calories: 420
- Sugar: 38g
- Sodium: 320mg
- Fat: 24g
- Saturated Fat: 8g
- Unsaturated Fat: 14g
- Trans Fat: 0g
- Carbohydrates: 50g
- Fiber: 1g
- Protein: 4g
- Cholesterol: 60mg

Your email address will not be published. Required fields are marked *