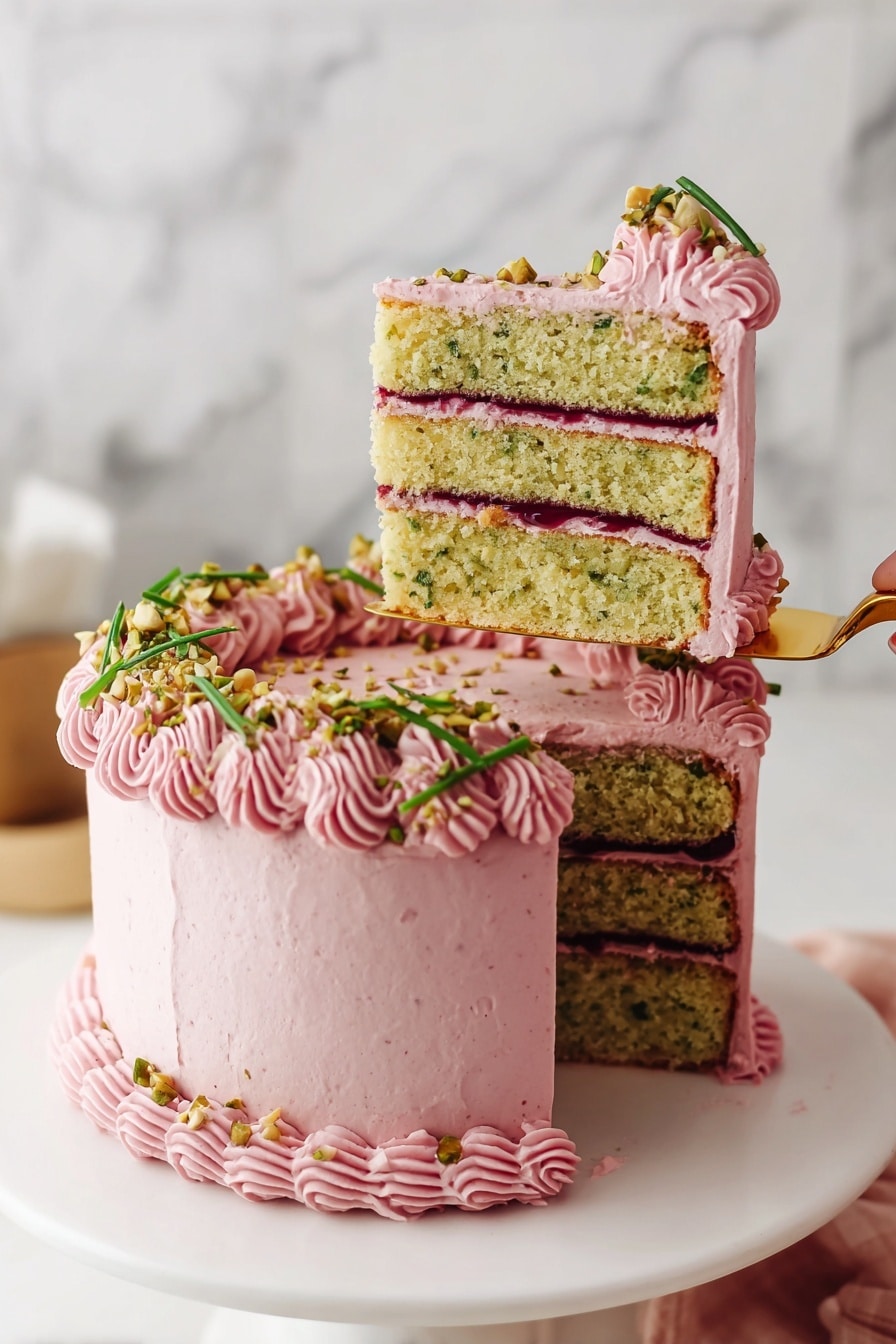
If you’re anything like me and love a cake that’s both elegant and bursting with flavor, then this Raspberry Pistachio Cake Recipe is going to be your new favorite. The combination of nutty pistachios with fresh raspberry jam and that luscious raspberry buttercream? It’s absolutely fan-freaking-tastic, and I can’t wait to share all the tips that make this cake shine every time.
Why You’ll Love This Recipe
- Unique Flavor Pairing: The earthy pistachios paired with tart, fresh raspberry jam create a perfectly balanced taste.
- Moist and Tender: Greek yogurt and oil keep the cake incredibly moist—not your typical dry nut cake.
- Show-Stopping Presentation: The vibrant green pistachios on the creamy pink frosting make it a feast for the eyes and the palate.
- Versatile for Any Occasion: Whether it’s a birthday, brunch, or just a treat, this cake impresses every time.

Ingredients You’ll Need
The magic of this Raspberry Pistachio Cake Recipe really starts with the ingredients. Each one plays a key role, from the ground pistachios adding texture and flavor to the tangy raspberry jam that cuts through the sweetness.

- Unsalted Pistachios: Fresh, shelled pistachios are essential—avoid roasted or salted versions to keep the flavor pure.
- All-Purpose Flour: This is the base of the cake; measure carefully for the right crumb.
- Baking Powder & Baking Soda: These leavening agents help the cake rise nicely for a light texture.
- Unsalted Butter: Melted to blend well with sugar, giving moisture and richness without greasiness.
- Granulated Sugar: Sweetness that balances both the nuts and tart raspberries.
- Large Eggs: Room temperature eggs provide structure and stability in the batter.
- Greek Yogurt: Adds moisture and a subtle tang that lifts the whole flavor profile.
- Light-Tasting Oil: Neutral oil keeps the cake tender without overpowering flavors.
- Vanilla Extract: A simple ingredient that deepens and connects all the other flavors.
- Fresh or Frozen Raspberries: For the jam; fresh is fantastic, but frozen works just as well if fresh aren’t available.
- Powdered Sugar: For the buttercream, to keep it smooth and airy.
- Heavy Cream: Helps achieve the perfect buttercream consistency.
Variations
I love making this Raspberry Pistachio Cake Recipe my own depending on the season or occasion. Don’t hesitate to tweak it—there’s so much room to experiment with this flavor combo.
- Use Different Nuts: I’ve used almonds instead of pistachios, and while it’s still delicious, pistachios give a uniquely vibrant color and flavor that I adore.
- Dairy-Free Variation: Swap out Greek yogurt and butter for coconut yogurt and a vegan butter substitute, perfect if you’re catering to a dairy-free crowd.
- Fruit Swaps: Raspberries can be exchanged for blackberries or cherries; I tried blackberries once and loved the deeper berry flavor.
- Spiced Twist: Add a pinch of cardamom or cinnamon to the batter for a warm, cozy note that complements the nuts and berries beautifully.
How to Make Raspberry Pistachio Cake Recipe
Step 1: Prepare Your Ingredients and Pans
First things first, preheat your oven to 350°F. Line three 6-inch cake pans with parchment paper rounds. This ensures your layers come out cleanly, which is crucial for assembling a neat cake later. I always spin the pans gently on the counter to spread the batter evenly once it’s in the pans—trust me, this little trick helps the cakes bake nice and flat without doming too much.
Step 2: Grind the Pistachios and Combine Dry Ingredients
Use a food processor or bullet blender to pulse your pistachios for about 30 seconds until you get a coarse flour texture. Don’t overdo it—some larger pieces add delightful bits of nuttiness and texture to the cake. Then mix in your flour, baking powder, baking soda, and salt in a medium bowl. Setting this aside keeps things organized so you’re ready to sift in the dry ingredients later on.
Step 3: Mix the Wet Ingredients
In a large bowl, whisk melted butter with granulated sugar until well combined. Add the eggs one at a time, whisking thoroughly between each addition—this not only blends the eggs but also helps with the cake’s airy texture. Then stir in Greek yogurt, light oil, and vanilla extract. I used to think the oil was an unusual addition, but it really keeps the crumb tender without weighing it down.
Step 4: Combine Dry and Wet Mixtures
Sift the dry pistachio-flour mixture over the wet batter through a fine-mesh sieve. This step breaks up any clumps and ensures an even distribution of flour. Fold gently until just combined. I learned that overmixing can lead to a dense cake, so be gentle here—some lumps are totally okay.
Step 5: Bake and Cool the Cake Layers
Divide the batter evenly among your prepared pans—about 320 grams per pan works perfectly. Bake for approximately 30-35 minutes, or until the tops turn lightly golden and a toothpick inserted comes out mostly clean (a few moist crumbs are just right). Let the cakes cool in the pans until you can handle them comfortably, then run an offset spatula around the edges and invert the cakes onto a wire rack. Peel off parchment and let cool fully—this step is crucial for cake stability during assembly.
Step 6: Make the Raspberry Jam
Combine raspberries, sugar, and water in a small pot over medium heat. Bring to a gentle boil, stirring occasionally. Cook until the mixture thickens to a jammy consistency—when you drag a spatula through it, the jam parts and slowly comes back together. Then push it through a fine sieve to remove seeds for a smooth jam that spreads easily. Cool completely before using.
Step 7: Whip Up Raspberry Buttercream
Beat room-temperature butter in a stand mixer on medium-high speed for about 10 minutes until pale and creamy. Gradually add powdered sugar and continue mixing for 5 minutes. Then incorporate your homemade raspberry jam and vanilla extract. Slowly add heavy cream, one tablespoon at a time, until you achieve a smooth, spreadable consistency. Pro tip: if your buttercream cools or stiffens too much, microwave a small dollop for 10 seconds to soften, then fold it back in for silky smooth frosting.
Step 8: Assemble Your Raspberry Pistachio Cake
Place your first cake layer on a turntable. Pipe a ring of buttercream around the edge — this acts like a dam to hold the raspberry jam in place. Spoon about four tablespoons of jam inside the ring and spread evenly. Repeat with the second layer, then add the last cake layer on top. Smooth a thin crumb coat of frosting over the entire cake and chill for 15 minutes to set.
After chilling, evenly spread about three-quarters of the remaining buttercream on the cake and smooth it with a scraper. Use the leftover buttercream to pipe decorative designs—I’ve used star tips and round nozzles, both look fantastic. Finish by sprinkling crushed pistachios on top for that signature crunch and a pop of color. Your Raspberry Pistachio Cake is ready for its close-up!
Pro Tips for Making Raspberry Pistachio Cake Recipe
- Room Temperature Ingredients: I always make sure eggs, butter, and yogurt are at room temp—it really helps with even mixing and the cake’s texture.
- Don’t Overmix: When combining dry and wet, stir just until combined to keep your cake tender and avoid a tough crumb.
- Grinding Pistachios: Pulse the nuts to a coarse flour, not powder; it adds texture and flavor that’s such a pleasant surprise in each bite.
- Buttercream Softening: If your buttercream firms up, gently warm a bit and fold it back in—a game changer for smooth frosting.
How to Serve Raspberry Pistachio Cake Recipe

Garnishes
I love a fresh and elegant finish, so I usually garnish this cake with extra crushed pistachios and a handful of fresh raspberries on top. Sometimes, a few edible flowers add a charming touch for special occasions—my guests always ask if they can eat those too!
Side Dishes
Pair this cake with a simple side of whipped cream or a scoop of vanilla bean ice cream to balance the tart raspberry jam. For drinks, a nice cup of Earl Grey or a glass of sparkling rosé really elevates the experience in my book.
Creative Ways to Present
For birthdays or parties, I’ve piped little buttercream flowers in different colors and arranged fresh pistachios around the base. Another fun idea is serving individual slices topped with a dollop of berry compote and a sprig of mint—so simple, yet beautiful. When I made this for Mother’s Day, adding a delicate ribbon around the cake pan made it feel luxurious and gift-worthy.
Make Ahead and Storage
Storing Leftovers
This cake keeps beautifully in an airtight container in the fridge for up to 4 days. I usually slice it and cover each piece well to keep that buttercream from drying out. Just make sure the cake is completely cooled before wrapping to avoid condensation.
Freezing
I’ve frozen fully assembled cakes wrapped tightly in plastic wrap and foil, and they thaw with barely any loss in flavor or texture. If you want to freeze just the layers, wrap each individually and thaw before assembly. This is a great way to prep ahead when planning a party.
Reheating
Because it’s a buttercream and fruit jam cake, I avoid microwaving slices with frosting—it melts too fast. Instead, bring slices to room temperature for an hour or so; the flavors open up and the buttercream softens nicely without losing structure.
FAQs
-
Can I use roasted pistachios instead of raw?
While roasted pistachios have a deeper flavor, I recommend raw unsalted pistachios for this cake to keep the delicate nutty taste and avoid added saltiness that can throw off the sweetness balance.
-
Is it okay to use frozen raspberries for the jam?
Absolutely! Frozen raspberries work just as well as fresh ones and often create a thicker jam due to their higher juice content. Just thaw them a bit before cooking.
-
Can I make this cake gluten-free?
Yes, swapping the all-purpose flour for a gluten-free blend of similar weight works fine. Just keep in mind some blends behave differently when it comes to texture, so consider adding a touch of xanthan gum if your blend doesn’t contain it.
-
How do I prevent the cake layers from dome baking?
I like to spin the batter-filled pans gently on the counter before baking to spread the batter evenly. Also, baking at the right temperature and not overfilling pans helps keep the tops flat.
-
Can I make the raspberry buttercream ahead of time?
Yes! Make the buttercream in advance and store it in an airtight container in the fridge. Bring it back to room temperature, then whip it again before using to restore fluffiness.
Final Thoughts
I absolutely love how this Raspberry Pistachio Cake Recipe turns out every single time. It’s one of those recipes that feels fancy but is surprisingly straightforward, making it perfect for both baking newbies and seasoned pros. When I first tried it, I was blown away by how the textures and flavors just danced together, and now my family goes crazy for it. If you decide to make this, I promise you’ll enjoy every bite and be proud to serve it on any occasion. Give it a try—you deserve a slice of this nutty, fruity, creamy goodness!
Print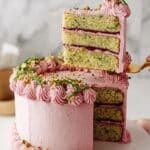
Raspberry Pistachio Cake Recipe
- Prep Time: 1 hour 50 minutes
- Cook Time: 50 minutes
- Total Time: 2 hours 55 minutes
- Yield: One 6-inch cake 1x
- Category: Dessert
- Method: Baking
- Cuisine: American
Description
This Raspberry Pistachio Cake is a delightful layered dessert combining moist pistachio-flavored cake layers with a luscious homemade raspberry jam and creamy raspberry buttercream frosting. The cake is perfectly balanced with nutty pistachios, fresh raspberry jam, and a silky, smooth buttercream, decorated with crushed pistachios for an elegant finish.
Ingredients
Pistachio Cake
- 100 g unsalted pistachios, shelled
- 170 g all-purpose flour
- ½ teaspoon baking powder
- ½ teaspoon baking soda
- ½ teaspoon salt
- 115 g unsalted butter, melted
- 225 g granulated sugar
- 3 large eggs, room temperature
- 180 g Greek yogurt, room temperature
- 65 g light-tasting oil
- 2 teaspoons vanilla extract
Raspberry Jam
- 300 g raspberries, fresh or frozen
- 50 g granulated sugar
- 1 tablespoon water
Raspberry Buttercream
- 460 g unsalted butter, softened to room temperature
- 230 g powdered sugar
- 2 tablespoons raspberry jam (from above)
- 2 teaspoons vanilla extract
- 3 tablespoons heavy cream
Instructions
- Prepare and Preheat: Preheat your oven to 350°F (175°C). Line three 6-inch cake pans with parchment paper on the bottoms and set aside.
- Grind Pistachios: Using a bullet blender or food processor, pulse the shelled pistachios for about 30 seconds until they become a coarse flour texture. Transfer this to a medium mixing bowl.
- Mix Dry Ingredients: Add the all-purpose flour, baking powder, baking soda, and salt to the ground pistachios. Stir well to combine and set this dry mixture aside.
- Combine Wet Ingredients: In a large bowl, whisk together melted butter and granulated sugar until combined. Add eggs one at a time, whisking thoroughly after each addition.
- Add Remaining Wet Ingredients: Whisk in the Greek yogurt, light-tasting oil, and vanilla extract until the mixture is smooth and well combined.
- Combine Dry and Wet Mixtures: Sift the dry flour mixture into the wet mixture using a fine-mesh sieve to break up any clumps, especially of pistachio flour. Add any larger pistachio pieces caught by the sieve back into the batter. Mix gently until just combined.
- Fill Cake Pans: Divide the batter evenly into the three prepared cake pans, approximately 320 grams per pan. Spin each pan on the counter to help the batter settle flat and even.
- Bake the Cakes: Place the pans in the oven and bake for 30-35 minutes or until they are lightly golden and a toothpick inserted into the center comes out mostly clean.
- Cool Cake Layers: Allow the cakes to cool in their pans until they can be handled. Run an offset spatula around the edges, invert the cakes onto wire racks, remove parchment paper, and let cool completely.
- Make Raspberry Jam: In a small pot over medium heat, combine raspberries, sugar, and water. Bring to a boil, stirring occasionally, and cook until the mixture thickens to a jammy consistency (the jam parts and slowly closes when a spatula is dragged through it).
- Strain Jam: Push the cooked jam through a fine-mesh sieve to remove seeds. Discard the seeds and allow the seedless jam to cool completely before using.
- Prepare Raspberry Buttercream: In a stand mixer with paddle attachment, beat the softened butter on medium-high speed for about 10 minutes, scraping the bowl halfway, until pale and creamy.
- Add Sugar & Flavorings: Gradually add the powdered sugar, starting mixer on low speed and increasing to medium-high, beating for about 5 minutes. Add raspberry jam and vanilla extract; continue mixing.
- Adjust Buttercream Texture: Slowly add heavy cream, one tablespoon at a time, to thin the buttercream to desired consistency. Scrape down bowl and beat for another 5 minutes.
- Smooth Buttercream: Microwave a small amount of buttercream for 10 seconds until partially melted, then fold it back into the rest for a smooth, silky texture. Repeat as necessary to maintain softness.
- Assemble First Layer: Place first cake layer on a turntable. Pipe a ring of buttercream around the edge, fill the center with about 4 tablespoons of raspberry jam, and spread evenly with an offset spatula.
- Add Second and Third Layers: Place the second cake layer on top, repeat the buttercream ring and jam filling. Top with the third layer.
- Crumb Coat: Apply a thin layer of buttercream over the entire cake to trap crumbs. Use a cake scraper to smooth and remove excess. Refrigerate for 15 minutes until the crumb coat is firm.
- Final Buttercream Layer: Spread three-fourths of remaining buttercream smoothly over the cake sides and top. Scrape off excess with a cake scraper for a neat finish.
- Decorate: Use the remaining buttercream in piping bags fitted with preferred tips to decorate the cake. Finish by sprinkling crushed pistachios on top and adorning with ribbon bows if desired.
Notes
- Room temperature ingredients ensure better mixing and a smoother batter.
- Spinning the cake pans after filling helps the batter settle for a level cake surface.
- Straining the raspberry jam removes seeds for a smooth texture in the frosting and filling.
- Microwaving a small portion of buttercream softens it to help achieve a smooth frosting consistency.
- Store the assembled cake in the refrigerator and bring to room temperature before serving for best flavor and texture.
- This cake is best enjoyed within 2-3 days for optimal freshness.
Nutrition
- Serving Size: 1 slice (1/12 of cake)
- Calories: 350
- Sugar: 28 g
- Sodium: 120 mg
- Fat: 24 g
- Saturated Fat: 12 g
- Unsaturated Fat: 10 g
- Trans Fat: 0 g
- Carbohydrates: 30 g
- Fiber: 2 g
- Protein: 5 g
- Cholesterol: 80 mg

Your email address will not be published. Required fields are marked *