
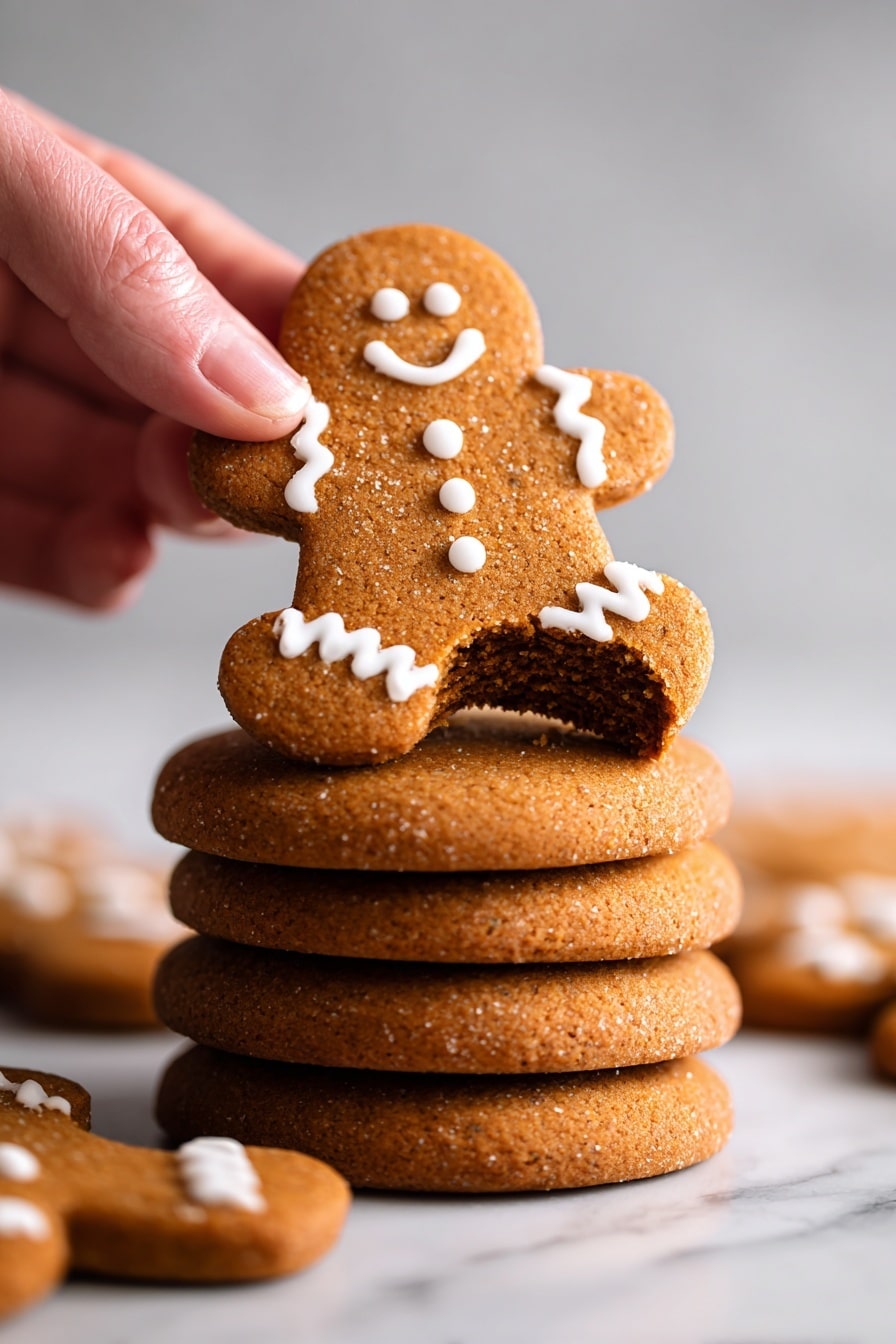
If you’re on the hunt for an irresistibly chewy, warmly spiced gingerbread cookie that just melts in your mouth, let me share my Perfect Gingerbread Cookies Recipe with you. This recipe has been a game changer for me—every bite bursts with molasses richness and the perfect balance of ginger and cinnamon. Whether it’s your first time making gingerbread or you’ve tried countless recipes, I promise you’ll find something special here that makes these cookies stand out.
Why You’ll Love This Recipe
- Chewy & Flavorful: The combination of molasses, ginger, and cinnamon creates that perfect chew and warmth you crave in gingerbread.
- Easy Dough Handling: Chilling and rolling tips mean you won’t wrestle with sticky dough for long.
- Customizable Icing: Simple, quick royal icing that you can color and pipe with your favorite designs.
- Reliable Baking Times: Clear timing and cues make sure your cookies come out just right every single time.

Ingredients You’ll Need
I love how all these ingredients come together harmoniously for these cookies. From the rich molasses to the warm spices, each one is essential. A few tips here: use good-quality molasses for the best depth of flavor, and don’t skip the cream of tartar—it really helps the texture!

- Unsalted Butter: Room temperature butter blends easily with shortening for a tender crumb.
- Vegetable Shortening: Adds softness and helps keep the cookies chewy over time.
- Dark Brown Sugar: Packed sugar gives moisture and a deeper caramel flavor.
- Vanilla Extract: Enhances the sweet spices beautifully.
- Egg: Binds everything together and adds structure.
- Unsulphured Molasses: This is your flavor superstar—Grandma’s brand is my go-to!
- Ground Ginger: Yes, a full tablespoon! That punch of ginger is exactly what makes these cookies “gingerbread.”
- Ground Cinnamon: Rounds out the spice profile with warmth.
- Kosher Salt: Balances the sweetness and spices.
- Baking Soda: Helps the cookies rise and develop their texture.
- Cream of Tartar: Adds a slight tang and improves chewiness.
- Ground Clove: Just a touch for complexity.
- All-Purpose Flour: The base of the dough; spooned and leveled for accuracy.
Variations
I’m all about making recipes your own, so I often tweak this Perfect Gingerbread Cookies Recipe depending on who I’m baking for or the occasion. Feel free to experiment—you might discover a new favorite version!
- Spice it up: I sometimes add a pinch of nutmeg or cardamom for an extra layer of warmth that my family really enjoys.
- Gluten-Free: Swap flour for a gluten-free blend and chill the dough longer; it works surprisingly well with some careful handling.
- Vegan Version: Use vegan butter and flax eggs, plus maple syrup instead of molasses, adjusting for sweetness—you’ll be amazed how close it tastes.
- Decorations: Beyond royal icing, try dipping half the cookie in melted dark chocolate for a fancy twist.
How to Make Perfect Gingerbread Cookies Recipe
Step 1: Cream Your Fats Until Fluffy
Start by mixing your unsalted butter, vegetable shortening, and dark brown sugar on medium-high speed until the mixture looks light and creamy—about a minute or so. I learned early on that creaming these ingredients well is key to getting that tender bite in the finished cookie. Don’t rush it, and scrape the bowl down once to keep things evenly mixed.
Step 2: Add Vanilla, Egg, Then Molasses
Next, blend in the vanilla and egg until smooth. Then pour in that molasses—it’s such a luscious moment when the dough darkens and shines. I always take a moment here to appreciate how inviting it looks (and smells!) before moving on.
Step 3: Mix in Your Spices and Leavening Agents
Combine your ginger, cinnamon, salt, baking soda, cream of tartar, and clove. Add these into the bowl and mix just until everything’s combined. These spices create gingerbread magic, so don’t skip or skimp on the ginger—it’s the star.
Step 4: Incorporate Flour Thoroughly
Add your flour gradually, mixing with your stand or hand mixer as long as it can handle—this dough is thick and sticky, but don’t be tempted to add extra flour. When the mixer is struggling, switch to a strong rubber spatula and fold to evenly combine—it takes some muscle but trust me, it’s worth it.
Step 5: Chill Your Dough for Best Results
Dump the dough onto a floured sheet of plastic wrap, flour your hands, and pat it into a 1-inch thick rectangle. Wrap it tightly and chill for at least an hour or overnight. I found chilling just a couple hours makes it chewy and less fragile. Overnight chilling makes rolling easier but softens the chew a bit—if you go overnight, shave off a minute of bake time.
Step 6: Roll, Cut, and Bake
Once chilled, preheat your oven to 350°F. Cut the dough in half and chill the unused half while you work your first batch. Flour your surface and rolling pin, roll the dough to 1/4 inch thick, and cut your shapes. Transfer cookies carefully to parchment-lined baking sheets, spaced a couple inches apart.
Bake for 8–10 minutes. I always start with 8 and check if they’re nicely puffed with a cracked surface but still a bit soft in the center. Let them rest a few minutes before moving to a cooling rack—the cookies will deflate slightly as they cool, sealing that tender texture inside.
Step 7: Mix and Decorate with Icing
Once your cookies have cooled, whisk powdered sugar with 6 teaspoons of water and corn syrup until thick but spreadable—just a bit like thick glue. Adjust with a teaspoon of water at a time if needed. Add gel colors if you want, then pipe on your best designs. I love the simplicity of white icing with a gingerbread man’s cheerful smile, but colored designs really pop for the holidays.
Pro Tips for Making Perfect Gingerbread Cookies Recipe
- Chill Twice: Chill your dough before rolling and keep unused dough in the fridge—it makes rolling easier and prevents spreading in the oven.
- Don’t Overbake: Pull the cookies out when the center looks just a touch underdone—the residual heat finishes the baking, and you get max chewiness.
- Flour Handling: Dust your hands and rolling surface liberally with flour, but don’t add extra flour to the dough; it’s naturally sticky and that’s okay.
- Cookie Thickness: Keep your cookies around 1/4 inch thick for the best balance of soft and crisp edges.
How to Serve Perfect Gingerbread Cookies Recipe
Garnishes
I like to keep it classic with simple royal icing—sometimes just white, sometimes with red and green touches for a festive look. I also enjoy sprinkling a bit of sanding sugar or tiny edible pearls to add sparkle. For a cozy touch, a dusting of powdered sugar just before serving looks like fresh snow.
Side Dishes
These gingerbread cookies shine alongside a cup of spiced cider or your favorite holiday tea. I’ve also served them with a scoop of vanilla bean ice cream or a simple cup of hot chocolate for dipping and it’s always a hit!
Creative Ways to Present
For holiday parties, I like arranging these cookies on a festive wooden board with pine sprigs and cranberries for color. Another idea is packaging a stack tied with twine and a cinnamon stick as heartfelt, edible gifts. Gingerbread houses made with this dough? Chef’s kiss!
Make Ahead and Storage
Storing Leftovers
After decorating, store the cookies in an airtight container at room temperature—my family usually finishes them within 5 days. They soften a little over time but that chewiness just gets better. For longer storage, refrigeration keeps them fresh up to a week without getting too soft.
Freezing
I freeze unbaked dough wrapped tightly in plastic wrap and then in a freezer bag—when I want fresh cookies, I thaw overnight in the fridge and bake as usual. You can also freeze fully baked, decorated cookies in a single layer separated by parchment paper. Just thaw them at room temp before serving.
Reheating
If you want to revive a little crispness or freshness, pop leftover cookies in a 300°F oven for 3-5 minutes. This refreshes the texture without drying them out. Avoid microwaving unless you want chewy-chewy-chewy in a not-so-good way.
FAQs
-
Can I substitute molasses with honey or maple syrup?
Molasses provides a distinct rich, bittersweet flavor critical to classic gingerbread cookies, so while you can substitute with honey or maple syrup, the flavor and texture will change. Expect a milder taste and softer cookies. I recommend using molasses for that authentic result.
-
How do I prevent my gingerbread cookies from spreading too much in the oven?
Chilling dough thoroughly before rolling and baking is key to control spreading. Also, rolling dough evenly to 1/4 inch thickness and baking at 350°F helps. Avoid over-creaming butter and sugar, as too much air can cause excessive spreading.
-
Why is cream of tartar included in this recipe?
Cream of tartar adds a subtle tang and helps with the cookie’s chewiness by stabilizing the baking soda’s leavening action. It contributes to the tender yet slightly chewy texture that makes these gingerbread cookies so perfect.
-
Can I make these cookies without vegetable shortening?
Vegetable shortening helps keep the cookies soft and chewy. You could try using extra butter only, but the texture may be slightly crisper and less pliable. If avoiding shortening, be mindful that dough might be a bit tougher to work with.
-
How thick should I roll the dough for perfect cookies?
Rolling the dough about 1/4 inch thick yields the best balance between tender chew and a sturdier cookie that holds shape well. Thinner cookies bake faster and can get crispier, while thicker cookies may need longer baking and stay softer inside.
Final Thoughts
I absolutely love how this Perfect Gingerbread Cookies Recipe turns out every single time—full of cozy spice, perfect chew, and just the right sweetness. When I first tried it, I struggled with dough softness and crumbly cookies, but this method changed everything. I hope you find these tips and instructions as helpful as I do and enjoy baking these treats with your loved ones. Trust me, once you make these, they’ll become your go-to holiday favorite too!
Print
Perfect Gingerbread Cookies Recipe
- Prep Time: 35 minutes
- Cook Time: 10 minutes
- Total Time: 1 hour 38 minutes
- Yield: 20 cookies 1x
- Category: Dessert, Cookies
- Method: Baking
- Cuisine: American
Description
These BEST Gingerbread Cookies combine traditional warm spices like ginger, cinnamon, and clove with molasses and brown sugar for a chewy, flavorful holiday treat. Perfect for decorating with homemade royal icing, these cookies offer the ideal balance of softness and crisp edges after chilling and baking, making them a festive favorite.
Ingredients
Gingerbread Cookies
- 1/2 cup (112g) unsalted butter, room temp
- 6 tbsp vegetable shortening
- 3/4 cup (150g) dark brown sugar, packed
- 1 tbsp vanilla extract
- 1 large egg
- 3/4 cup (250g) unsulphured molasses (e.g., Grandma’s)
- 1 tbsp ground ginger
- 2 tsp ground cinnamon
- 1/2 tsp kosher salt
- 1/2 tsp baking soda
- 1/2 tsp cream of tartar
- 1/4 tsp ground clove
- 3 1/2 cups (450g) all-purpose flour, spooned and leveled
Icing
- 1 1/2 cups (165g) powdered sugar
- 6–8 tsp water
- 1 tsp corn syrup
- Gel food coloring (optional)
Instructions
- Mix Butter, Shortening, and Sugar: In a large bowl using a hand or stand mixer fitted with the paddle attachment, beat the butter, vegetable shortening, and dark brown sugar on medium-high speed for about 1 minute until light and creamy.
- Add Vanilla, Egg, and Molasses: Scrape down the bowl, then mix in the vanilla extract and egg until smooth. Scrape the bowl again and beat in the molasses until the mixture is smooth, rich, and glossy.
- Add Spices and Leavening: Mix in ground ginger, ground cinnamon, kosher salt, baking soda, cream of tartar, and ground clove until combined evenly throughout the batter.
- Incorporate Flour: Scrape down the bowl, then gradually add the all-purpose flour while mixing. The dough will become very thick and sticky; mix as long as your mixer can handle it, then finish folding the dough using a strong silicone spatula to ensure that the dough is fully combined.
- Chill the Dough: Transfer the dough onto a flour-dusted sheet of plastic wrap. Flour your hands, pat the dough into a 1-inch thick rectangle, wrap tightly, and chill in the refrigerator for at least 1 hour or up to overnight. For chewier cookies, chill for 1-2 hours; overnight chill softens the dough making rolling easier but cookies less chewy.
- Prepare for Baking: Preheat the oven to 350°F (175°C). Remove the dough from the fridge and cut it in half. Return one half to the refrigerator while you work with the other half.
- Roll and Cut: Flour both sides of the dough half and roll out on a well-floured surface to 1/4 inch thickness. Use cookie cutters to cut out your desired shapes and carefully transfer them to a parchment paper-lined baking sheet, spacing cookies 2 inches apart.
- Bake the Cookies: Bake for 8-10 minutes starting with 8 minutes. Cookies are done when puffed and cracked but center looks slightly underdone.
- Cool Cookies: Let cookies rest on the pan for 1-2 minutes to set, then transfer to a wire rack to cool completely. Cookies will flatten and de-puff as they cool.
- Repeat Baking: Continue rolling and cutting remaining dough halves and scraps, refrigerating between batches as needed, and bake them following the same process.
- Prepare the Icing: Once cookies have cooled, whisk powdered sugar, corn syrup, and 6 teaspoons of water together until smooth and thick but spreadable like thick glue. Add water 1 teaspoon at a time if too thick. Add gel food coloring if desired.
- Decorate: Pipe designs using the icing onto cooled cookies and allow to set before serving or storing.
Notes
- Size and Baking Time: Cookies approximately 4×2.5 inches bake perfectly at 8 minutes. Smaller cookies require 6-8 minutes; larger cookies may need up to 10 minutes.
- Storage: Store cookies in an airtight container at room temperature for up to 5 days; they will soften over time. For extended freshness, refrigerate for a few more days.
Nutrition
- Serving Size: 1 cookie (approx. 35g)
- Calories: 140 kcal
- Sugar: 10 g
- Sodium: 110 mg
- Fat: 6 g
- Saturated Fat: 3.5 g
- Unsaturated Fat: 2 g
- Trans Fat: 0 g
- Carbohydrates: 20 g
- Fiber: 1 g
- Protein: 1.5 g
- Cholesterol: 25 mg

Your email address will not be published. Required fields are marked *