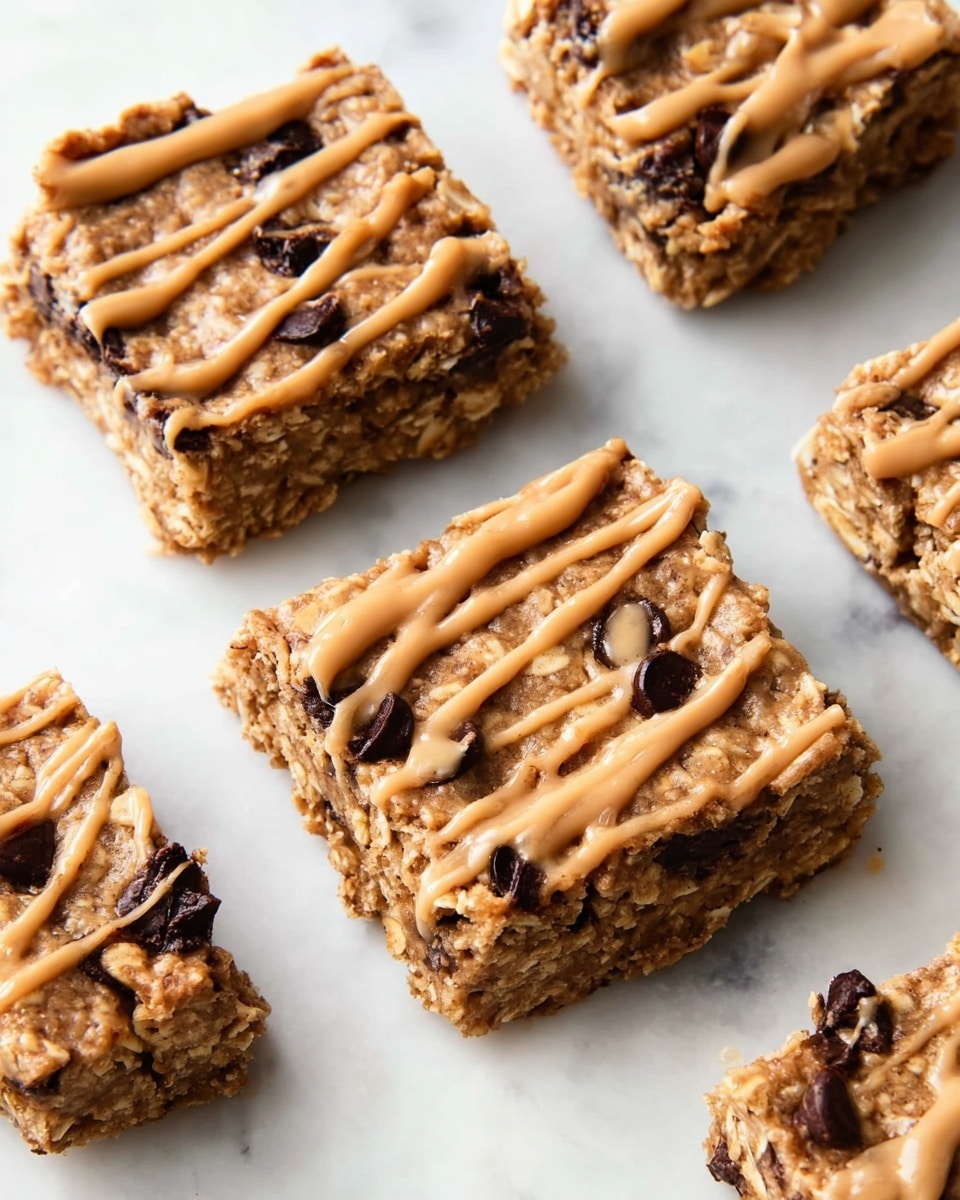
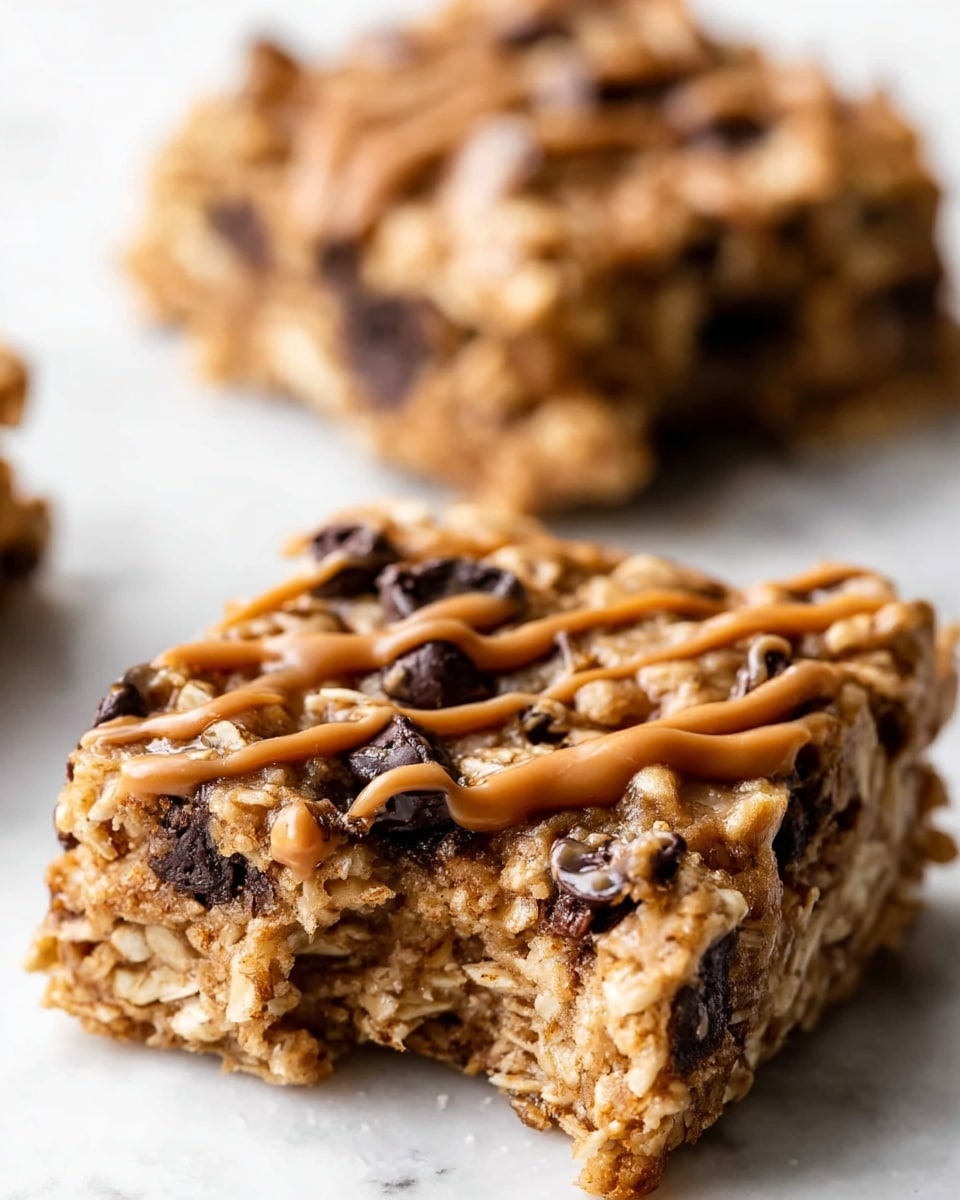
If you’re on the lookout for a snack that’s as wholesome as it is delicious, you’re going to adore this Peanut Butter Banana Oatmeal Bars Recipe. I’ve made these bars a handful of times now, and honestly, they always come out moist, chewy, and packed with that cozy peanut butter and banana goodness. Whether you need a quick breakfast on-the-go, a lunchbox treat, or a post-workout pick-me-up, these bars fit the bill perfectly. Stick with me here—I’m going to share everything you need to know to make these bars rock your kitchen!
Why You’ll Love This Recipe
- Simple Ingredients: Uses pantry staples like oats, bananas, and peanut butter that you likely already have on hand.
- No Refined Sugar: Sweetened naturally with bananas and coconut sugar, making it a healthier snack option.
- Perfect Texture: Chewy and moist with a hint of chocolate—every bite is pure comfort.
- Versatile & Friendly: Easily customized for vegan, gluten-free, or nut-free diets without sacrificing flavor.
Ingredients You’ll Need
These ingredients come together effortlessly, creating bars that are hearty yet tender. A quick tip: be sure your bananas are ripe with lots of brown spots—that natural sweetness and softness make all the difference.
- Bananas: The riper, the better! They add natural sweetness and moisture.
- Peanut Butter: Creamy or crunchy, both work beautifully. Choose your favorite nut butter if you want to switch it up.
- Coconut Sugar: Adds a subtle caramel flavor without overpowering the other ingredients.
- Applesauce: I prefer unsweetened to keep things natural; it replaces egg for a moist, tender texture.
- Almond Milk: Any non-dairy milk you have works—helps bind everything smoothly.
- Old-Fashioned Oats: For that classic chewiness and structure; avoid instant oats here.
- Baking Powder & Salt: Small but essential for lifting and balancing flavors.
- Cinnamon: Adds warmth and works magic with bananas and peanut butter.
- Vanilla Extract: Just a splash brightens the whole bar.
- Chocolate Chips: Semi-sweet or dairy-free, the melty chocolate pockets are pure joy.
Variations
I love how flexible this Peanut Butter Banana Oatmeal Bars Recipe is—you can easily tweak it depending on what you have or your dietary preference. Over time, I’ve tried lots of variations, and they all bring something fun to the table.
- Nut-Free Version: Swap peanut butter for sunflower seed butter, and opt for dairy-free chocolate chips to keep it allergy-friendly.
- Extra Crunch: Toss in chopped walnuts or pecans for more texture; my family goes crazy for this addition.
- Chocolate-Free: Leave out the chips and add dried cranberries or raisins for natural sweetness.
- Protein Boost: Stir in a scoop of your favorite protein powder—great if you need a post-gym snack.
- Flax Egg Replacement: I sometimes use homemade flax egg instead of applesauce if I’m out of it, and it works like a charm.
How to Make Peanut Butter Banana Oatmeal Bars Recipe
Step 1: Prep Your Pan and Preheat the Oven
Start by preheating your oven to 350°F (177°C). Line a 9-inch square baking pan with parchment paper, making sure the paper hangs over the edges—this makes lifting the bars out once they’re set super easy. Trust me, this little step saves you a lot of frustration and keeps your bars intact.
Step 2: Mix the Wet Ingredients Together
In a large bowl or your mixer’s bowl, mash the bananas until mostly smooth—little lumps are fine and add texture. Then beat in the peanut butter, coconut sugar, applesauce, almond milk, and vanilla extract one by one. The batter will be thick but still pourable, so don’t worry if it feels dense.
Step 3: Fold in the Dry Ingredients
Sprinkle baking powder, salt, cinnamon, and oats into the wet mixture, stirring gently until everything comes together. The oats are your structural hero here—they make these bars chewy and filling. Once combined, fold in the chocolate chips last, keeping them as melty surprises throughout.
Step 4: Bake and Cool the Bars
Pour the batter evenly into your prepared pan, smoothing out the top with a spatula. Bake for about 25-28 minutes—you’re looking for the center to be set, though it will still look a little soft. Resist the urge to overbake; these bars keep a lovely chewy, tender bite.
Once out of the oven, cool the pan at room temperature for 30 to 60 minutes. Then pop it in the fridge for at least an hour. I learned the hard way that chilling is key—trying to cut them warm is messy and sticky, but chilled bars slice beautifully.
Step 5: Slice and Serve
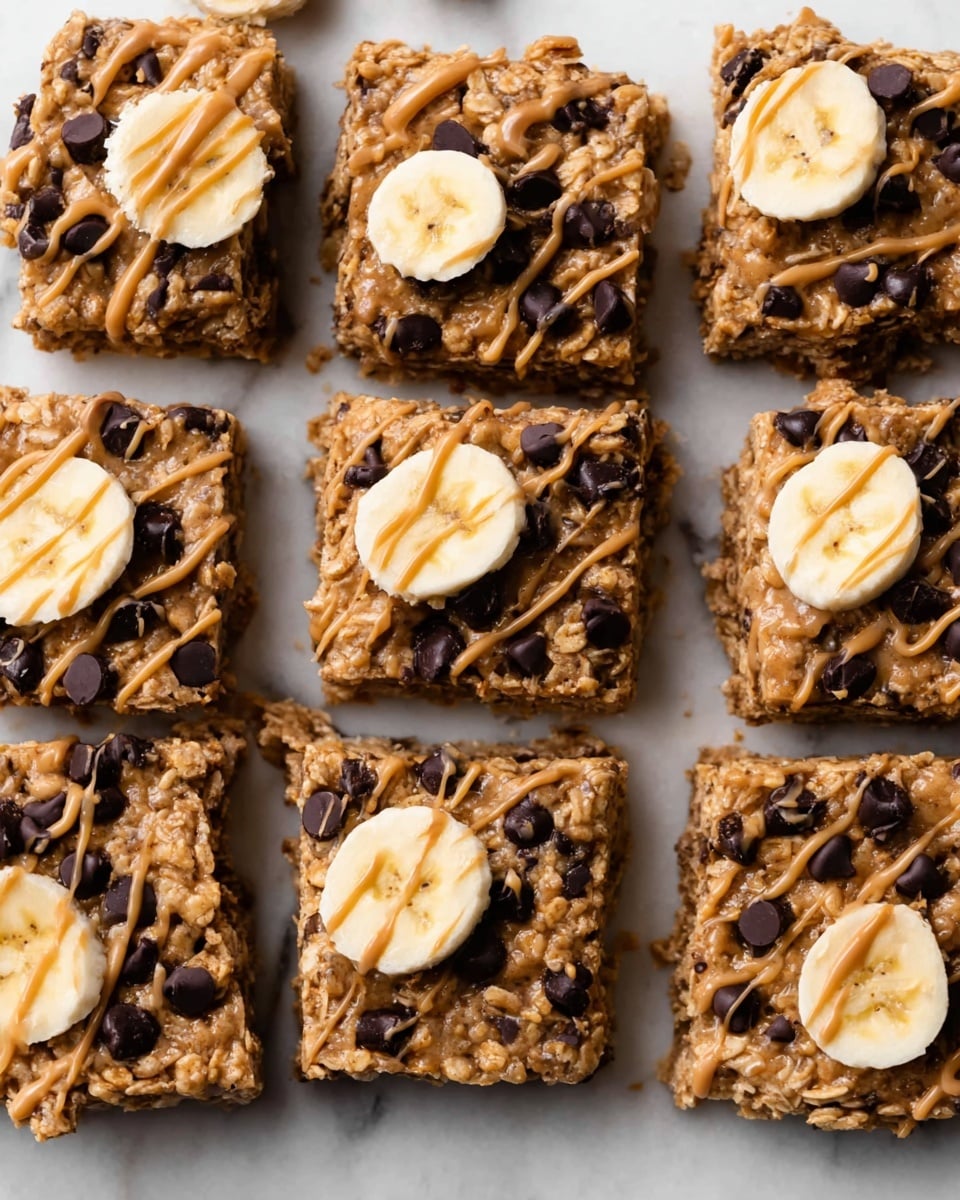
Using the parchment paper overhang, lift the whole batch from the pan and transfer to a cutting board. Cut into 16 bars or whatever size you prefer. Optional but my favorite touch: drizzle some melted peanut butter over the top for an extra creamy flair. Store any leftovers tightly covered in the fridge.
Pro Tips for Making Peanut Butter Banana Oatmeal Bars Recipe
- Use Ripe Bananas: The sweeter and mushier your bananas, the better your bars will taste and the moister they’ll be.
- Don’t Skip the Chilling: I used to rush cutting right out of the oven and it was a sticky mess—cooling and chilling solidifies the bars for clean slices.
- Mix by Hand or Mixer: Whether you prefer whisking by hand or using a stand mixer, just mix until combined to avoid overworking the oats and developing toughness.
- Line Your Pan Well: Parchment paper with overhang isn’t optional; it makes removal a breeze and preserves the shape perfectly.
How to Serve Peanut Butter Banana Oatmeal Bars Recipe

Garnishes
I like to keep the garnishes simple—sometimes a drizzle of warmed peanut butter or a sprinkling of chopped peanuts on top before chilling. It adds a lovely glossy finish and a little crunch. If you’re serving these bars for a brunch, a light dusting of cinnamon or a few mini chocolate chips on top adds extra charm too.
Side Dishes
These bars shine as a stand-alone snack, but if you’re serving breakfast or brunch, pair them with a fresh fruit salad or a dollop of Greek yogurt for some tang and protein. A warm cup of coffee or chai latte alongside really completes the cozy vibe.
Creative Ways to Present
If you’re taking these bars to a potluck or birthday brunch, try cutting them into fun shapes using cookie cutters after chilling, or layering them in a clear glass dish with yogurt and fresh berries for an attractive parfait-like presentation. For holiday twists, add festive sprinkles or a dusting of powdered sugar on top.
Make Ahead and Storage
Storing Leftovers
I keep my bars stored in an airtight container in the fridge, and they stay fresh for up to 10 days. The cool temperature really keeps their texture intact without drying them out. I usually separate layers with parchment paper so nothing sticks together.
Freezing
I find these bars freeze wonderfully—just wrap individual bars in parchment or wax paper, stack them in a freezer-safe container or bag with sheets of parchment between layers. They keep for up to 3 months, and thaw perfectly overnight in the fridge so they’re ready when you are.
Reheating
If you want a warm treat, I pop a chilled bar into the microwave for about 20 seconds—it softens up just enough without melting the chocolate too much or drying out the bar. Alternatively, letting the bar sit at room temp for 10 minutes does the trick if you prefer it less warm.
FAQs
-
Can I make these Peanut Butter Banana Oatmeal Bars Recipe gluten-free?
Absolutely! Just make sure you use certified gluten-free oats, since not all oats are processed in gluten-free facilities. That’s the key step to keep these bars gluten-free and safe for sensitive diets.
-
What if I don’t have applesauce? Can I substitute it?
Yes! Applesauce acts as a moisture and binding agent, but you can replace it with one egg if you’re not vegan. Alternatively, try a flax egg (1 tbsp ground flaxseed mixed with 3 tbsp water, rested for 10 minutes)—I use this all the time and it works great.
-
Can I use crunchy peanut butter instead of creamy in this Peanut Butter Banana Oatmeal Bars Recipe?
Definitely! Crunchy peanut butter adds delightful texture and a little nutty crunch inside the bars. I’ve made these with both creamy and crunchy, and they turn out fantastic either way.
-
How do I prevent the bars from being too dry or crumbly?
Make sure to use ripe bananas and don’t overbake. Also, chilling the bars before cutting helps them hold together and keeps the moisture locked in. Following these steps gave me the best results every time.
-
Can I freeze these bars and will they still taste good?
Yes! Freezing is a wonderful way to keep these bars fresh longer. Wrap them individually and layer with parchment paper. When thawed overnight in the fridge, they taste just as good as fresh-baked.
Final Thoughts
I absolutely love how this Peanut Butter Banana Oatmeal Bars Recipe keeps winning over my family and friends—it’s that perfect blend of healthy ingredients and indulgent flavor that just works. If you’re anything like me, you’ll appreciate having this recipe in your go-to repertoire for snacks and breakfasts that feel like a treat but fuel you right. Give it a try, and I guarantee you’ll be slicing up batch after batch in no time. Happy baking!
Print
Peanut Butter Banana Oatmeal Bars Recipe
- Prep Time: 10 minutes
- Cook Time: 25 minutes
- Total Time: 2 hours (includes cooling and chilling)
- Yield: 16 bars 1x
- Category: Snack
- Method: Baking
- Cuisine: American
- Diet: Gluten Free
Description
Delicious and wholesome Peanut Butter Banana Chocolate Chip Oatmeal Bars that combine ripe bananas, creamy peanut butter, and sweet chocolate chips in a wholesome oat base. These bars are vegan, gluten-free with certified oats, and perfect for a nutritious snack or breakfast on the go. Soft and chewy with a hint of cinnamon, they are easy to make and store well in the fridge or freezer.
Ingredients
Wet Ingredients
- 1 cup (230g) mashed bananas (about 3 medium or 2 large ripe bananas)
- 1/2 cup (125g) creamy or crunchy peanut butter*
- 1/4 cup (50g) coconut sugar or brown sugar
- 1/4 cup (60g) unsweetened applesauce*
- 1/2 cup (120ml) almond milk (or any nondairy milk)
- 1 teaspoon pure vanilla extract
Dry Ingredients
- 2 and 1/2 cups (213g) old-fashioned whole oats or quick oats (not instant)
- 1 teaspoon baking powder
- 1/2 teaspoon salt
- 1 teaspoon ground cinnamon
Add-Ins
- 1 cup (180g) semi-sweet chocolate chips (use dairy free for vegan)
Instructions
- Preheat and Prepare Pan: Preheat your oven to 350°F (177°C). Line a 9-inch square baking pan with parchment paper, ensuring enough overhang on the sides for easy removal of the bars. Set aside.
- Mix Wet Ingredients: In a large bowl or the bowl of your stand mixer, mash the bananas thoroughly. On medium speed, beat or whisk in the peanut butter, coconut or brown sugar, applesauce, almond milk, and vanilla extract until the mixture is smooth and well combined.
- Add Dry Ingredients: Gradually add the oats, baking powder, salt, and cinnamon to the wet mixture. Mix until just combined. The batter will be thick but still pourable.
- Fold in Chocolate Chips: Gently fold the semi-sweet chocolate chips into the batter ensuring even distribution.
- Pour Batter and Bake: Spoon or pour the batter evenly into the prepared baking pan and spread it out. Bake for 25-28 minutes or until the center is set but still slightly soft to the touch.
- Cool and Chill: Remove from the oven and allow the bars to cool in the pan at room temperature for 30-60 minutes. Then place the pan in the refrigerator and chill for 1 hour to firm up for easier cutting.
- Cut and Store: Using the parchment paper overhang, lift the bars out of the pan. Cut into 16 bars. Optionally, drizzle with melted peanut butter before serving. Store leftover bars covered tightly in the refrigerator for up to 10 days.
Notes
- Freezing Instructions: Freeze bars in single layers with parchment paper between them in a freezer-friendly container for up to 3 months. Thaw overnight in the refrigerator.
- Special Tools: Electric mixer (handheld or stand), glass mixing bowl, 9-inch square baking pan.
- Peanut Butter: Any nut butter works (peanut, almond, cashew), natural or processed.
- Applesauce: Can substitute 1 egg or a flax egg (1 tbsp ground flax + 3 tbsp warm water, gelled for 10 minutes) instead of applesauce.
- Oats: Use certified gluten-free oats to keep it gluten-free.
- Chocolate Chips: Can replace or omit with peanut butter chips, chopped nuts, or raisins.
- Vegan: Use dairy-free chocolate chips and nondairy milk to ensure vegan compliance.
Nutrition
- Serving Size: 1 bar
- Calories: 190
- Sugar: 9g
- Sodium: 110mg
- Fat: 9g
- Saturated Fat: 2g
- Unsaturated Fat: 6g
- Trans Fat: 0g
- Carbohydrates: 23g
- Fiber: 3g
- Protein: 5g
- Cholesterol: 0mg


Your email address will not be published. Required fields are marked *