
If you’re craving the cozy, creamy, and nostalgic taste of the holidays, you’re going to fall head over heels for this Homemade Eggnog Recipe. I absolutely love how this eggnog comes together with simple ingredients and a decadent, velvety texture that reminds me of festive family gatherings. Whether you’re serving it at a holiday party or just want a warm hug in a glass, this recipe is your ticket to pure comfort in every sip.
Why You’ll Love This Recipe
- Rich and Creamy Texture: Thanks to heavy cream and fresh egg yolks, this eggnog is luxuriously smooth.
- Balanced Warm Spices: Cloves, cinnamon, and nutmeg add just the right amount of holiday warmth without overpowering.
- Customizable Boozy Kick: You control the rum or bourbon — or skip it for a kid-friendly version.
- Make-Ahead Friendly: The flavors meld beautifully overnight making it ideal for stress-free entertaining.

Ingredients You’ll Need
Each ingredient is chosen to create that classic eggnog taste you know and love — with fresh, approachable elements that anyone can find at their local grocery store. Be sure to pick whole milk and heavy cream for the best richness, and don’t skip the cloves for that authentic holiday aroma.
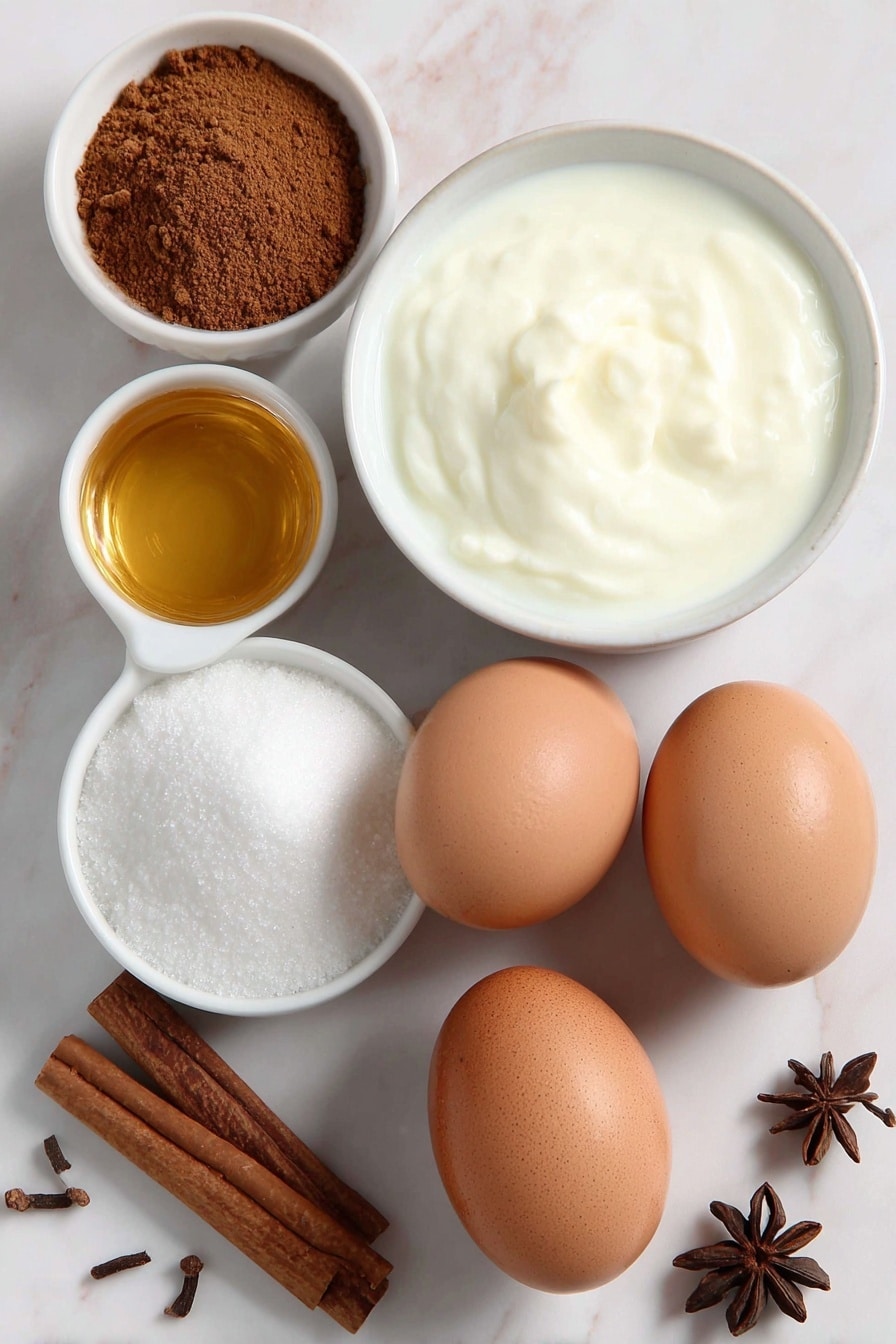
- Whole milk: Adds creaminess and serves as the base liquid; avoid low-fat — you want that full-bodied flavor.
- Whole cloves: Packed with warming spice, these infuse the milk gently—remember to strain them out later!
- Ground cinnamon: Used both in the milk mixture and for garnish, it brings that perfect sweet-spicy note.
- Ground nutmeg: A holiday essential; freshly grated is best if you can manage it for extra aroma.
- Egg yolks: Beating these until fluffy is key for the eggnog’s luscious texture.
- Granulated sugar: Sweetens the mix without overpowering; adjust to taste if you prefer it less sweet.
- Heavy cream: Adds richness and volume, making each sip silky smooth.
- Vanilla extract: Rounds out the flavors with a subtle, sweet warmth.
- Spiced rum or bourbon (optional): You decide how boozy you want to go; I love spiced rum for its festive kick.
Variations
I’ve played around with this Homemade Eggnog Recipe over the years, and you can make it your own depending on preferences or dietary needs. Whether you’re into a lighter nog or want to try fun twists, it’s easy to customize.
- Dairy-free variation: I swapped in oat milk and coconut cream once for a dairy-free holiday option, and it was surprisingly rich and satisfying.
- Non-alcoholic version: Simply omit the rum or bourbon and add a splash of vanilla or a sprinkle of cinnamon for warmth—the whole family loves it that way.
- Extra spice kick: If you want more holiday flair, try adding a star anise pod when warming the milk; it lends a subtle licorice note I adore.
- Sweetness adjustment: I sometimes reduce sugar by a quarter cup if serving with sweet desserts to balance the meal.
How to Make Homemade Eggnog Recipe
Step 1: Infuse the Milk with Spices
Start by combining your whole milk, cloves, cinnamon, and nutmeg in a small saucepan. Warm this mixture slowly over medium heat until it just starts to simmer — don’t let it boil. This is where those lovely holiday aromas really develop. Once you see steam and it’s hot all the way through, remove from heat and let those spices work their magic for a few extra minutes before straining the cloves out. This step took me a bit of practice to get right, but patience here really boosts the flavor depth.
Step 2: Whisk Egg Yolks and Sugar Until Fluffy
While the milk is warming, grab a medium bowl and whisk together your egg yolks and sugar. Whisk vigorously for about 2 to 3 minutes until the mixture becomes lighter in color and fluffy. This aeration adds volume and creaminess to the final eggnog. I find a balloon whisk works best here because it really catches the air.
Step 3: Temper the Eggs
This is the moment that intimidated me when I first tried making eggnog at home, but once you get the rhythm it’s easy: slowly add a small amount of the hot milk mixture into the egg yolk bowl while whisking constantly. This tempers the eggs so they don’t scramble from sudden heat. Gradually continue adding the milk in small increments until it’s all combined. Go slow here and keep whisking to avoid lumps. It’s worth the patience to get silky smooth eggnog.
Step 4: Cook Until Slightly Thickened
Pour the combined mixture back into your saucepan and cook over medium heat, stirring constantly. You’re aiming for the mixture to thicken so it coats the back of a spoon but don’t let it boil, or it will curdle. This usually takes about 3 to 5 minutes—keep your eye on it and stir frequently. Once thickened, remove from heat and strain out any cloves leftover from the infusion. Let it cool at room temperature for about an hour.
Step 5: Finish with Cream, Vanilla, and Rum
Once cooled, whisk in the heavy cream, vanilla extract, and if you’re using it, spiced rum or bourbon. This final step makes the eggnog luxuriously creamy with that perfect boozy balance. Chill your eggnog in the fridge for several hours or even overnight to let all the flavors meld beautifully before serving. Trust me, the wait is worth it!
Pro Tips for Making Homemade Eggnog Recipe
- Use Fresh Nutmeg: I always grate fresh nutmeg instead of pre-ground for a more vibrant aroma that really lifts the eggnog.
- Don’t Rush Tempering: Adding hot milk slowly while whisking keeps your eggs from scrambling – I learned this the hard way early on.
- Chill Overnight: I discovered that letting the eggnog rest overnight lets spices and alcohol integrate beautifully.
- Strain Thoroughly: Taking the time to remove cloves carefully ensures no surprise bites of spice while sipping.
How to Serve Homemade Eggnog Recipe
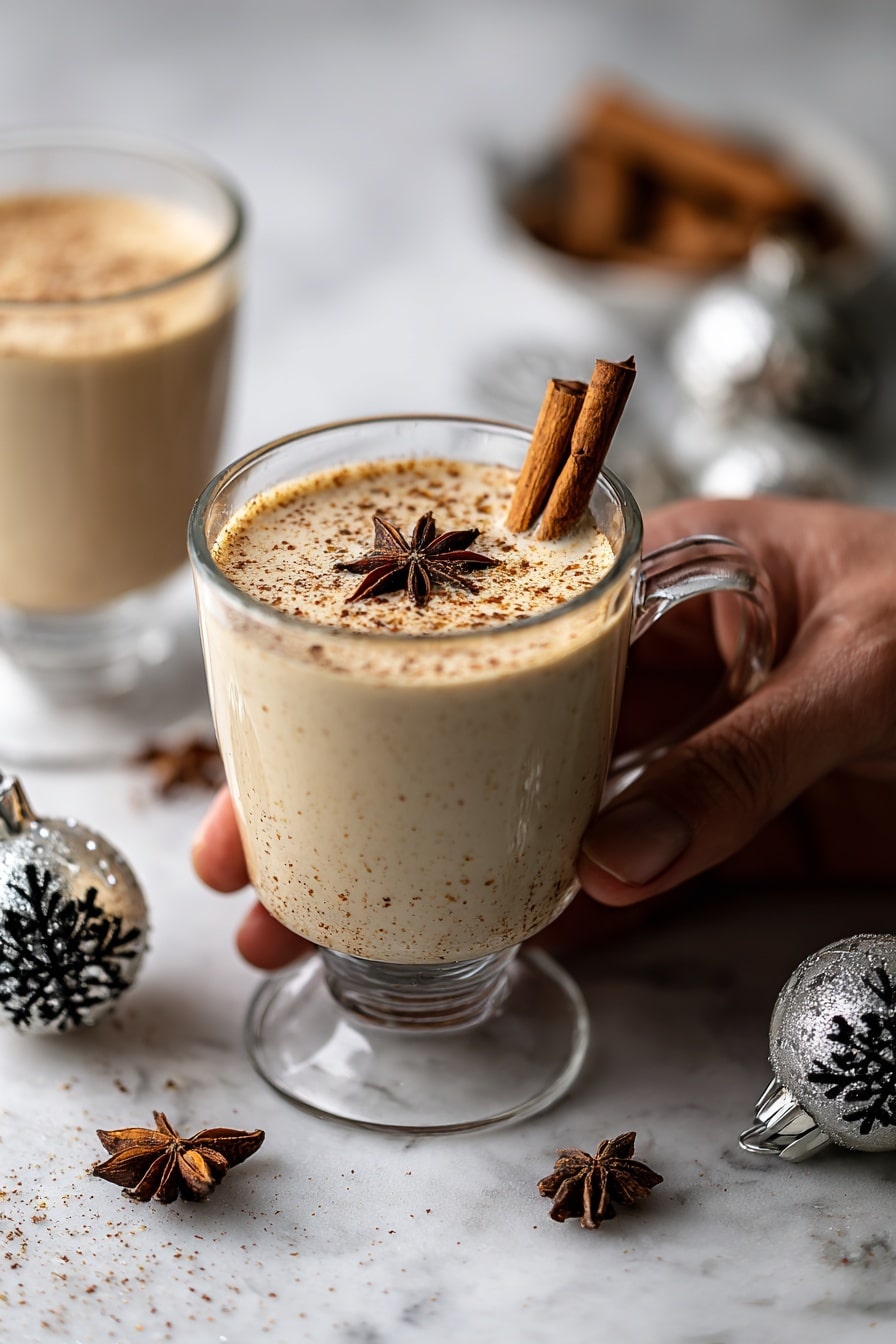
Garnishes
I like to keep it classic with a light dusting of freshly grated nutmeg or a sprinkle of cinnamon on top — it’s simple and really enhances the aroma. Sometimes I pop a cinnamon stick or a star anise pod in the glass for a festive touch that doubles as a stirrer. Little details like this make the experience feel extra special for guests.
Side Dishes
Eggnog pairs beautifully with sweet holiday treats — think gingerbread cookies, cinnamon rolls, or buttery shortbread. My family goes crazy for it alongside spiced nuts or a warm slice of pumpkin pie. The creamy richness of the eggnog balances perfectly with these flavors.
Creative Ways to Present
For special occasions, I’ve served homemade eggnog in small mason jars tied with festive twine and a cinnamon stick. It’s a charming presentation that doubles as a take-home gift. Another idea is layering it in clear glasses to show off the creamy texture, topped with a frothy whipped cream cloud and a sprinkle of nutmeg for extra indulgence.
Make Ahead and Storage
Storing Leftovers
I usually keep leftover eggnog in an airtight container in the fridge—this keeps it fresh for about 2 to 3 days. Before serving again, give it a good shake or whisk because natural settling can happen. It’s best enjoyed cold, so pop it right back into the fridge after each pour.
Freezing
I don’t recommend freezing eggnog, as the texture can separate when thawed due to the cream and eggs. I learned this after one experiment and found it loses its signature creaminess. Instead, I suggest making smaller batches or saving leftovers in the fridge.
Reheating
If you enjoy eggnog warm, heat it gently over low heat on the stove, stirring constantly. Avoid boiling to prevent curdling. You can add a touch more rum or a sprinkle of nutmeg when warming it up to revive flavors. I always test a small amount first until I find the perfect temp for my taste.
FAQs
-
Can I make this Homemade Eggnog Recipe without alcohol?
Absolutely! Simply omit the rum or bourbon, and you’ll still get a delicious, creamy eggnog with all the warming spices. It’s ideal for kids or anyone who wants the festive flavors minus the booze.
-
Is it safe to use raw eggs in homemade eggnog?
This recipe cooks the eggs gently by tempering them with hot milk and cooking the combined mixture until slightly thickened, which greatly reduces any risk. If you’re concerned, you can use pasteurized eggs available at many grocery stores for extra safety.
-
How long can I store homemade eggnog in the refrigerator?
Properly stored in an airtight container, homemade eggnog will last for 2 to 3 days in the fridge. Be sure to give it a good shake or whisk before serving again to recombine any settling.
Final Thoughts
Making this Homemade Eggnog Recipe has become a holiday ritual I look forward to every year. There’s something so rewarding about creating this creamy, spiced drink from scratch that turns any moment into a celebration. I hope you try it and savor every luscious sip like I do with my family around the table. Trust me, once you taste homemade eggnog, you won’t want to buy that carton from the store ever again!
Print
Homemade Eggnog Recipe
- Prep Time: 5 minutes
- Cook Time: 15 minutes
- Total Time: 20 minutes
- Yield: 6 servings 1x
- Category: Beverage
- Method: Stovetop
- Cuisine: American
Description
This Homemade Eggnog recipe offers a rich and creamy holiday classic, infused with warming spices and optional spiced rum or bourbon for an adult twist. Perfectly tempered eggs create a smooth and luscious texture, balanced by fragrant cinnamon, cloves, and nutmeg. Chill and serve this festive beverage for memorable seasonal gatherings or cozy nights in.
Ingredients
Milk Mixture
- 2 cups whole milk
- 3 whole cloves
- 1 teaspoon ground cinnamon, plus a little for garnish if desired
- ½ teaspoon ground nutmeg
Egg Mixture
- 6 large egg yolks
- 1 cup granulated sugar
Final Ingredients
- 2 cups heavy cream
- 1 teaspoon vanilla extract
- 1 ¼ cups spiced rum or bourbon, optional
Instructions
- Heat Milk Mixture: In a small saucepan, combine the whole milk, cloves, ground cinnamon, and ground nutmeg. Slowly bring this milk mixture to a gentle boil over medium heat, allowing the spices to infuse into the milk.
- Whisk Egg Yolks and Sugar: In a medium bowl, whisk together the six large egg yolks and one cup of granulated sugar until the mixture becomes light, fluffy, and pale in color, about 2 to 3 minutes.
- Temper the Eggs: Gradually add a very small amount of the hot milk mixture to the egg yolk mixture while whisking constantly. This step is crucial to slowly raise the temperature of the eggs and prevent them from cooking into scrambled eggs.
- Incorporate Remaining Milk: Continue to whisk consistently while gradually adding the rest of the warm milk mixture into the eggs until fully combined and smooth.
- Cook Eggnog Base: Pour the combined mixture back into the saucepan and cook over medium heat, stirring constantly until it thickens slightly and coats the back of a spoon, about 3 to 5 minutes. Be careful not to allow it to boil, as this could curdle the eggs.
- Strain Spices: Remove the saucepan from heat and strain out the whole cloves to prevent overpowering spice flavor.
- Cool the Base: Allow the eggnog base to cool at room temperature for one hour.
- Mix Final Ingredients: Once cooled, whisk in the heavy cream, vanilla extract, and optional spiced rum or bourbon until fully incorporated.
- Chill: Refrigerate the eggnog for several hours or overnight to let flavors meld and serve chilled. Garnish with a sprinkle of ground cinnamon if desired.
Notes
- Make Ahead: This eggnog can be prepared in advance. Aging it slightly enhances the depth of flavor. Store in an airtight container in the refrigerator until ready to serve.
- Storage: Keep homemade eggnog refrigerated in an airtight container for 2-3 days. Shake well before serving to re-incorporate any settled ingredients.
Nutrition
- Serving Size: 1 cup (approx. 240 ml)
- Calories: 360
- Sugar: 24g
- Sodium: 90mg
- Fat: 28g
- Saturated Fat: 17g
- Unsaturated Fat: 9g
- Trans Fat: 0.3g
- Carbohydrates: 24g
- Fiber: 0.5g
- Protein: 7g
- Cholesterol: 220mg

Your email address will not be published. Required fields are marked *