If you’re craving a rich, velvety dessert that’s genuinely from scratch, you’re going to adore this Homemade Chocolate Pudding from Scratch Recipe. I absolutely love how this pudding turns out silky smooth without any weird artificial flavors or preservatives, and once you try it, you’ll see why it’s a game changer compared to store-bought versions. Let me walk you through all the tips and tricks to get it just right every single time.
Why You’ll Love This Recipe
- Simple Ingredients: You only need a few pantry staples — no mysterious additives, just pure chocolate goodness.
- Perfect Texture: This pudding is creamy and thick, with just the right amount of richness that feels indulgent but not too heavy.
- Quick and Easy: From start to finish, it takes under 40 minutes, making it manageable on a weeknight or for a last-minute treat.
- Kid-Approved: My family goes crazy for this recipe, and it’s a lovely way to sneak in real ingredients kids can recognize.
Ingredients You’ll Need
The ingredients for this Homemade Chocolate Pudding from Scratch Recipe are straightforward and work harmoniously together to create that luscious chocolate flavor and smooth finish. I always recommend organic cocoa powder and milk for the best taste, but regular works too!
- Sugar: Provides sweetness and balances the cocoa’s natural bitterness; I use granulated white sugar for a clean flavor.
- Unsweetened cocoa powder: This adds deep chocolate flavor; opt for organic if you can — it truly makes a difference.
- Cornstarch: The magic thickener — it sets the pudding without any graininess when mixed properly.
- Salt: Just a pinch enhances all the flavors and helps bring out the chocolate.
- Milk: Whole milk gives the creamiest pudding, but you can substitute 2% if you want it lighter.
- Butter: Adds silkiness and richness; make sure it’s at room temperature for smooth incorporation.
- Vanilla extract: Adds depth and a warm note — use pure vanilla, not imitation, for the best result.
Variations
I love tweaking this Homemade Chocolate Pudding from Scratch Recipe depending on the season or mood. You can add your own twist easily — it’s so forgiving and customizable!
- Double Chocolate: Once, I stirred in some mini chocolate chips right after removing from heat — they melted into a dreamy patchy chocolate swirl that my kids loved.
- Dairy-Free Version: Use almond, oat, or coconut milk instead of cow’s milk, and swap butter for coconut oil — the texture shifts a bit but still delicious.
- Spiced Chocolate Pudding: I added a pinch of cinnamon and a tiny hint of cayenne for a subtle warmth that made this feel extra special on chilly nights.
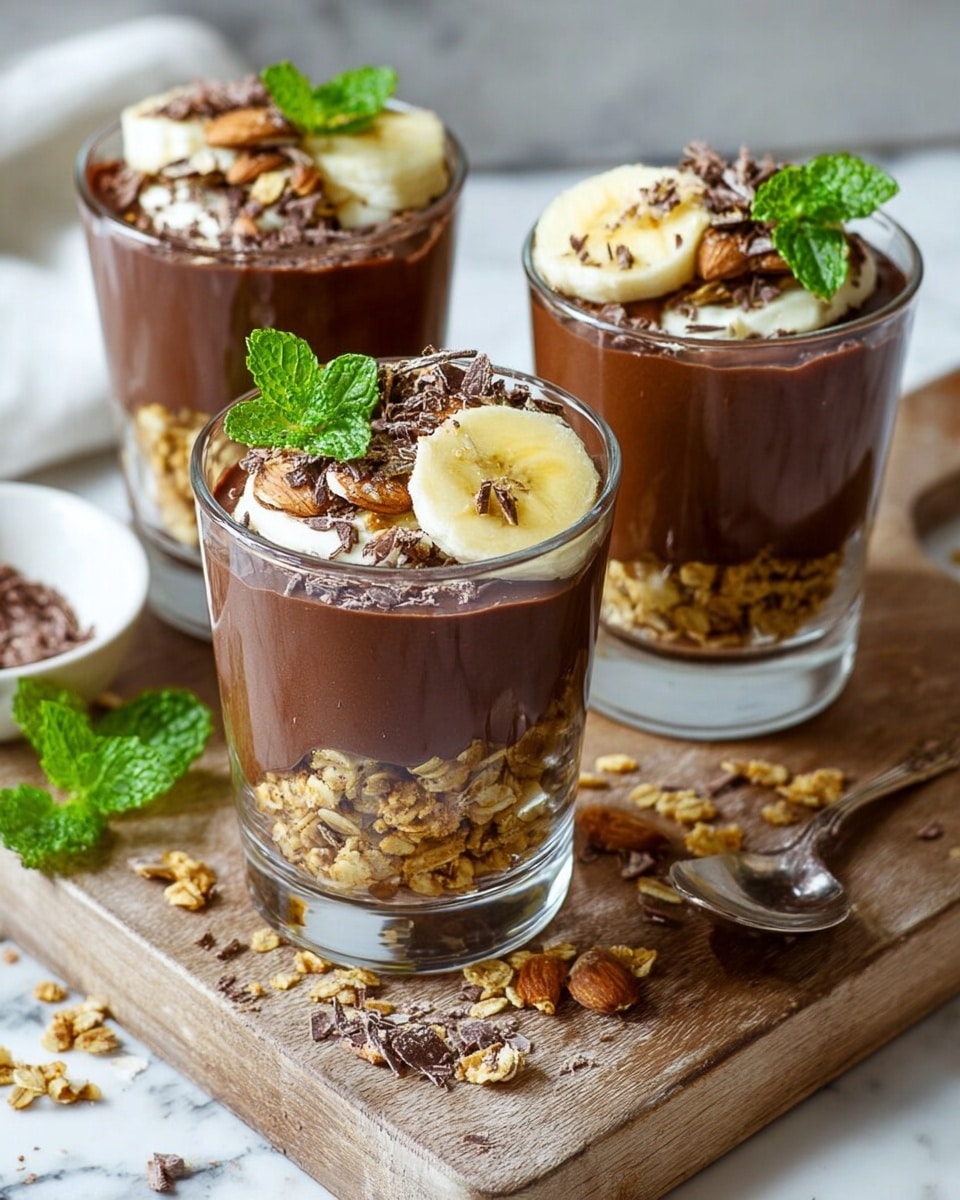
- Layered Dessert: Try layering the pudding with crushed cookies or fresh raspberries for a fun presentation and flavor contrast.
How to Make Homemade Chocolate Pudding from Scratch Recipe
Step 1: Mix Your Dry Ingredients Thoroughly
Start by whisking together the sugar, unsweetened cocoa powder, cornstarch, and salt in a medium saucepan. I like to sift the cocoa and cornstarch together first to avoid lumps — trust me, it makes your pudding smoother.
Step 2: Stir in Milk Over Medium Heat
Gradually add the milk while stirring constantly to combine everything evenly. Set your heat to medium, and keep stirring because this step is key to preventing lumps and burning.
Step 3: Bring to a Boil and Thicken
This is where the magic happens. Keep stirring almost constantly — especially scraping the edges and bottom — while the mixture heats. When it starts to bubble and thickens to coat the back of a spoon (this usually takes about 8–10 minutes), you’re done cooking this part. If it’s too thin, keep stirring an extra minute or two; patience here is your friend!
Step 4: Add Butter and Vanilla for Richness
Remove the pudding from heat and stir in your room temperature butter and vanilla extract. The butter melts into the hot pudding and makes it irresistibly silky. You’ll want to taste it here — sometimes I sneak a little spoonful and it’s pure heaven.
Step 5: Cool and Chill
Transfer the pudding to a bowl or individual serving dishes, cover with plastic wrap pressed directly onto the surface to avoid a skin forming, and let it cool at room temperature. Once cooled, pop it in the fridge for at least an hour before serving. The chilling helps it set to that perfect pudding consistency.
Pro Tips for Making Homemade Chocolate Pudding from Scratch Recipe
- Stir Constantly: I discovered constantly stirring prevents lumps and keeps the pudding silky — don’t wander off during cooking.
- Use Room Temperature Butter: Adding cold butter can cause clumps, so always let it sit out a bit before using.
- Press Plastic Wrap on Surface: Putting a layer of wrap directly on the pudding helps avoid the annoying skin that can form on top.
- Taste and Adjust Sweetness: Every cocoa powder varies in bitterness—taste before chilling and add a tiny bit more sugar if you prefer it sweeter.
How to Serve Homemade Chocolate Pudding from Scratch Recipe

Garnishes
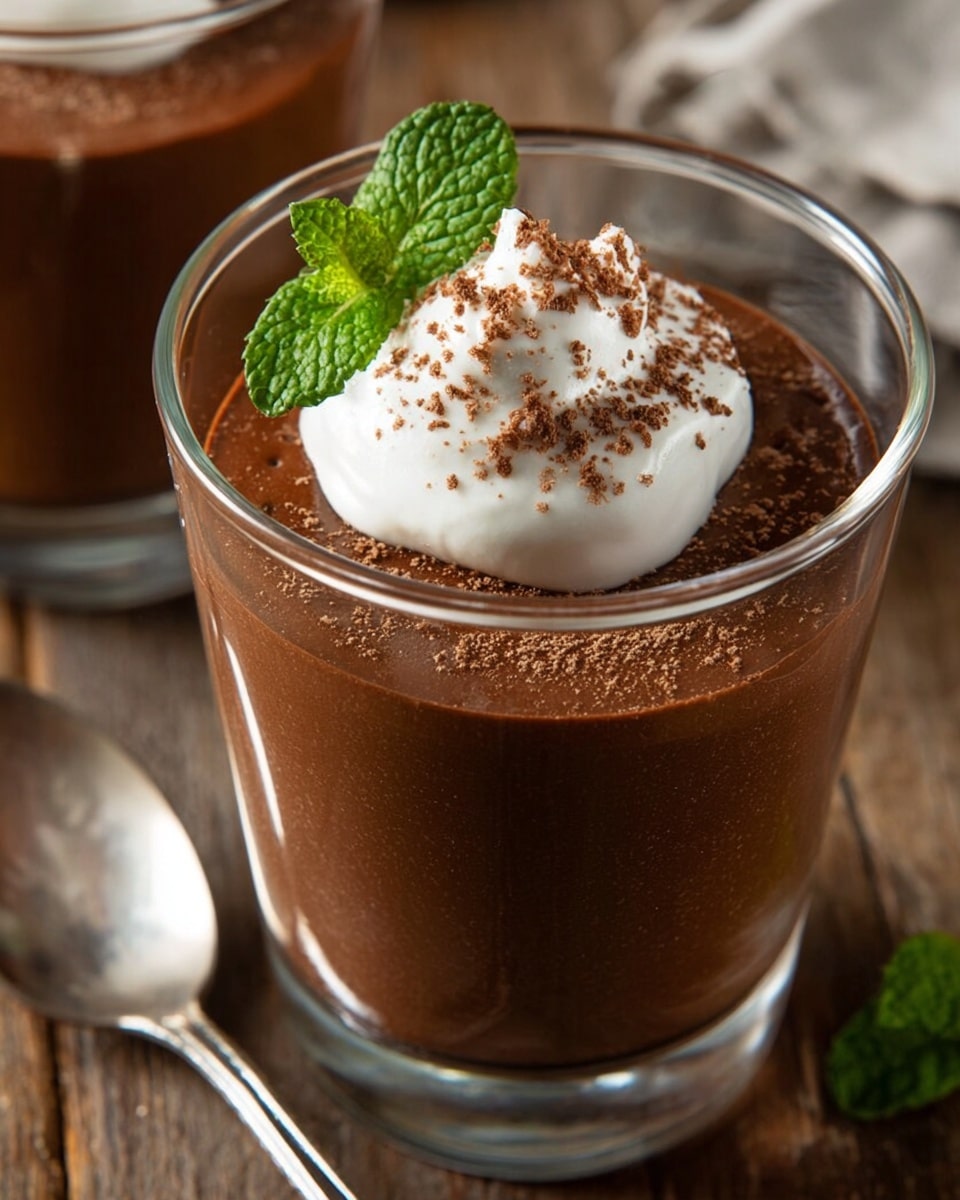
I love topping this pudding with a dollop of freshly whipped cream and a few chocolate shavings or a sprinkle of toasted coconut flakes for extra texture. Sometimes, fresh raspberries or sliced bananas add a nice fruity contrast that keeps each bite exciting.
Side Dishes
This pudding pairs beautifully with a warm cookie on the side, such as a crisp biscotti or buttery shortbread. When I’m feeling fancy, a small glass of cold milk or even a coffee makes the perfect accompaniment to balance the richness.
Creative Ways to Present
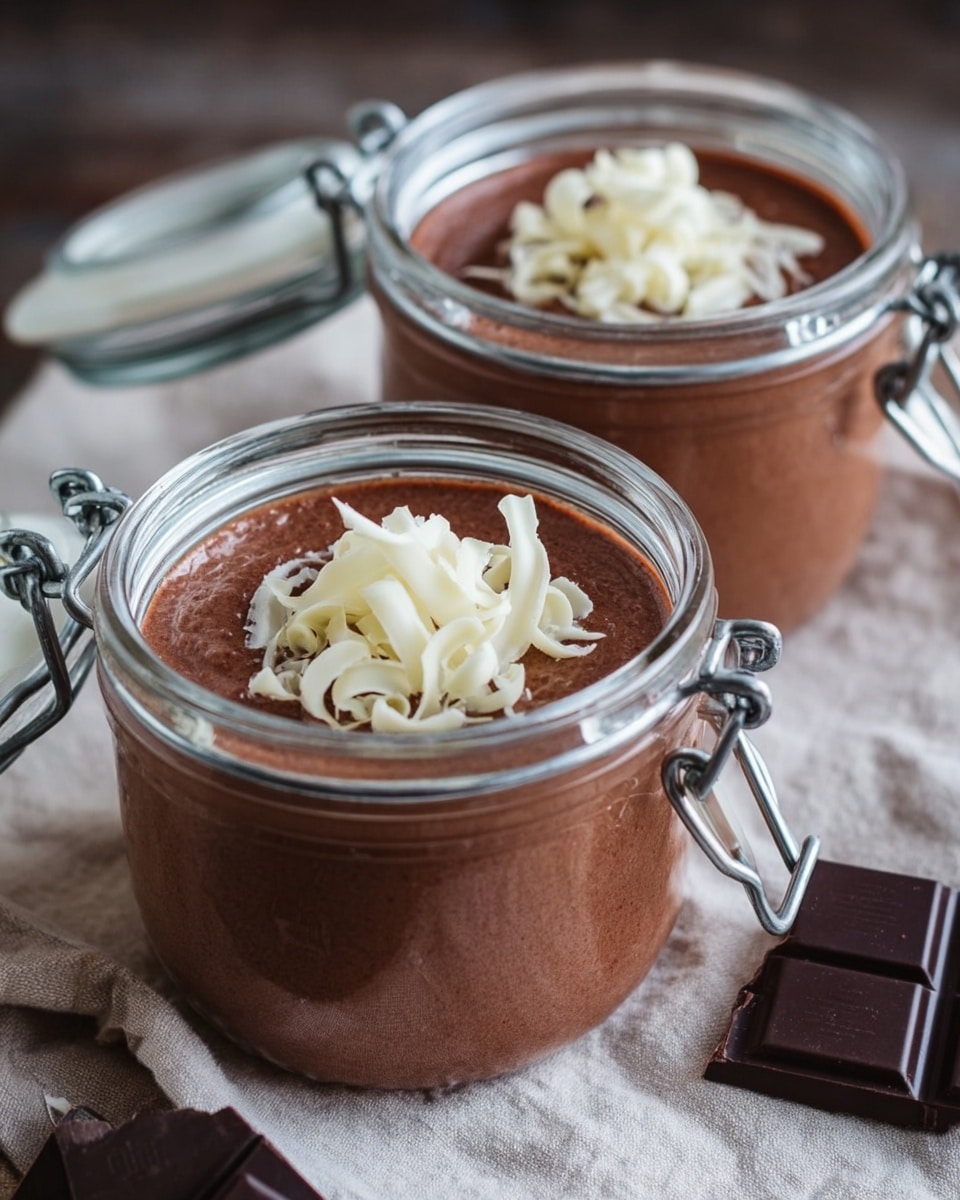
For gatherings, I like to serve the pudding in clear glass jars or stemmed dessert glasses layered alternately with crushed graham crackers or crumbled brownies to turn it into a decadent parfait. It’s always a crowd-pleaser and looks super inviting.
Make Ahead and Storage
Storing Leftovers
Any leftovers you have go straight into an airtight container in the refrigerator. I usually keep mine fresh for up to 3 days, but honestly, it rarely lasts that long in my house! Just make sure to cover it well to prevent it from absorbing fridge smells.
Freezing
I haven’t had much success freezing this pudding because the texture can get a bit grainy upon thawing, but if you need to, freeze it in small portions and thaw overnight in the refrigerator. Stir well before serving.
Reheating
If you want to enjoy it warm, gently reheat the pudding in a saucepan over low heat, stirring constantly to prevent scorching. You might want to add a splash of milk to loosen it up to its original creamy texture.
FAQs
-
Can I use other types of milk for this homemade chocolate pudding?
Absolutely! Whole milk gives the creamiest results, but you can substitute 2% or skim milk if you prefer a lighter version. For dairy-free options, almond, oat, or coconut milk work well, though the texture may slightly differ.
-
How do I prevent lumps in my pudding?
The key is to whisk your dry ingredients thoroughly before adding the milk, and then stir constantly over medium heat until it thickens. Using a whisk rather than a spoon helps keep things smooth, and avoid high heat so the cornstarch doesn’t clump.
-
Is it necessary to chill the pudding before serving?
Chilling is important as it allows the pudding to set completely and develop that luscious texture. While you can eat it warm, it’s much creamier and more satisfying after an hour or more in the refrigerator.
-
Can I make this pudding without cornstarch?
Cornstarch is the thickening agent that gives pudding its classic texture, so leaving it out would result in a runnier dessert. If you want to avoid cornstarch, you might try alternative thickeners like arrowroot powder but in less quantity and adjusted cooking time.
Final Thoughts
This Homemade Chocolate Pudding from Scratch Recipe is honestly one of those comforting classics I find myself returning to again and again. It’s approachable, reliable, and gives you that pure chocolate fix without any fuss. Next time you want something indulgent but homemade, give this a try — you’ll feel proud making it, and your taste buds will thank you. Plus, sharing it with friends or family? That’s the best part.
Print
Homemade Chocolate Pudding from Scratch Recipe
- Prep Time: 10 minutes
- Cook Time: 20 minutes
- Total Time: 40 minutes
- Yield: 4 servings 1x
- Category: Dessert
- Method: Stovetop
- Cuisine: American
Description
This homemade chocolate pudding recipe delivers a rich, creamy dessert made from scratch using simple pantry ingredients. With a smooth texture and deep chocolate flavor, it’s a perfect treat for any occasion, prepared easily on the stovetop and chilled to perfection.
Ingredients
Dry Ingredients
- 1/2 cup sugar
- 3 tablespoons unsweetened organic cocoa powder
- 1/4 cup organic cornstarch
- 1/8 teaspoon salt
Wet Ingredients
- 2 3/4 cups milk
- 2 tablespoons room temperature butter
- 1 teaspoon vanilla extract
Instructions
- Combine Dry Ingredients: In a medium-sized saucepan, thoroughly stir together the sugar, unsweetened cocoa powder, cornstarch, and salt until evenly mixed.
- Add Milk and Heat: Gradually stir in the milk over medium heat, ensuring there are no lumps. Continuously stir the mixture as it warms.
- Cook Until Thickened: Bring the pudding mixture to a boil, stirring constantly to prevent burning. Continue cooking and stirring until the pudding thickens enough to coat the back of a metal spoon, which typically takes about 10-15 minutes.
- Add Butter and Vanilla: Remove the saucepan from heat, then stir in the room temperature butter and vanilla extract until the butter is fully melted and incorporated into the pudding.
- Cool and Chill: Allow the pudding to cool at room temperature for about 10 minutes, then transfer to the refrigerator. Chill for at least 2 hours or until fully set and cold before serving.
Notes
- For a richer pudding, substitute some or all of the milk with half-and-half or cream.
- Stirring constantly prevents the pudding from forming lumps or sticking to the bottom of the pan.
- Use a fine mesh sieve to strain the pudding if you want an ultra-smooth texture.
- Serve topped with whipped cream or fresh berries for added decadence.
- Store leftovers covered in the refrigerator for up to 3 days.
Nutrition
- Serving Size: 1/4 of recipe (approx. 1/2 cup)
- Calories: 180
- Sugar: 25g
- Sodium: 90mg
- Fat: 6g
- Saturated Fat: 3.5g
- Unsaturated Fat: 2g
- Trans Fat: 0g
- Carbohydrates: 30g
- Fiber: 2g
- Protein: 5g
- Cholesterol: 20mg


Your email address will not be published. Required fields are marked *