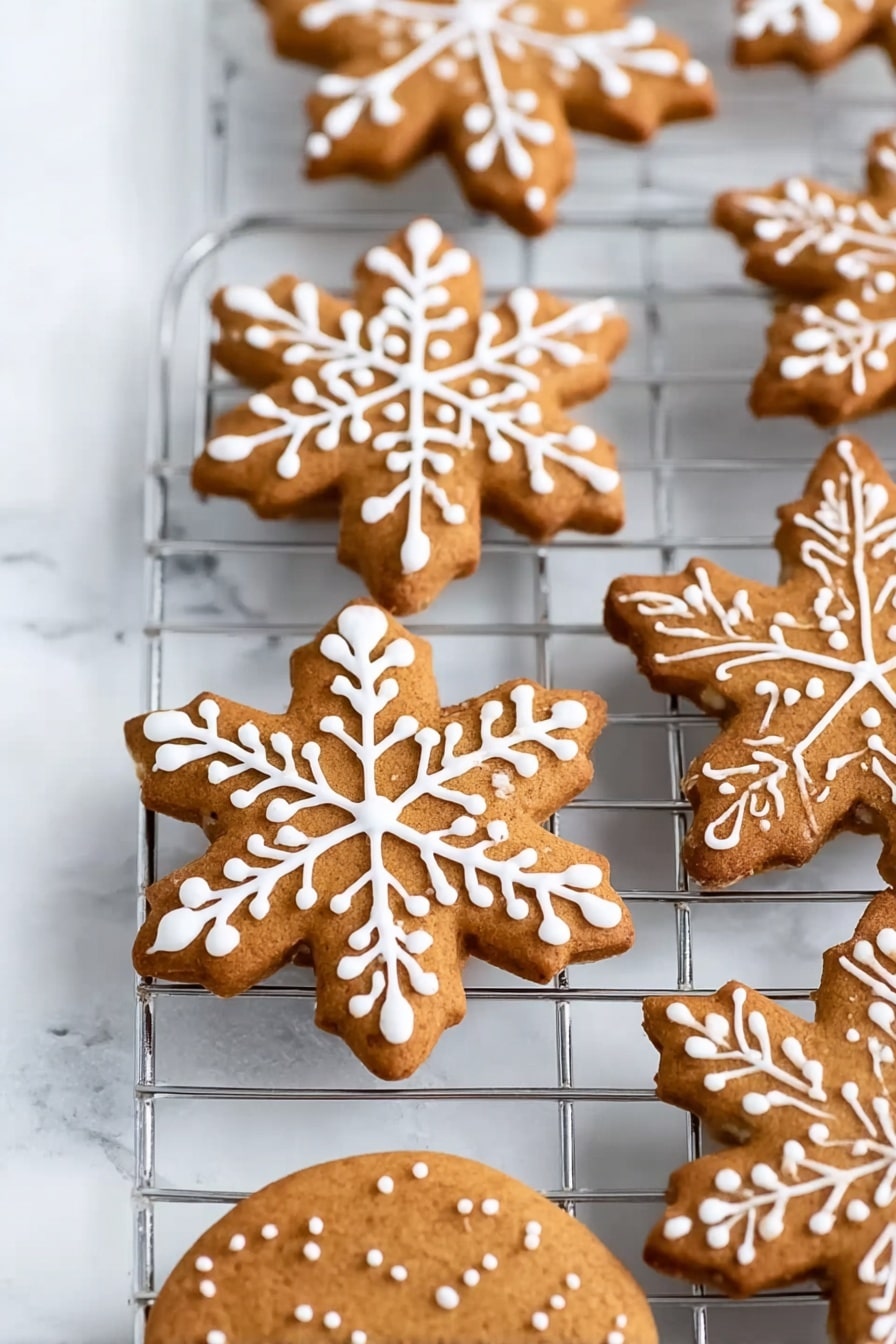
If you’re on the hunt for a cookie that feels like winter magic in every bite, you’ve got to try my Gingerbread Snowflake Cookies Recipe. These cookies are not only adorable with their delicate snowflake shapes and pretty vanilla glaze, but they’re also bursting with warm spices that make your kitchen smell like the holidays. I absolutely love how they turn out crisp on the edges and tender in the middle—trust me, you’ll want to make a double batch.
Why You’ll Love This Recipe
- Classic Holiday Flavors: The blend of ginger, cinnamon, and molasses captures that perfect cozy taste you crave during the colder months.
- Perfect Texture: Crispy edges with a tender center that isn’t too chewy—a cookie everyone can enjoy.
- Beautiful Presentation: The snowflake shapes and smooth vanilla glaze make these cookies look almost too pretty to eat.
- Fun and Easy to Make: Great for baking with family, and the dough is easy to handle—no stress or fancy tools required.

Ingredients You’ll Need
The ingredients here work harmoniously to deliver that perfect classic gingerbread taste. Make sure to use fresh spices—ground ginger and cinnamon really bring the cookies to life. And if you can find a good quality molasses, it makes all the difference in depth and flavor.
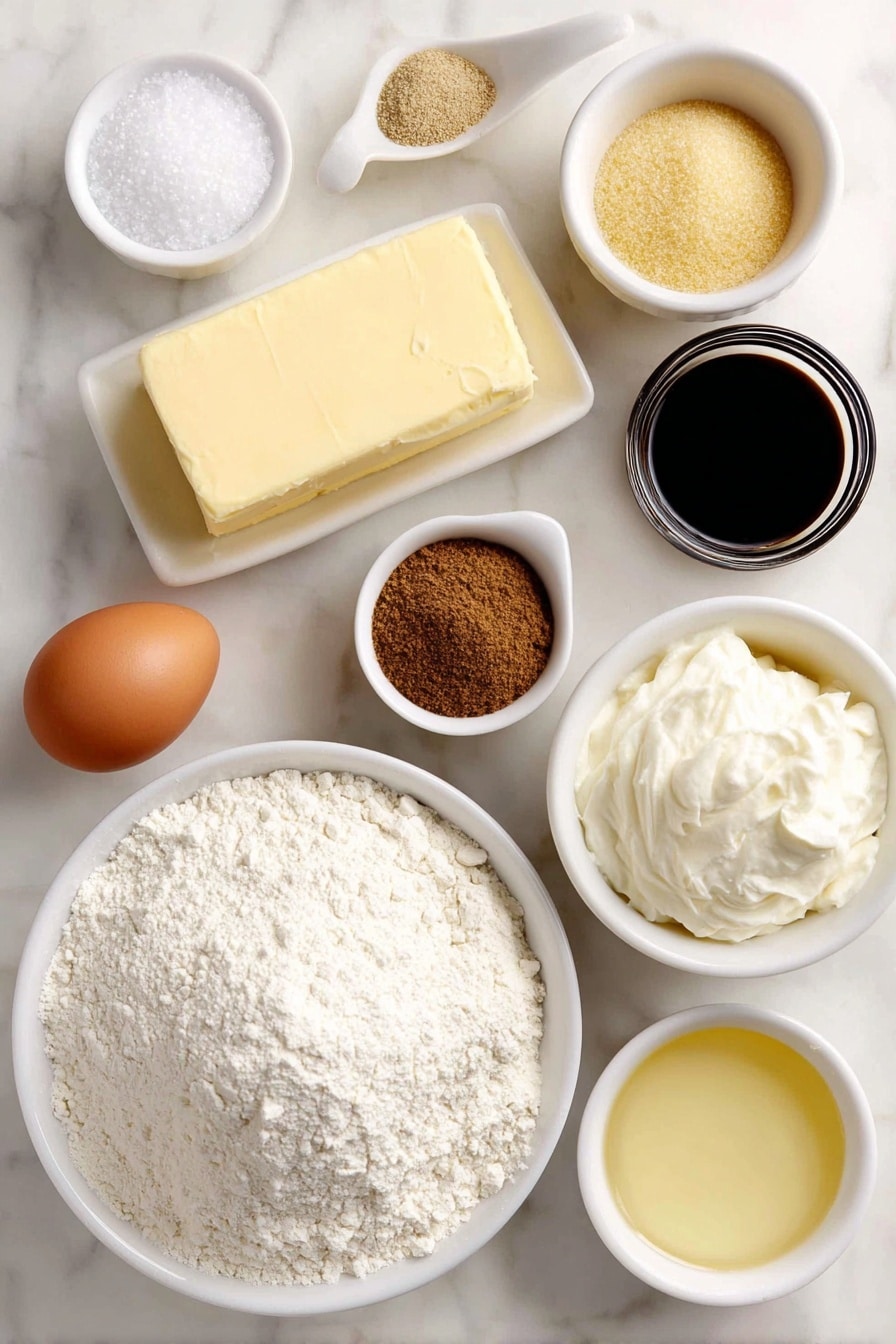
- Butter: Using softened butter helps you easily cream it with sugar for the right cookie texture.
- Sugar: Regular granulated sugar ensures a clean sweetness that balances the spices.
- Molasses: Gives that rich, slightly smoky flavor classic to gingerbread—you’ll want the real deal here, not a substitute.
- Egg: Binds everything together and adds moisture to your dough.
- Vanilla extract: Adds warmth and rounds out the flavor beautifully.
- Flour: All-purpose flour works perfectly for the sturdy yet tender cookie base.
- Ground ginger and cinnamon: These are your star spices—freshly ground if possible for max flavor.
- Baking soda: Helps the cookies rise just enough so they’re light without losing their shape.
- Allspice: A subtle background spice that complements ginger and cinnamon perfectly.
- Salt: Enhances all the flavors and balances the sweetness.
- Powdered sugar, milk or cream, corn syrup: For the vanilla glaze that adds a delightful sweet finish with a beautiful sheen.
Variations
I love how versatile this Gingerbread Snowflake Cookies Recipe is, so I often change things up depending on the mood or occasion. You can easily tweak the glaze colors or swap out spices based on what you have at home.
- Spice Swap: I like to add a pinch of cardamom or nutmeg sometimes, which gives the cookies a slightly exotic and warmer note—my family goes crazy for this twist!
- Glaze Colors: Adding a few drops of food coloring to the vanilla glaze is a fun way to create festive cookies for Christmas or winter parties.
- Vegan Version: Substitute the butter with a plant-based margarine and use a flax egg instead, and you can easily enjoy these gingerbread cookies without dairy or eggs.
- Gluten-Free: You can try gluten-free all-purpose flour blends, but be sure to add a little xanthan gum if your blend doesn’t include it to keep the dough from falling apart.
How to Make Gingerbread Snowflake Cookies Recipe
Step 1: Cream Together Butter and Sugar
Start by creaming the softened butter and sugar in a large bowl until the mixture becomes light and fluffy—this usually takes about 3-5 minutes with an electric mixer. This step is key to getting your cookies tender rather than dense. I discovered this trick when I was first trying to get that perfect cookie texture; creaming makes all the difference!
Step 2: Mix in Egg, Vanilla, and Molasses
Once your butter and sugar are fluffy, stir in the vanilla and egg until combined. Then add the molasses and mix well to get its rich, deep sweetness all through the dough. Be patient and scrape down the bowl so every last bit of molasses is incorporated—it adds that unmistakable gingerbread character.
Step 3: Combine Dry Ingredients and Add to Wet Mixture
In a separate bowl, whisk together the flour, ground ginger, cinnamon, baking soda, allspice, and salt. Slowly add this to the wet mixture, mixing just until everything comes together. Overmixing develops gluten and can make your cookies tough, so I always tell friends to stop as soon as the dough looks uniform and the flour streaks vanish.
Step 4: Chill the Dough
Here’s a step I don’t skip: shape the dough into a disc, wrap it tightly in plastic wrap, and refrigerate for at least one hour. Chilling makes the dough easier to roll out and helps your cookies keep their beautiful snowflake shape without spreading too much in the oven. When I first tried skipping this, my cookies turned out flat blobs—lesson learned!
Step 5: Roll Out and Cut Your Snowflakes
Preheat your oven to 375°F. Divide the dough in half and roll it on a lightly floured surface to about ¼ inch thick. Use a snowflake cookie cutter to cut out shapes. If you don’t have a snowflake cutter, any decorative shape will do, but snowflakes always add that extra holiday charm. Place the cookies on a parchment-lined baking sheet, spaced about an inch apart.
Step 6: Bake and Cool
Bake for 8-10 minutes until the edges just start to firm up but the centers aren’t hard. Cookies will continue to set as they cool, so it’s better not to overbake. Transfer them to a wire rack and allow to cool completely before glazing, or you’ll end up with a melty mess. Waiting is hard, I know—especially when the smell is this good!
Step 7: Prepare and Pipe the Vanilla Glaze
Mix powdered sugar, milk or cream, corn syrup, and vanilla in a bowl until smooth. The glaze should be pourable but thick enough to hold its shape when drizzled. I usually start with 3 tablespoons of milk and add more if it’s too thick. Pour the glaze into a piping bag fitted with a small tip and carefully decorate your snowflakes with beautiful lines and dots. It’s such a satisfying finishing touch!
Pro Tips for Making Gingerbread Snowflake Cookies Recipe
- Chill Thoroughly: Don’t rush the refrigeration step—it really prevents spreading and keeps your cutouts sharp and pretty.
- Use Parchment Paper: Baking on parchment ensures easy cookie removal and prevents burning on the bottom.
- Start Glazing When Cookies Are Fully Cool: Warm cookies defeat the purpose and your glaze will get all runny.
- Test Oven Temperature: If your cookies are browning too fast, your oven might be hotter than the dial shows—use an oven thermometer for accurate baking.
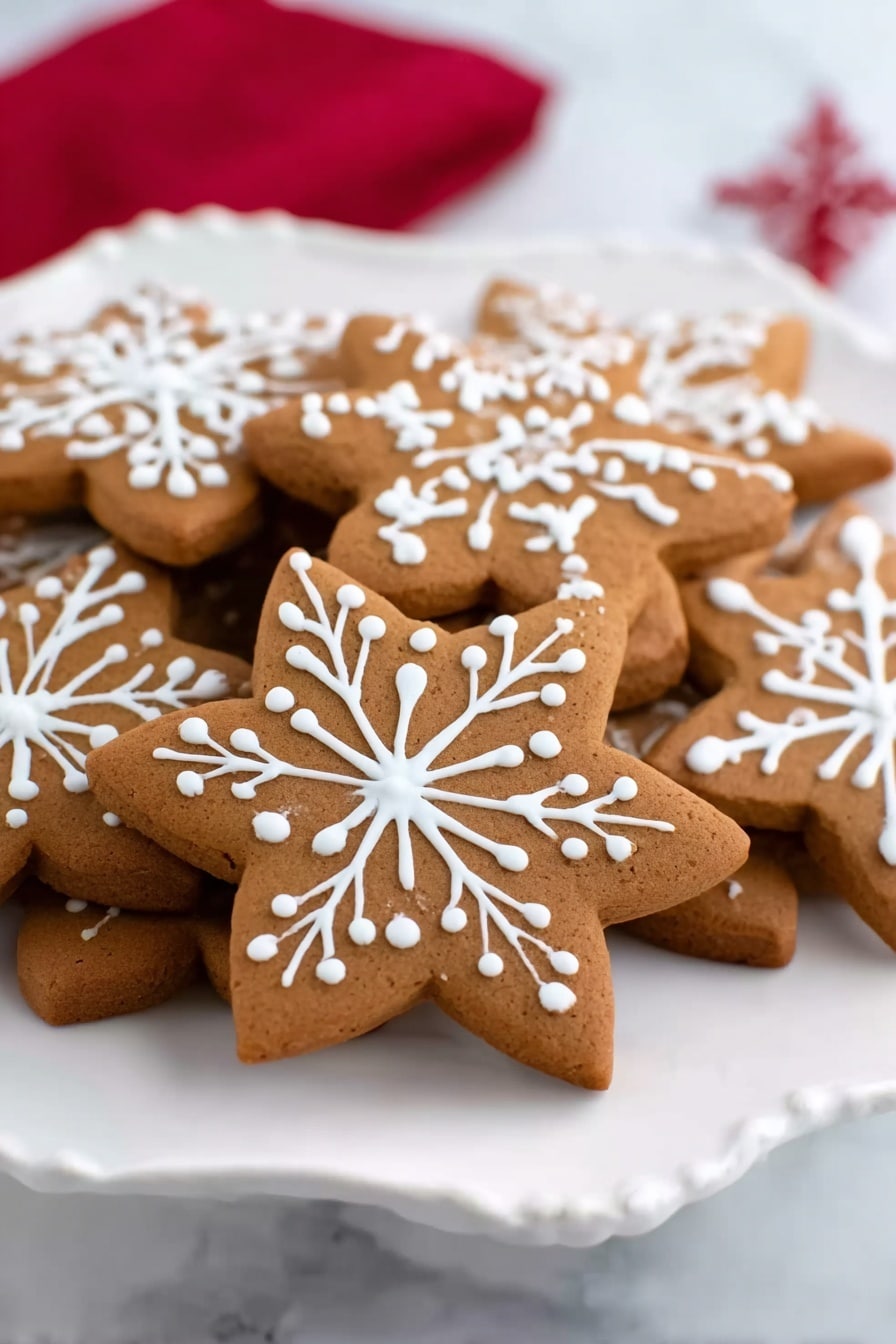
How to Serve Gingerbread Snowflake Cookies Recipe
Garnishes
I often sprinkle a pinch of edible glitter or colorful sugar crystals on the glaze right after piping for a festive sparkle. Sometimes I add tiny silver dragees to mimic ice crystals—it’s these little touches that make the cookies feel special and gift-worthy.
Side Dishes
These cookies go beautifully with a cup of spiced chai tea or a mug of hot chocolate topped with whipped cream. For holiday gatherings, I serve them alongside roasted chestnuts or a cheese platter to balance the sweetness.
Creative Ways to Present
I once arranged these Gingerbread Snowflake Cookies in a clear glass jar layered with cinnamon sticks and pine needles for a winter-themed gift. Another time, I threaded them with ribbon holes to create edible garlands. My friends were totally impressed—and I loved how creative you can get!
Make Ahead and Storage
Storing Leftovers
I store leftover cookies in an airtight container at room temperature, placing parchment paper between layers to keep them from sticking. They usually last a week perfectly. The spices even deepen in flavor the next day, which is a lovely bonus.
Freezing
These cookies freeze wonderfully—just freeze the unglazed cookies in a single layer on a tray, then transfer them to a freezer bag. When you’re ready, let them thaw and then decorate with the glaze. This two-step freezing keeps your decorations fresh and pretty.
Reheating
If you like your cookies slightly warm, I gently reheat them for 5-7 seconds in the microwave—not too long or they soften too much. This brings back the softness without losing the crisp edges. Be sure not to glaze warm cookies though!
FAQs
-
Can I use a different cookie cutter shape for this Gingerbread Snowflake Cookies Recipe?
Absolutely! While snowflakes add a lovely festive touch, any cookie cutter shape you like will work just as well. Just adjust the baking time slightly if the shapes are much larger or smaller than snowflakes.
-
How long do these gingerbread cookies stay fresh?
Stored properly in an airtight container at room temperature, these cookies stay fresh and delicious for up to one week. The spices even seem to develop more as time goes on.
-
Can I make the dough ahead of time?
Yes! You can prepare the dough up to 2 days in advance. Just keep it wrapped tightly in the fridge until you’re ready to roll out and bake.
-
What can I substitute for molasses?
Molasses is key for authentic gingerbread flavor, but you can substitute dark corn syrup or honey if necessary. Keep in mind it will slightly alter the flavor and color of the cookies.
-
Why is chilling the dough so important for this Gingerbread Snowflake Cookies Recipe?
Chilling firms up the butter in the dough, which prevents the cookies from spreading too much during baking. This keeps your snowflake shapes crisp and well-defined—an absolute must for decorative cookies!
Final Thoughts
This Gingerbread Snowflake Cookies Recipe has become a holiday staple in my kitchen because it’s easy to make, looks stunning, and tastes like a warm holiday hug in cookie form. I love sharing these with friends and family—there’s something magical about making and decorating them together. I hope you give this recipe a try and let it bring a little extra joy (and spice!) to your festive season.
Print
Gingerbread Snowflake Cookies Recipe
- Prep Time: 24 minutes
- Cook Time: 10 minutes
- Total Time: 1 hour 34 minutes
- Yield: 30 cookies 1x
- Category: Dessert
- Method: Baking
- Cuisine: American
- Diet: Vegetarian
Description
These Gingerbread Snowflake Cookies are classic holiday treats with a perfect blend of spices and a sweet vanilla glaze. Soft and flavorful, they’re ideal for decorating and sharing during festive gatherings.
Ingredients
Cookies
- 1 cup butter (softened)
- 1 cup sugar
- ¾ cup molasses
- 1 egg
- 1 teaspoon vanilla
- 4 cups flour
- 3 teaspoons ground ginger
- 2 teaspoons ground cinnamon
- 1 ½ teaspoons baking soda
- ½ teaspoon allspice
- ½ teaspoon salt
Vanilla Glaze
- 3 cups powdered sugar
- 3–4 tablespoons milk or cream
- 1 tablespoon corn syrup
- ½ teaspoon vanilla
Instructions
- Cream Butter and Sugar: In a large mixing bowl, cream together the softened butter and sugar until the mixture is light and fluffy to create the base for your cookies.
- Add Wet Ingredients: Stir in the vanilla extract and egg thoroughly until fully incorporated, then add the molasses and mix until the dough is well combined and smooth.
- Combine Dry Ingredients: In a separate bowl, whisk together the flour, ground ginger, ground cinnamon, baking soda, allspice, and salt to evenly distribute the spices and leavening agent.
- Mix Dry and Wet Ingredients: Gradually add the dry ingredient mixture to the wet mixture in the bowl. Mix well until a consistent dough forms.
- Chill Dough: Remove the dough from the bowl and shape it into a large disc. Wrap it tightly in plastic wrap and refrigerate for at least 1 hour to firm up and develop flavors.
- Preheat Oven: Set your oven to 375°F (190°C) to prepare for baking the cookies.
- Roll and Cut Dough: Divide the chilled dough in half. On a lightly floured surface, roll out each half to about ¼ inch thickness. Use a snowflake cookie cutter or your preferred shape to cut out cookies.
- Prepare Baking Sheet: Place the cut-out cookies on a baking sheet lined with parchment paper or an ungreased baking sheet, spacing them slightly apart.
- Bake Cookies: Bake in the preheated oven for 8-10 minutes until the edges are firm but not browned.
- Cool Cookies: Once baked, transfer the cookies to a wire rack and allow them to cool completely before adding glaze.
- Prepare Glaze: In a bowl, whisk together powdered sugar, milk or cream, corn syrup, and vanilla until smooth. Adjust the consistency by adding more milk or powdered sugar if necessary to achieve a glaze that flows but holds shape.
- Decorate Cookies: Place the vanilla glaze in a piping bag fitted with a small tip and pipe snowflake decorations onto the cooled cookies for a festive look.
Notes
- Ensure the dough is well chilled to make rolling and cutting easier.
- Use parchment paper to prevent cookies from sticking and aid in even baking.
- The glaze consistency is key for decorating—too thin will run off, too thick will be hard to pipe.
- Cookies can be stored in an airtight container for up to a week.
- For extra flavor, consider adding a pinch of cloves or nutmeg in the spice mix.
Nutrition
- Serving Size: 1 cookie
- Calories: 150 kcal
- Sugar: 12 g
- Sodium: 160 mg
- Fat: 7 g
- Saturated Fat: 4 g
- Unsaturated Fat: 3 g
- Trans Fat: 0 g
- Carbohydrates: 21 g
- Fiber: 1 g
- Protein: 1.5 g
- Cholesterol: 25 mg

Your email address will not be published. Required fields are marked *