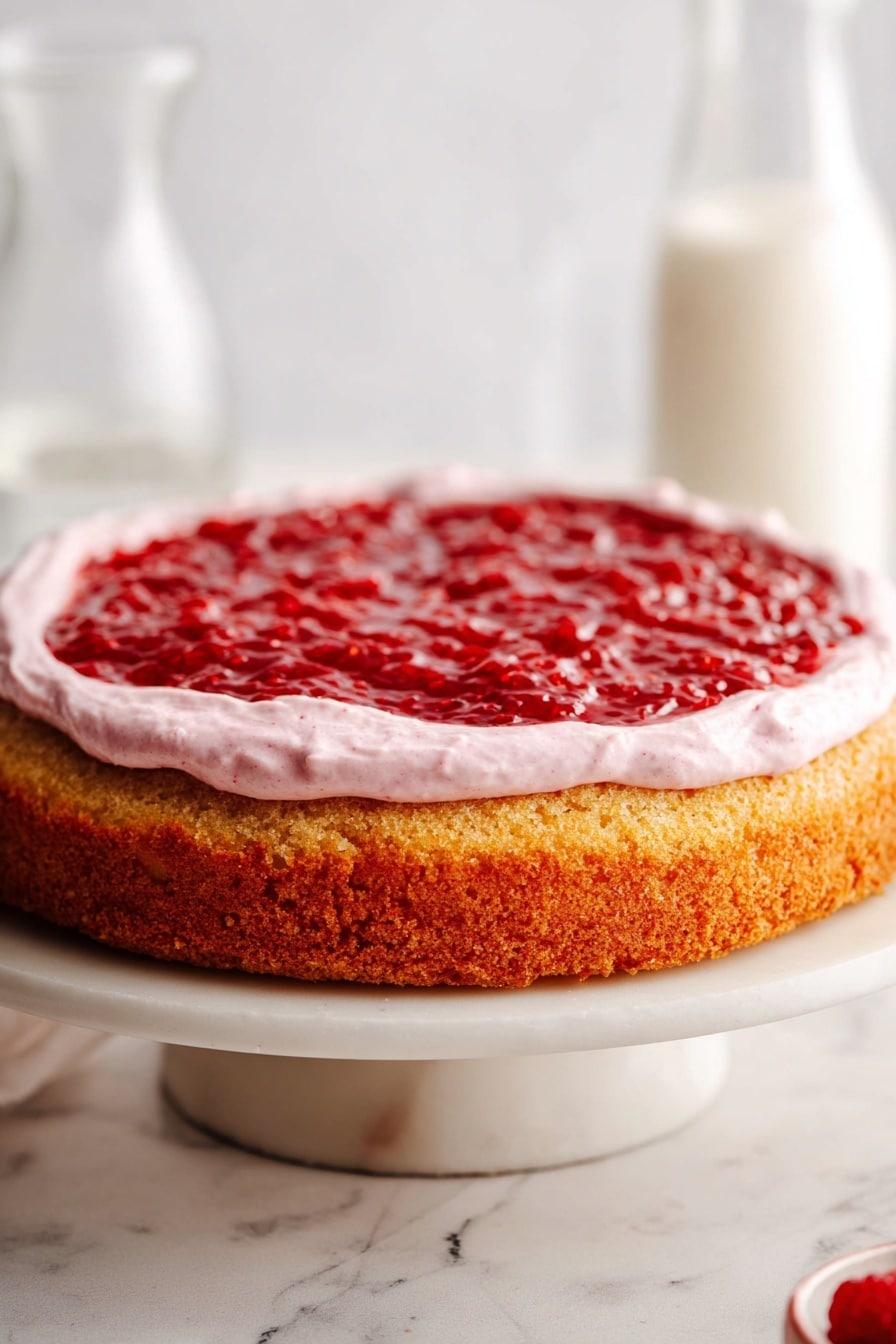
If you’ve ever wanted a fresh, homemade strawberry filling that bursts with real fruit flavor without a ton of fuss, you’re going to love this Easy Strawberry Cake Filling Recipe. Seriously, once I cracked the code on this one, it became my go-to anytime I want to elevate a simple cake or cupcakes. It’s bright, sweet-tart, and thickened just right to spread or dollop—just what you want between cake layers or on top of pastries. Stick around, because I’m sharing all my tips to help you nail it on the first try!
Why You’ll Love This Recipe
- Super Simple to Make: You only need a handful of ingredients and 20 minutes to get this filling ready.
- Bursting with Real Fruit: Unlike store-bought fillings, this uses fresh strawberries for that natural, vibrant flavor.
- Versatile and Customizable: Use it in cakes, cupcakes, pastries, or even over ice cream for a sweet surprise.
- Keeps Well: Store it in the fridge for a few days, making it easy to prep ahead of time.

Ingredients You’ll Need
The beauty of this easy strawberry cake filling recipe is that it doesn’t rely on fancy or hard-to-find ingredients. Just fresh fruit, sugar, and a few kitchen staples come together perfectly to create a luscious filling that holds its shape. I always recommend using the freshest, ripest strawberries you can find—the natural sweetness and vibrant color make all the difference here.
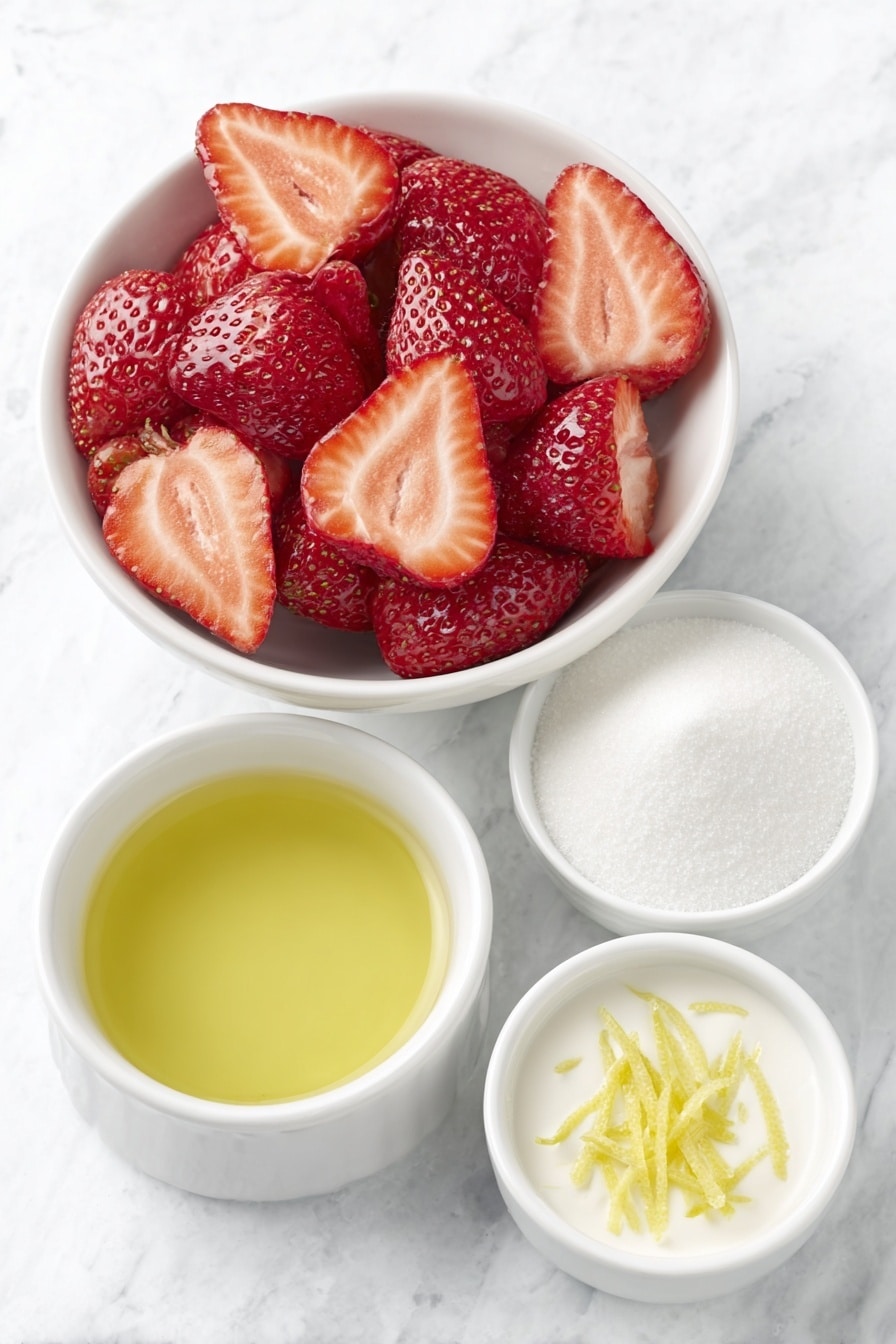
- Strawberries: Ripe, fresh berries are best, but frozen work in a pinch—just be prepared for a bit more liquid.
- Granulated sugar: Balances the tartness of the fruit, but you can tweak the amount to taste.
- Lemon juice: Adds brightness and helps deepen the strawberry flavor.
- Cornstarch: The secret to thickening without making the filling gummy.
- Lemon zest (optional): Uplifts the flavor with a fresh citrusy note.
Variations
One of the things I love about this easy strawberry cake filling recipe is how fun and flexible it is. I’ve tried several twists to suit different occasions and tastes, and you’ll find it’s easy to make your own. Don’t hesitate to experiment with add-ins or swap ingredients to fit what you’ve got on hand.
- Add Fresh Herbs: I once tried adding a bit of chopped fresh basil to the filling—it brought a subtly herbal, sophisticated note that elevated an everyday cake into something special.
- Swap Lemon for Orange: For a sweeter, slightly different citrus flavor, orange zest and juice make a lovely substitute that gives a fresh twist.
- Use Frozen Strawberries: This works well when fresh berries are out of season—just thaw and drain some of the excess liquid before cooking to keep it from being too runny.
- Lighter Version: If you want a lighter filling, reduce the sugar slightly or use a sugar substitute designed for cooking, but remember this can affect the texture.
How to Make Easy Strawberry Cake Filling Recipe
Step 1: Prep and Slice Your Strawberries
Start by washing your strawberries thoroughly and removing the green tops. I like to slice them in halves or quarters depending on how chunky you want your filling—leaving them larger for a heartier texture or smaller for a smoother spread. If you’re using frozen berries, let them thaw completely and drain any excess liquid before cooking to avoid a watery filling.
Step 2: Simmer Strawberries with Sugar and Lemon
Pop the strawberries into a medium saucepan along with the granulated sugar, lemon juice, and optional lemon zest. Heat everything over medium heat until it starts bubbling and the strawberries release their juicy goodness. This simmering helps the sugar to dissolve fully and lets the fruit’s flavors concentrate beautifully.
Step 3: Thicken with Cornstarch Slurry
While your fruit simmers gently, mix the cornstarch with a little cold water to create a smooth slurry—this prevents lumps in your filling. Slowly stir this mixture into your simmering strawberries, making sure to keep stirring constantly. You’ll notice the filling starts thickening within a couple of minutes; once it coats the back of your spoon, you’re golden.
Step 4: Cool Before You Use or Store
Remove the pan from heat and let the filling cool completely—it will thicken a bit more as it chills. I’ve learned the hard way that adding warm filling directly to cakes can melt the frosting, so patience here makes a huge difference. Once cooled, it’s ready to spread, or you can keep it stored in an airtight container in the fridge for up to 3 days.
Pro Tips for Making Easy Strawberry Cake Filling Recipe
- Use Natural Sweetness: Taste your strawberries first and adjust sugar accordingly—ripe berries often need less sugar than you’d expect.
- Don’t Skip the Lemon: That little splash of acid really brightens flavors and balances sweetness perfectly.
- Stir Often and Gently: Prevent burning by stirring regularly and keeping heat moderate—you want a gentle simmer, never a rolling boil.
- Cool Fully Before Use: Adding warm filling to cake layers can cause frosting meltdowns; cooling saves the day.
How to Serve Easy Strawberry Cake Filling Recipe
Garnishes
I love topping desserts with a sprinkle of fresh mint or a few tiny sliced strawberries for a pop of color and freshness that compliments the filling. Sometimes I add a dusting of powdered sugar or a drizzle of white chocolate over the cake to make it extra special and eye-catching.
Side Dishes
This strawberry filling pairs wonderfully with vanilla buttercream cakes or fluffy sponge cakes. I’ve also spooned it over vanilla ice cream or alongside a simple cheesecake for a burst of fruity goodness. Fresh whipped cream and a cup of tea or coffee round out the experience perfectly.
Creative Ways to Present
One of my favorite ways to showcase this filling is in a layered trifle with pound cake cubes and whipped cream—delicious and visually stunning. For a special occasion, I’ve piped the filling inside hollowed cupcakes before frosting. It’s such a delightful surprise that always impresses guests!
Make Ahead and Storage
Storing Leftovers
I keep leftover filling in a well-sealed container in the refrigerator for up to 3 days. Make sure your container is airtight to prevent the fresh flavors from fading. Give it a gentle stir before using again since it can settle a bit after resting.
Freezing
If you want to save some for a longer stretch, I’ve frozen this filling successfully in freezer-safe containers. Just thaw it overnight in the fridge and give it a quick stir—sometimes it needs a gentle warm-up on the stove to bring back that perfect consistency.
Reheating
To reheat, place the filling in a small saucepan over low-medium heat, stirring often until it’s warmed through and smooth again. Don’t boil it, as that can break down the fruit too much and thin the filling. Let it cool fully if you’re using it for cake layers or pastries afterward.
FAQs
-
Can I use frozen strawberries for this filling?
Yes, frozen strawberries can work well if fresh aren’t available. Just thaw them fully and drain any extra liquid to avoid making the filling too watery. You might also want to cook the filling a bit longer to help reduce excess moisture.
-
How thick should the strawberry cake filling be?
The filling should be thick enough to coat the back of a spoon and hold its shape when spread. Remember it will thicken further as it cools, so avoid over-thickening on the stove to keep a luscious texture.
-
Can I make the strawberry filling ahead of time?
Absolutely! It keeps well in the fridge for up to three days, making it perfect to prepare in advance for your cakes or desserts. Just be sure to cool it completely before covering and refrigerating.
-
Can I blend the filling smooth instead of chunky?
Yes! If you prefer a smoother finish, you can blend the cooked filling or even strain it to remove larger pieces of strawberry. This works great if you want a more uniform texture for certain desserts.
-
Will the filling affect cake frosting?
Warm filling can melt the frosting, so always let the strawberry cake filling cool completely before spreading it between cake layers or on top. This prevents any mess and keeps your cake looking picture perfect.
Final Thoughts
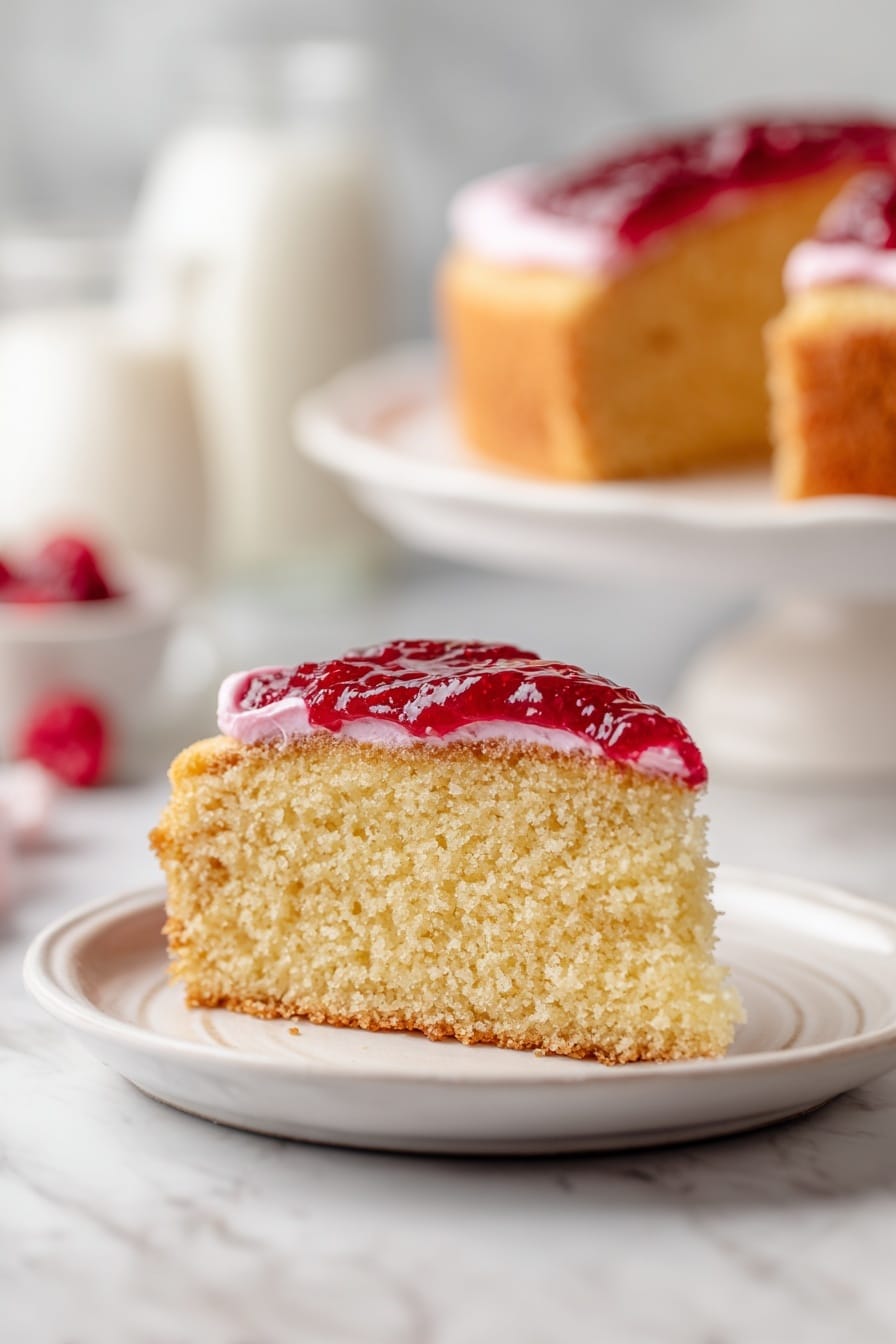
I absolutely love how this easy strawberry cake filling recipe transforms simple baked goods into something unforgettable. When I first tried making strawberry filling from scratch, I was surprised how quickly it came together and how fresh it tasted compared to store-bought versions. My family goes crazy for it on birthday cakes and even spooned over vanilla ice cream as a quick dessert. I’m confident you’ll enjoy making it just as much as I do—it’s one of those small details that makes your baking feel truly homemade and special. Give it a try, and I can’t wait to hear about your delicious creations!
Print
Easy Strawberry Cake Filling Recipe
- Prep Time: 2 minutes
- Cook Time: 20 minutes
- Total Time: 22 minutes
- Yield: Enough to fill one two-layer cake
- Category: Filling
- Method: Stovetop
- Cuisine: American
- Diet: Vegetarian
Description
This Strawberry Cake Filling recipe is a simple and delicious way to add fresh, fruity flavor to your cakes, cupcakes, or pastries. Made with fresh strawberries, sugar, lemon juice, and thickened with cornstarch, this filling is easy to prepare in about 20 minutes. It has a perfect balance of sweetness and tartness, with the option to adjust texture between chunky or smooth to suit your dessert needs.
Ingredients
Strawberries
- 3 cups strawberries, sliced in half
Syrup and Thickener
- ¼ cup granulated sugar
- 1 tablespoon lemon juice
- 1 teaspoon lemon zest (optional)
- 1 teaspoon cornstarch mixed with a little water
Instructions
- Prepare the Strawberries: Wash, hull, and chop fresh strawberries or thaw frozen ones. For chunkier filling, leave the strawberry pieces larger.
- Cook Strawberries with Sugar and Lemon: Place strawberries in a saucepan with sugar, lemon juice, and optional lemon zest. Heat over medium heat until the mixture starts bubbling and strawberries release their juices.
- Simmer the Mixture: Reduce heat to medium-low and simmer for 20 minutes, stirring occasionally to avoid sticking.
- Add Cornstarch Slurry: In a small bowl, mix cornstarch with a bit of water to form a smooth slurry. Stir this into the simmering strawberry mixture, stirring constantly to prevent lumps.
- Thicken the Filling: Continue cooking while stirring until the mixture thickens and coats the back of a spoon, usually taking a few more minutes.
- Cool the Filling: Remove from heat and let the filling cool completely. It will thicken further as it cools. Use immediately or store refrigerated in an airtight container for several days.
Notes
- Cut strawberries to preferred size for chunkiness; keep them larger for chunkier texture.
- The filling thickens more as it chills; cool it fully before adjusting thickness or using.
- Stir frequently during cooking to prevent sticking and burning at the bottom of the pan.
- For a smoother filling, blend or strain out strawberry pieces as desired.
- Use fresh, ripe strawberries for the best natural flavor; frozen berries add moisture but work as well.
- Thoroughly clean and hull strawberries to avoid bitterness.
- Simmer gently to preserve bright color and fresh flavor without overcooking.
- Taste and adjust sugar or lemon juice depending on strawberry ripeness.
- Let filling cool completely before using on frosted cakes or delicate desserts to prevent melting.
Nutrition
- Serving Size: 1/8 cup (about 60g)
- Calories: 60
- Sugar: 12g
- Sodium: 1mg
- Fat: 0g
- Saturated Fat: 0g
- Unsaturated Fat: 0g
- Trans Fat: 0g
- Carbohydrates: 15g
- Fiber: 2g
- Protein: 0.5g
- Cholesterol: 0mg

Your email address will not be published. Required fields are marked *