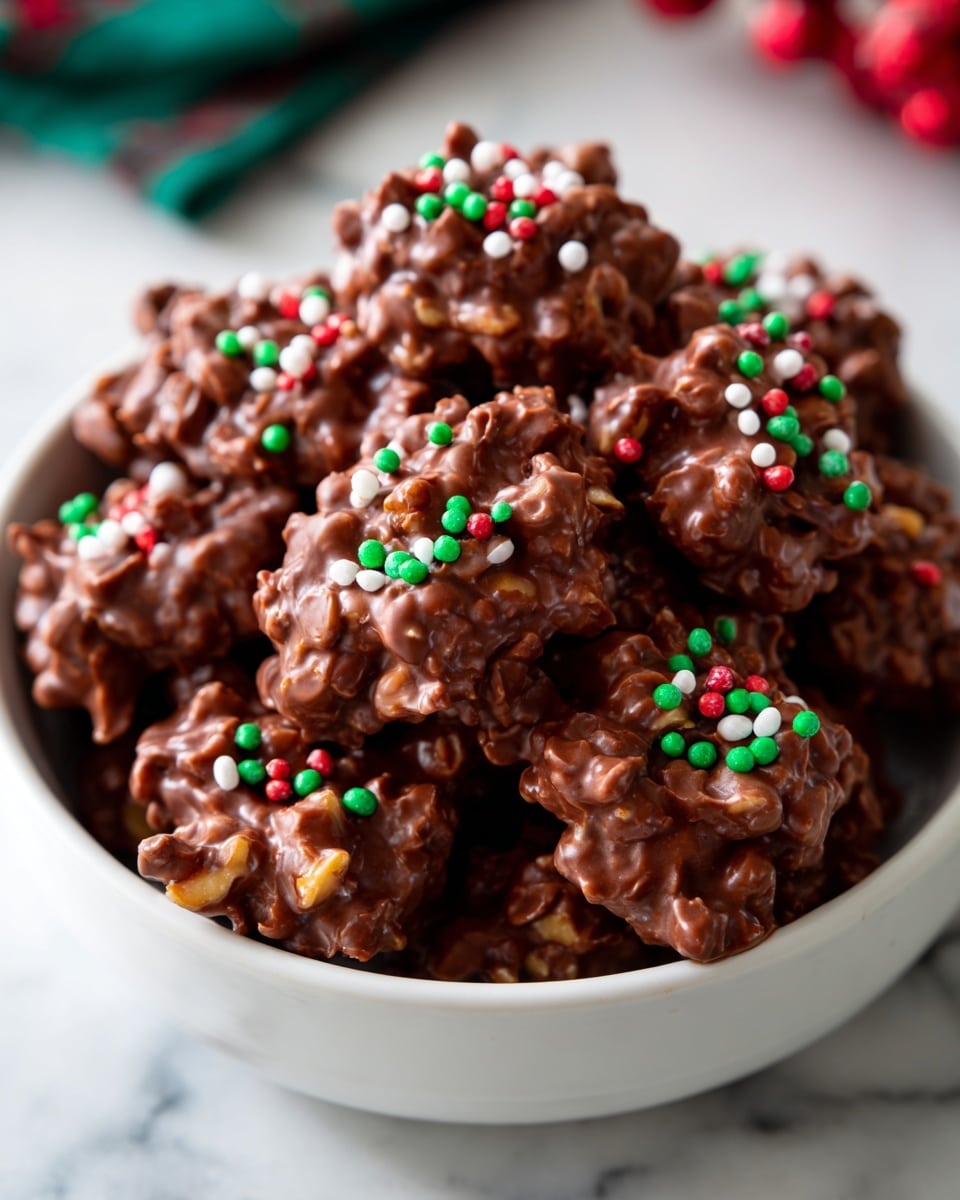
If you’re looking for a festive, easy-to-make treat that will wow your friends and family, you’re going to love this Crockpot Holiday Chocolate Candy Recipe. It’s the perfect blend of crunchy peanuts, rich baking chocolates, and a touch of sweetness from candy melts—all slowly melted together in the crockpot to create that smooth, glossy chocolate you dream about during the holidays. I absolutely love how this turns out because it’s hands-off, super simple, and the results are always a crowd-pleaser. Stick with me here, and I’ll walk you through all the tips and tricks to nail this festive favorite.
Why You’ll Love This Recipe
- Hands-Off Convenience: The slow cooker does all the melting and mixing for you with minimal stirring.
- Perfect Holiday Gift: These candies are festive, delicious, and make adorable gifts packed in pretty tins or boxes.
- Customizable Fun: You can swap out sprinkles or chocolate types to suit your taste or dietary needs.
- Smooth, Glossy Texture: The slow, gentle heat ensures the chocolate melts evenly and stays silky smooth.
Ingredients You’ll Need
Choosing the right ingredients makes all the difference here. I always recommend getting good quality baking chocolate because it melts better and tastes richer, giving your candy that professional touch without the fuss.
- Lightly salted roasted peanuts: The perfect crunch and salty contrast to the sweet chocolate—don’t skip the salted kind for balance.
- 60% cocoa baking chocolate: Adds deep, rich cocoa flavor with just the right hint of bitterness to cut sweetness.
- 48% cocoa baking chocolate: This mellower chocolate blends smoothly with the darker chocolate for a balanced taste.
- White baking chocolate: Offers creamy sweetness and beautiful color contrast when layered.
- Vanilla-flavored candy melts: These melt easily and taste delightful—they add smoothness and help with texture.
- Holiday sprinkles: Because what’s a holiday candy without some colorful festive flair?
Variations
I like to keep the base recipe as is for that classic holiday vibe, but I always encourage you to make this recipe your own. It’s fun to experiment with different chocolates and mix-ins—you might just discover a new family favorite.
- Nut-Free Version: Swap peanuts with toasted pumpkin seeds or crispy rice cereal to accommodate allergies—my niece loves the crunch of pumpkin seeds here!
- Dark Chocolate Lovers: Increase the percentage of dark baking chocolates and reduce the white chocolate for a more intense cocoa punch.
- Festive Flavors: Add a teaspoon of peppermint extract or orange zest during the melting process to give your candy a seasonal twist—I tried peppermint once, and it was magical!
- Gluten-Free & Paleo: Use certified gluten-free candy melts and verify chocolate labels; it’s an easy swap I’ve made for friends with dietary restrictions.
How to Make Crockpot Holiday Chocolate Candy Recipe
Step 1: Layer Your Ingredients Thoughtfully
In your slow cooker (I recommend at least 2.5-quart size), start by layering the lightly salted roasted peanuts at the bottom. Then break up your baking chocolates into chunks and add the 60% cocoa chocolate first, followed by the 48% cocoa chocolate. Next, add the white baking chocolate and finally the vanilla-flavored candy melts on top. I’ve learned that layering like this helps each ingredient melt at just the right pace—trust me, it makes a difference.
Step 2: Cook Low and Slow for That Smooth Melt
Turn your slow cooker to LOW, cover it, and let the magic begin. Let it melt undisturbed for the first hour—that’s crucial to avoid the chocolate burning or seizing up. After the hour, gently stir the mixture to combine the peanuts with the now partially melted chocolates. Then continue cooking on LOW for another 1½ hours, stirring every 30 minutes. You’ll notice the chocolate becomes silky and glossy—it’s my favorite part to watch!
Step 3: Cool Slightly Before Portioning
Once everything is smooth and well combined, turn off the slow cooker but keep the lid on for about 30 minutes. This cooling step helps the chocolate mixture thicken just enough so when you scoop it, the candies hold their shape better. I used to skip this part and ended up with a mess on my baking sheets—learn from me!
Step 4: Portion and Decorate Your Holiday Treats
Line two large baking sheets with parchment or wax paper. Using a tablespoon or a small cookie scoop, drop 2-tablespoon sized portions of the chocolate mixture onto the sheets. Make sure to leave about ½ inch between each portion so they don’t stick together. While the chocolates are still soft and warm, sprinkle them generously with your festive holiday sprinkles—you’ll get the prettiest, most colorful candy this way.
Step 5: Chill Until Set and Enjoy
Pop the trays into the fridge for at least an hour. This allows the candies to set up firm and glossy. When I first tried this recipe, I couldn’t help sneaking a quick taste at 30 minutes, but patience really pays off—the texture is much better once fully chilled!
Pro Tips for Making Crockpot Holiday Chocolate Candy Recipe
- Even Chocolate Pieces: Breaking the chocolate bars into similar-sized chunks helps them melt evenly without clumps.
- Don’t Rush Stirring: Let the chocolates melt undisturbed initially to avoid grainy texture from over-stirring.
- Use a Silicone Spatula: It’s flexible and gentle when stirring the sticky chocolate mixture, making cleanup easier too.
- Avoid Overcrowding Candy Portions: Give each candy enough space to set properly and avoid sticking together.
How to Serve Crockpot Holiday Chocolate Candy Recipe

Garnishes
I’m a big fan of classic red, white, and green sprinkles for a festive pop, but sometimes I mix it up with crushed candy canes or edible glitter for an extra sparkly touch. These little details really impress guests and add to that holiday magic vibe.
Side Dishes
This candy shines as a sweet finish to holiday dinners, but I also love pairing it with homemade hot cocoa or a creamy eggnog—the rich chocolate and nutty flavors complement warm drinks perfectly.
Creative Ways to Present
For holiday parties, I like to arrange these chocolates on a tiered dessert stand lined with fresh evergreen sprigs for a rustic look. Wrapping small batches in clear cellophane tied with a festive ribbon also makes for adorable homemade gifts that friends always appreciate.
Make Ahead and Storage
Storing Leftovers
I store leftover candy in an airtight container lined with parchment paper between layers to keep them from sticking together. They stay fresh and glossy in the fridge for up to two weeks—if they last that long!
Freezing
Freezing works great too. I wrap individual portions in wax paper and place them in a freezer-safe container. When I’m ready for a sweet snack, I just let them thaw in the fridge overnight—texture and taste remain just as good as fresh.
Reheating
If your candy gets too firm, I reheat small portions gently in the microwave in short 10-second bursts, stirring in between. This softens them enough to enjoy without losing their wonderful texture or shine.
FAQs
-
Can I use other nuts besides peanuts in this Crockpot Holiday Chocolate Candy Recipe?
Absolutely! While peanuts add a classic salty crunch, you can substitute almonds, pecans, or even walnuts if you prefer. Just make sure they are roasted and lightly salted for the best flavor contrast. If you have nut allergies, seeds like pumpkin or sunflower can work well too.
-
Why is it important to cook the chocolate mixture on LOW in the crockpot?
Melting chocolate slowly at low temperatures prevents it from burning or seizing, which can make the candy grainy or tough. The LOW setting allows the chocolate to melt evenly and blend perfectly with the peanuts and candy melts, resulting in that smooth, glossy finish you want.
-
Can I skip the candy melts and just use baking chocolates?
You can, but candy melts add important sweetness and smooth texture that balance the bitterness from the baking chocolates. If you skip them, you might want to add a bit of white chocolate or sweetened coating to keep the candy from tasting too intense or dry.
-
How long does this candy keep fresh?
Stored properly in an airtight container in the refrigerator, your Crockpot Holiday Chocolate Candy will stay fresh for up to two weeks. For longer storage, freezing is a great option and keeps the candy tasting just as delicious.
Final Thoughts
Making this Crockpot Holiday Chocolate Candy Recipe became one of my favorite holiday traditions because it’s so easy to pull off, yet feels impressively homemade. Your kitchen fills with that amazing chocolate aroma, and everyone’s face lights up when they taste it. Whether you’re gifting it or enjoying it yourself, this recipe never disappoints. Give it a try this season—you’ll be amazed at how simple but spectacular homemade holiday candy can be!
Print
Crockpot Holiday Chocolate Candy Recipe
- Prep Time: 5 minutes
- Cook Time: 2 hours 30 minutes
- Total Time: 3 hours 35 minutes
- Yield: Approximately 30–35 candies (2 tablespoons each) 1x
- Category: Candy
- Method: Slow Cooking
- Cuisine: American
Description
This Crockpot Christmas Candy recipe combines layers of roasted peanuts and various types of rich baking chocolates, slowly melted and mixed in a slow cooker to create a smooth, glossy candy mixture. After thickening and portioning, the candies are decorated with festive holiday sprinkles and chilled to set, making a delightful and easy holiday treat perfect for gifting or sharing.
Ingredients
Ingredients
- 16 ounces lightly salted roasted peanuts
- 10 ounces 60% cocoa baking chocolate
- 4 ounces 48% cocoa baking chocolate
- 4 ounces white baking chocolate
- 10 ounces vanilla-flavored candy melts
- Holiday sprinkles (red, white, and green)
Instructions
- Layer the ingredients: In a 2.5-quart or larger slow cooker, layer the peanuts at the bottom first, then add the 60% cocoa baking chocolate broken into smaller pieces, followed by the 48% cocoa baking chocolate, the white baking chocolate, and finally the vanilla-flavored candy melts on top.
- Cook in the slow cooker: Set the slow cooker to LOW and cover. Allow to cook undisturbed for 1 hour. After 1 hour, gently stir the mixture to combine the chocolates and peanuts. Continue cooking on LOW for an additional 1½ hours, stirring every 30 minutes until the chocolate mixture is smooth and glossy.
- Cool the mixture: Turn off the slow cooker but keep it covered for 30 minutes. This resting period helps the mixture thicken slightly, making it easier to portion.
- Prepare the baking sheets: Line two large baking sheets with parchment paper or wax paper to prevent sticking.
- Portion the candies: Using a tablespoon or small cookie scoop, drop 2-tablespoon portions of the thickened mixture onto the prepared baking sheets, spacing them about ½ inch apart.
- Decorate with sprinkles: While the candies are still wet, generously sprinkle the tops with red, white, and green holiday sprinkles for festive decoration.
- Set the candies: Refrigerate the baking sheets for at least 1 hour or until the candies are completely set and firm to the touch, ready for serving or gifting.
Notes
- Be sure to use a slow cooker that is at least 2.5 quarts to allow enough space for stirring.
- Gently breaking the chocolate bars into smaller pieces helps them melt evenly.
- Do not stir the mixture during the initial cooking hour to allow proper melting.
- If desired, swap out the peanuts for other nuts like almonds or pecans for variation.
- Store the finished candies in an airtight container in the refrigerator for up to two weeks.
Nutrition
- Serving Size: 1 candy (2 tablespoons)
- Calories: 150
- Sugar: 16g
- Sodium: 60mg
- Fat: 10g
- Saturated Fat: 5g
- Unsaturated Fat: 4g
- Trans Fat: 0g
- Carbohydrates: 16g
- Fiber: 2g
- Protein: 3g
- Cholesterol: 0mg


Your email address will not be published. Required fields are marked *