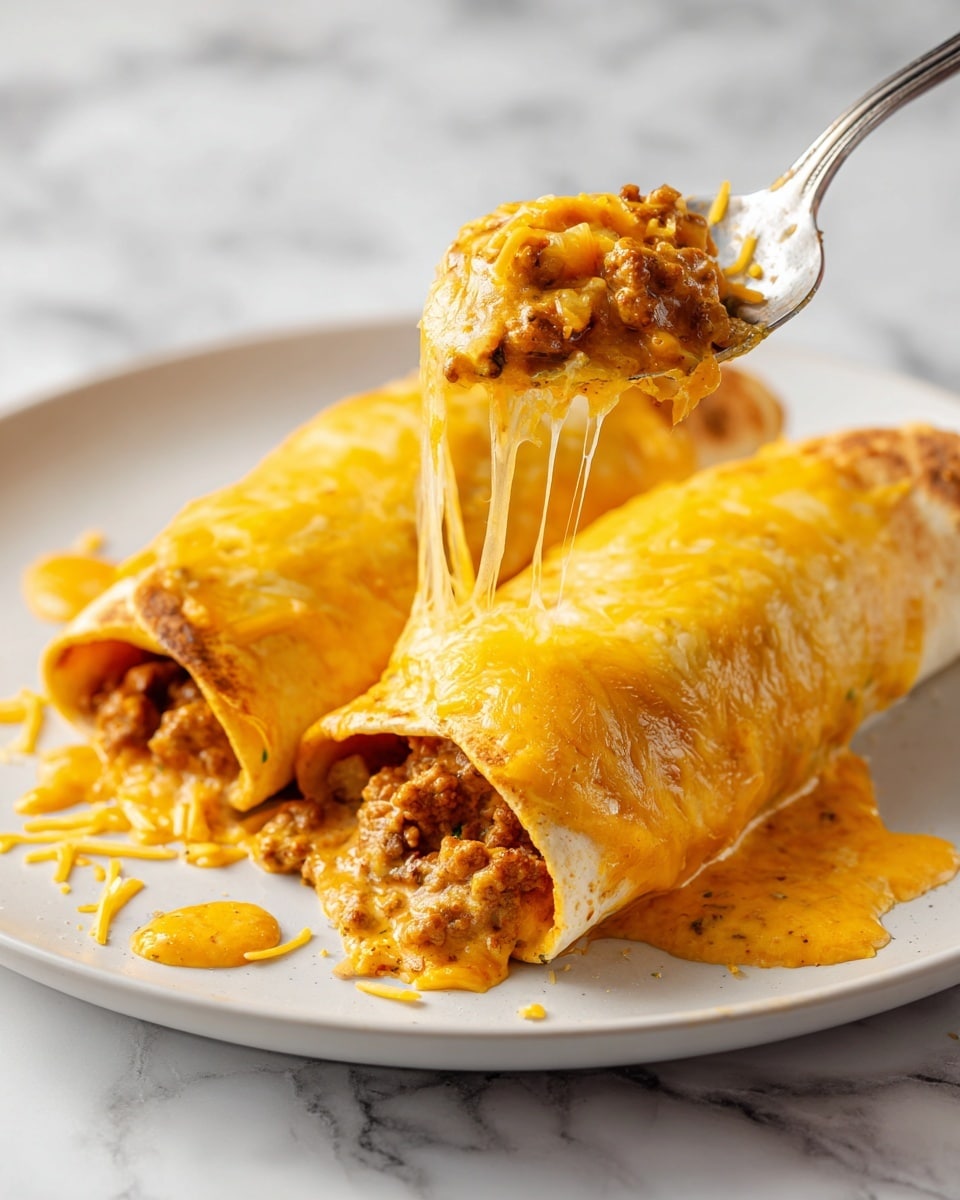
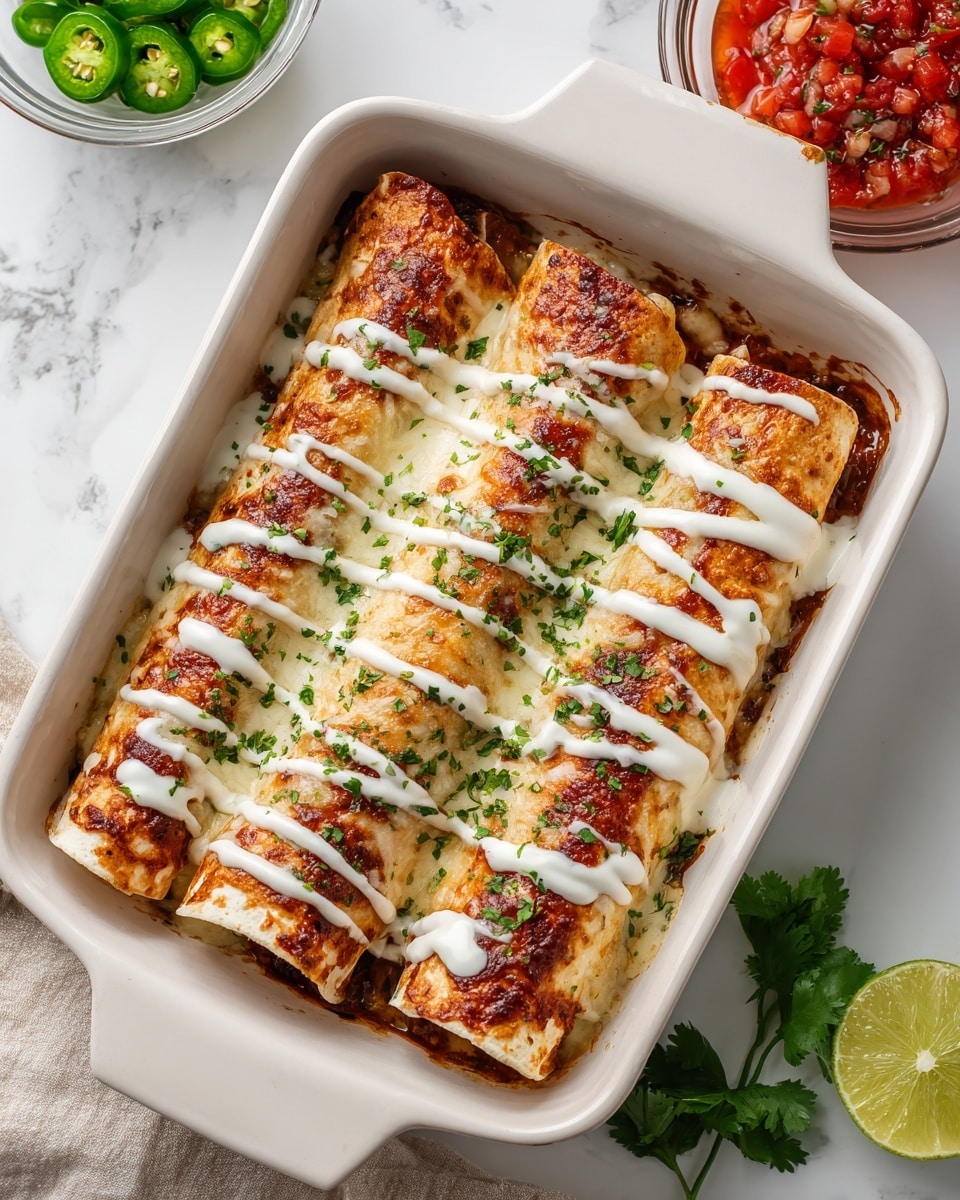
If you’re craving something crispy, cheesy, and packed with bold flavors but want to skip the deep frying, this Baked Chicken Chimichangas Recipe is the way to go. I absolutely love how these chimichangas come out golden and crunchy on the outside, with a creamy, seasoned chicken filling that just melts in your mouth. Trust me, once you try baking instead of frying, you’ll wonder why you ever bothered with anything else!
Why You’ll Love This Recipe
- Healthier Alternative: Baking the chimichangas cuts out the dreaded deep fryer, making a lighter, less oily dish.
- Simple Yet Flavorful: The combo of cheeses, spices, and a homemade tomato sauce brings layers of flavor without complicated steps.
- Family Friendly: My kids and friends go crazy for these, and they’re easy enough to whip up on a busy weeknight.
- Versatile Filling: You can tweak the spices or swap chicken for veggies or beef to make this recipe your own.
Ingredients You’ll Need
The magic of this Baked Chicken Chimichangas Recipe really lies in simple, pantry-friendly ingredients that work together perfectly. Fresh garlic and onions build your base, while chili powder and cumin give you that warm, smoky kick. Plus, creamy cheese and refried beans add richness and texture you’ll love.
- Vegetable oil: Helps sauté the aromatics without overpowering the flavors.
- Yellow onion: The small dice size means it cooks evenly and sweetens as it softens.
- Garlic cloves: Fresh and minced for that essential punch of savory goodness.
- Chicken breasts: Cut into small strips so they cook quickly and mix nicely with the sauce.
- Chili powder: Adds warmth and a subtle smokiness you can’t get from plain paprika alone.
- Cumin: This earthy spice rounds out the chili powder, making the filling more authentic tasting.
- Paprika: Just a pinch for color and mild sweetness.
- Salt & freshly cracked pepper: The classic seasonings to bring everything together and enhance flavors.
- Chicken broth: Used to deglaze the pan and add depth – I love using Better Than Bouillon here for richness.
- Tomato sauce: Gives a lovely tangy base to the filling’s saucy component.
- Colby Jack cheese: Melts beautifully and offers a creamy, mild flavor everyone loves.
- Cream cheese: I discovered this trick – it makes the filling luxuriously creamy and thick.
- Refried beans: The perfect filler that keeps everything moist without being soggy.
- Large flour tortillas: Burrito-sized are key here for wrapping everything up and folding nicely.
- Non-stick cooking spray: Ensures you get a golden crust without sticking to the baking dish.
- Sour cream: A cool and tangy topping to balance the warm spices.
Variations
One of my favorite things about this Baked Chicken Chimichangas Recipe is how easy it is to mix things up. Whether you’re accommodating dietary needs or just want a different flavor profile, there’s room to make it yours.
- Vegetarian version: Swap the chicken for sautéed mushrooms, zucchini, or roasted veggies for a meatless twist that’s still hearty and delicious.
- Spicy kick: Add a diced jalapeño or a dash of cayenne to the filling if you like it hot – my husband always asks me to turn up the heat like this!
- Cheese swap: Try pepper jack or a mix of mozzarella and cheddar for a different cheesy vibe.
- Gluten-free option: Use gluten-free tortillas to make this recipe accessible for everyone.
How to Make Baked Chicken Chimichangas Recipe
Step 1: Prep and Sauté Your Aromatics
Start by heating your vegetable oil in a medium sauté pan over medium heat. When it’s shimmering, toss in your diced onions and minced garlic. I love how the kitchen fills with a comforting aroma right here. Cook for about 2 minutes until the onions start to soften and become translucent, but not browned – that’s key to a mellow, sweet flavor instead of bitterness.
Step 2: Cook and Season the Chicken
Add the chicken strips to the pan and sprinkle with chili powder, cumin, paprika, salt, and pepper. I always give it a good stir to coat the chicken evenly. Cook for 2 to 3 minutes until the chicken starts to brown but isn’t fully cooked through. This way, the chicken stays juicy once it finishes baking later.
Step 3: Deglaze and Simmer in Sauce
Pour in the chicken broth and use your spoon to scrape up any browned bits from the bottom of the pan — that’s flavor gold right there! Let the liquid reduce by half over 3 to 4 minutes, then add your tomato sauce. Simmer for another 4 to 5 minutes until the sauce thickens nicely. Stir occasionally so it doesn’t stick or burn.
Step 4: Melt in the Cheeses
Turn off the heat and add the shredded Colby Jack and cream cheese into the sauce. Stir continuously for 2 minutes until the cheeses melt into a silky, creamy filling. This step really elevates the texture to something so comforting and indulgent.
Step 5: Assemble Your Chimichangas
Lay out your flour tortillas and evenly spread about ¼ cup of refried beans on each, leaving a 2-inch border around the edges so they fold nicely. Spoon the chicken and cheese mixture over the beans in the center of each tortilla. Fold in the sides and roll them up like burritos, making sure the seam is on the bottom to prevent unwrapping.
Step 6: Bake to Perfection
Place your rolled chimichangas seam-side down into an 8×8 baking dish that you’ve greased or sprayed with non-stick cooking spray. Give the tops a light spray too to help achieve that beautiful golden crunch without needing deep frying. Bake at 400°F for 10 to 15 minutes, until the tortillas are crisp and golden. Remove from the oven and top with dollops of sour cream or your favorite garnishes – I promise the wait is worth it!
Pro Tips for Making Baked Chicken Chimichangas Recipe
- Don’t Overfill the Tortillas: Leaving a 2-inch border gives you room to fold and roll without bursting, which I learned the hard way!
- Use Cooking Spray Generously: A light spray ensures a crispy top without oil dripping or sogginess.
- Warm Tortillas Before Assembling: Softening tortillas a bit (in the microwave or skillet) makes folding easier and prevents cracking.
- Watch the Baking Time: Every oven is different, so keep an eye on those chimichangas after 10 minutes — you want golden, not burnt.
How to Serve Baked Chicken Chimichangas Recipe

Garnishes
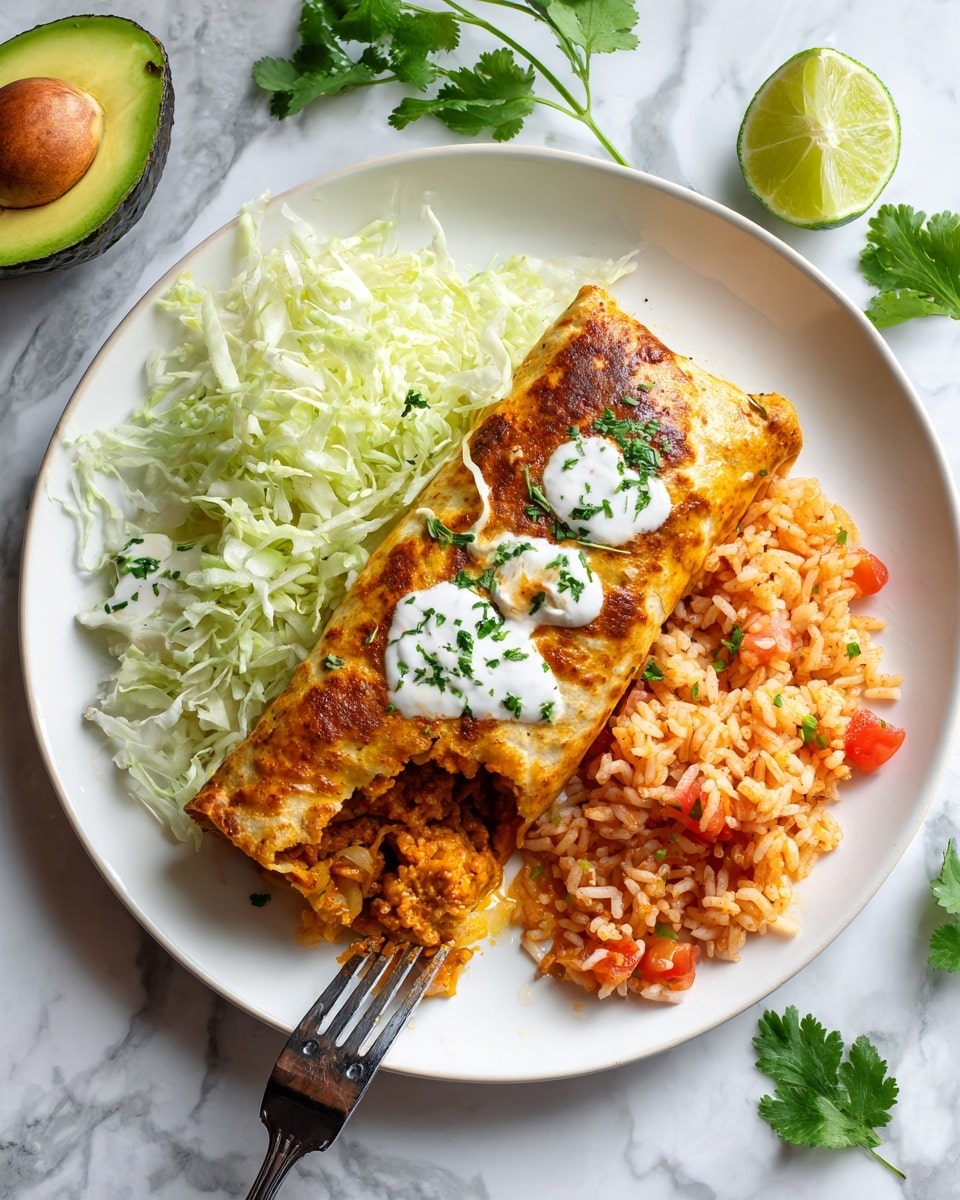
I love topping mine with a generous dollop of sour cream and some fresh chopped cilantro. Sometimes I add sliced avocado, a squeeze of lime, or a sprinkle of diced tomatoes for color and freshness. These simple touches really brighten up the dish and add layers of texture and flavor.
Side Dishes
For sides, I like to keep it simple: Mexican rice or cilantro-lime rice is my go-to, along with a side salad or roasted corn on the cob. Black beans with a little cumin and garlic also pair beautifully, making it feel like a full fiesta plate.
Creative Ways to Present
At a family get-together, I served these chimichangas sliced on a platter with colorful bowls of salsas, guacamole, and pickled jalapeños for DIY topping stations. It’s great for letting everyone customize their own, plus it looks festive and inviting on the table.
Make Ahead and Storage
Storing Leftovers
Leftover baked chimichangas store wonderfully in an airtight container in the fridge for up to 3 days. I find it best to wrap them individually in foil or parchment paper first to keep the tortilla from getting soggy.
Freezing
This recipe freezes great, too! After assembling but before baking, wrap each chimichanga tightly in plastic wrap then foil and freeze. When you’re ready, thaw overnight in the fridge and bake fresh at 400°F for about 15 minutes until crisp and heated through.
Reheating
I always reheat leftover chimichangas in the oven or air fryer rather than the microwave — this keeps the tortilla crisp instead of soggy. Just 8–10 minutes at 375°F does the trick nicely.
FAQs
-
Can I make this Baked Chicken Chimichangas Recipe ahead of time?
Absolutely! You can prepare the filling and assemble the chimichangas in advance. Store them wrapped, either refrigerated for a day or frozen for longer, and bake fresh when you want to serve them for the best texture.
-
What can I substitute for refried beans?
If you’re not a fan of refried beans, black beans or pinto beans mashed with a bit of seasoning work great. Just make sure they’re thick enough not to make the tortillas soggy.
-
Can I use shredded chicken instead of strips?
Yes! Shredded chicken works well and will blend nicely into the cheesy sauce, giving a slightly different but equally delicious texture.
-
How do I keep the tortillas from getting soggy?
Be sure to spread the refried beans and filling evenly but not too close to the edges. Also, baking on a greased dish with cooking spray helps crispen the outside. Warming tortillas beforehand also prevents cracking and helps them fold more securely.
Final Thoughts
Honestly, this Baked Chicken Chimichangas Recipe is a winner in my house every time. The combination of creamy cheese, seasoned chicken, and crispy tortilla feels like a hug on a plate, and baking them keeps cleanup easy and the kitchen smelling incredible without the mess of frying. I hope you enjoy making—and eating—these as much as I do. So grab those tortillas, and let’s get baking!
Print
Baked Chicken Chimichangas Recipe
- Prep Time: 15 minutes
- Cook Time: 30 minutes
- Total Time: 45 minutes
- Yield: 4 servings 1x
- Category: Main Course
- Method: Baking
- Cuisine: Mexican-American
Description
This Baked Chicken Chimichangas recipe delivers a crispy, golden-brown exterior with a flavorful, cheesy chicken filling. The chimichangas are stuffed with a savory mixture of sautéed chicken, onions, garlic, tomato sauce, spices, refried beans, and a blend of Colby Jack and cream cheese, then baked to perfection. Perfect for a satisfying meal that’s not fried but still indulgently delicious.
Ingredients
Chicken Filling
- 2 Tbsp vegetable oil (1 oz)
- ½ yellow onion, small diced (about 1 cup, 100g)
- 2 garlic cloves, minced (1 Tbsp)
- 2 chicken breasts, cut into small strips (500g / 1.10 lb)
- 1 Tbsp chili powder
- ½ tsp cumin
- ¼ tsp paprika
- ¼ tsp salt
- ¼ tsp freshly cracked black pepper
- ¼ cup chicken broth (2 oz)
- 1 (8 oz) can tomato sauce (227g)
- 2 cups shredded Colby Jack cheese (8 oz)
- 4 oz cream cheese
Assembly
- 1 (16 oz) can refried beans
- 4 large flour tortillas (burrito-sized)
- Non-stick cooking spray
- ¼ cup sour cream
Instructions
- Preparation: Gather all ingredients and prep chicken and vegetables by cutting chicken into strips and dicing the onion. Preheat your oven to 400°F (200°C) and grease an 8×8 inch oven-safe baking dish.
- Sauté Onions and Garlic: Heat vegetable oil in a medium sauté pan over medium heat. When hot, add the diced onions and minced garlic, sautéing for about 2 minutes until fragrant and translucent.
- Cook Chicken with Spices: Add chicken strips to the pan. Season with chili powder, cumin, paprika, salt, and freshly cracked black pepper. Cook the chicken for 2-3 minutes, stirring frequently until chicken is lightly cooked on the outside.
- Deglaze Pan: Pour in the chicken broth to deglaze the pan, stirring to loosen any browned bits. Allow the liquid to reduce by half over 3-4 minutes to concentrate the flavors.
- Simmer with Tomato Sauce: Add the tomato sauce to the pan and simmer for 4-5 minutes, stirring occasionally until the sauce thickens to a rich consistency.
- Add Cheeses: Remove the pan from heat and stir in the shredded Colby Jack cheese and cream cheese until fully melted, creating a creamy, cheesy chicken mixture.
- Assemble Chimichangas: Lay out each large flour tortilla and spread about a quarter cup of refried beans evenly on each, leaving a 2-inch border around the edges. Spoon the cheesy chicken filling onto the center of each tortilla. Fold in the sides and tightly roll up each tortilla like a burrito, ensuring the seam side is underneath to seal.
- Prepare for Baking: Place the wrapped chimichangas seam-side down into the prepared baking dish. Spray the tops lightly with non-stick cooking spray to help them crisp up during baking.
- Bake: Bake the chimichangas in the preheated oven at 400°F for 10-15 minutes until they are golden brown and slightly crispy on top.
- Serve: Remove from the oven and serve warm topped with sour cream and any additional toppings you prefer, such as salsa, guacamole, or chopped cilantro.
Notes
- I like to use Better Than Bouillon to make chicken broth cheaply and easily.
- In the U.S., canned tomato sauce is made from cooked, pureed tomatoes and may include salt and light seasoning. In other countries, you can substitute with passata.
- Use large, burrito-sized flour tortillas to ensure there is enough room to fill and roll the chimichangas properly.
Nutrition
- Serving Size: 1 chimichanga
- Calories: 520
- Sugar: 5g
- Sodium: 780mg
- Fat: 28g
- Saturated Fat: 12g
- Unsaturated Fat: 14g
- Trans Fat: 0g
- Carbohydrates: 38g
- Fiber: 6g
- Protein: 35g
- Cholesterol: 85mg


Your email address will not be published. Required fields are marked *