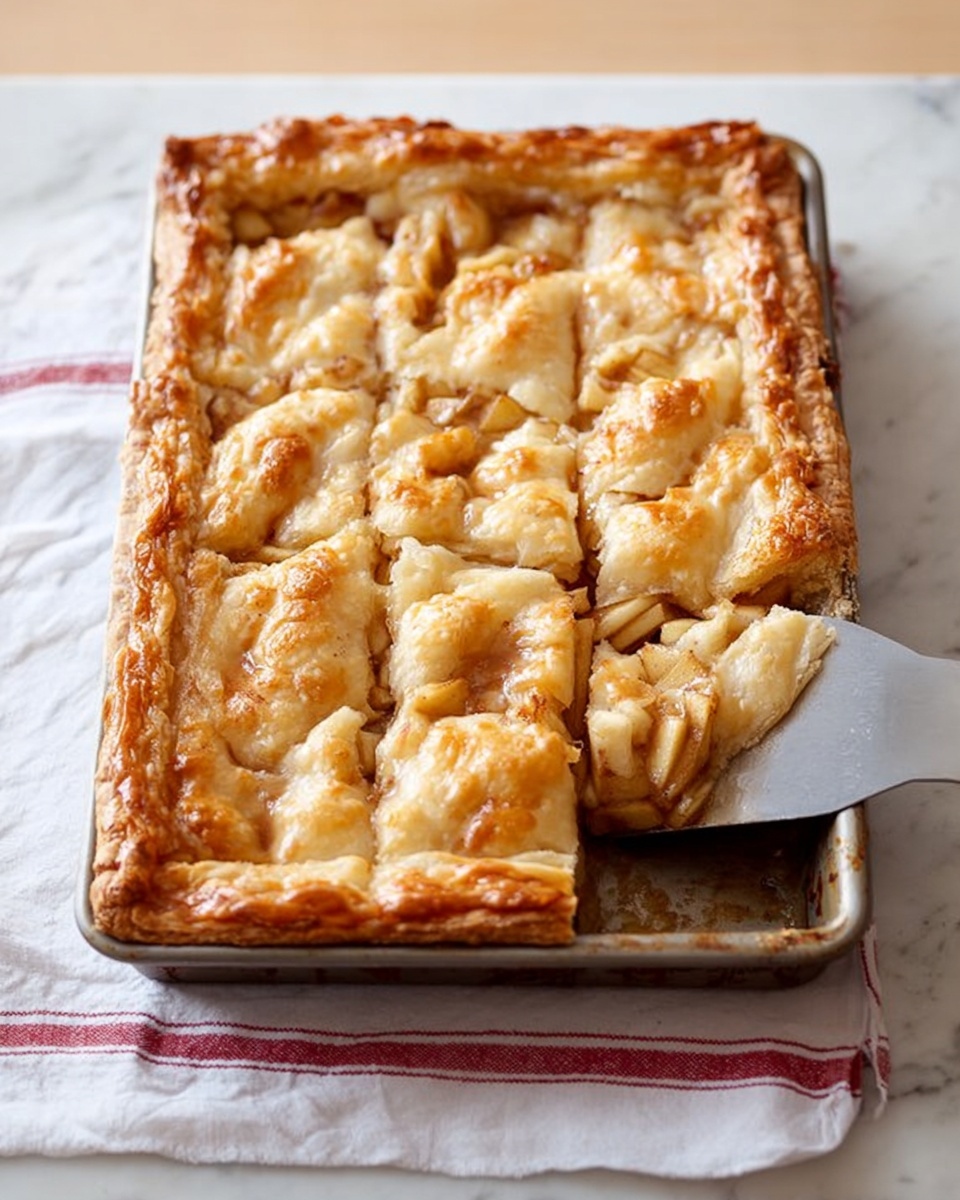
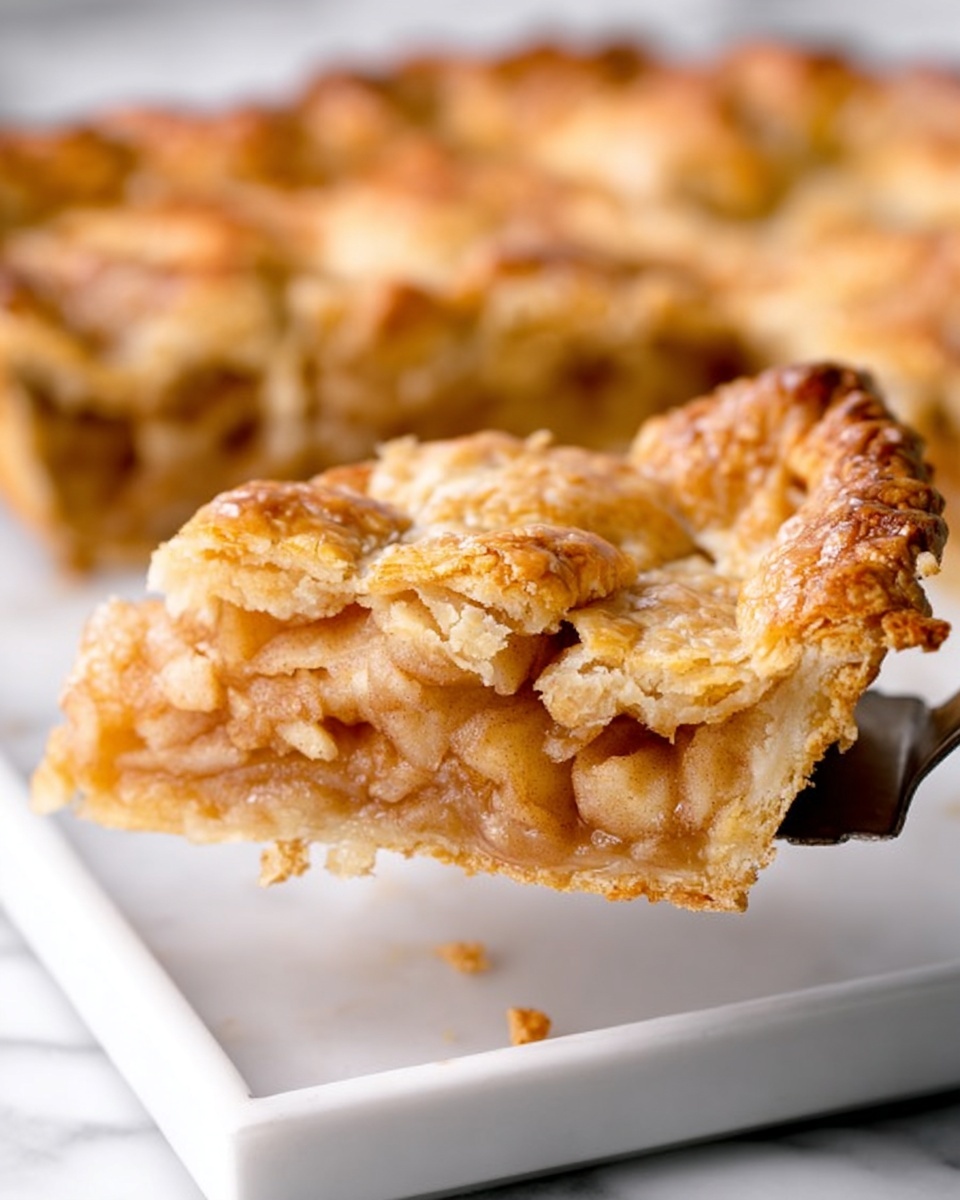
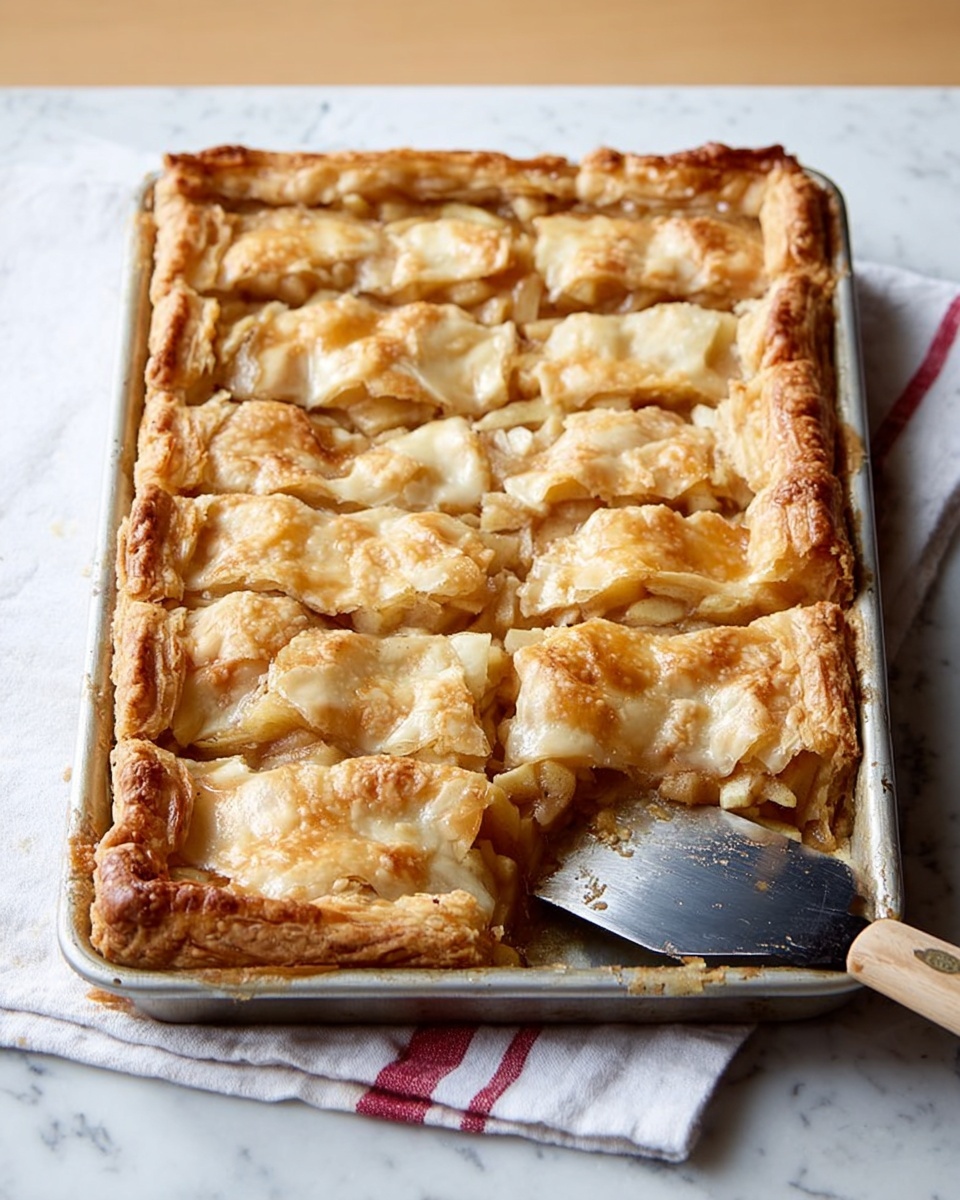
If you’re looking for a show-stopping dessert that feeds a crowd without fussing over tiny individual pies, this Apple Slab Pie Recipe is exactly what you need. I absolutely love how this pie comes out — it’s got that perfect flaky crust, a juicy cinnamon-spiced apple filling, and enough size to satisfy everyone at your table. Whether you’re baking for a family gathering or simply craving some cozy homemade goodness, this slab pie is a total winner you’ll want to keep in your back pocket.
Why You’ll Love This Recipe
- Easy Crowd-Pleaser: The slab style means no fussing with tiny crusts—just one big, beautiful pie everyone can share.
- Perfectly Flaky Crust: Using cold butter and the right flour ratio gives you that tender, buttery crunch every time.
- Flavorful Apple Filling: The cinnamon, nutmeg, and a hint of allspice create a cozy, Americana classic apple taste.
- Make Ahead Friendly: You can prep this pie a day in advance and bake when you need it, making entertaining way easier.
Ingredients You’ll Need
Every ingredient plays a crucial role here, from that cold butter in the crust for flakiness to the lemon juice that keeps the apples from browning. Choosing the right apples is pretty important, too—I usually go for a mix of tart and sweet for the best filling flavor.
- All-purpose flour: The base of your crust, providing structure and tenderness.
- Sugar: Adds a touch of sweetness to the crust and filling; adjust according to your apple’s natural sugar.
- Table salt: Enhances flavor and balances sweetness.
- Unsalted butter: Use very cold butter for the best flaky pie crust texture.
- Very cold water: Helps bring the dough together without melting the butter.
- Apples (peeled, cored, chopped): Fresh and crisp; mix tart and sweet varieties if you can for depth.
- Lemon juice: Prevents the apples from browning and brightens the flavor.
- Cornstarch: A thickening agent so your filling isn’t runny after baking.
- Ground cinnamon, nutmeg, allspice: Classic warm spices for that nostalgic apple pie aroma.
- Heavy cream or egg wash: For brushing the crust to get that golden, beautiful finish.
Variations
I’ve played around with this Apple Slab Pie Recipe a lot—and trust me, you can customize it to suit your tastes or dietary needs without losing its magic. Feel free to swap spices or add in extras like nuts or even raisins if you’re feeling adventurous.
- Spice it up: I once added a teaspoon of ginger and a splash of vanilla extract, and my family went crazy for the subtle twist it gave.
- Gluten-free crust: For friends with gluten sensitivities, I swapped the flour for a gluten-free blend with great results, just be sure to chill the dough well.
- Vegan version: Swap the butter for a plant-based alternative and use a flax egg for the wash—your pie still gets that golden finish and flaky crust.
- Apple combo: I like half Granny Smith for tartness and half Fuji or Honeycrisp for sweetness, but Waldorf and Braeburn work beautifully too.
How to Make Apple Slab Pie Recipe
Step 1: Make the Flakiest Crust
Start by whisking your flour, sugar, and salt in a large bowl. Then toss in the cold cubed butter and coat each bit with the flour—this step is key to that buttery flakiness you’ll love. I usually mash the butter with my fingertips until the pieces are just pea-sized; it’s quick, and the tactile feel helps you avoid overworking the dough. Next, stir in cold water a little at a time until the dough just comes together. It’ll seem dry at first but be patient—too much water makes it tough. Then, shape the dough into two rectangles, wrap them up, and chill for at least 2 hours. Trust me, this patience pays off in crust texture.
Step 2: Prepare the Apple Filling
In a giant bowl, toss the chopped apples with a squeeze of lemon juice to keep them fresh and vibrant. Then mix sugar and spices separately before sprinkling them over the apples and tossing to coat evenly. The cornstarch is your best ally here to thicken the filling as it cooks—don’t skip it, or your pie might be a bit runny.
Step 3: Assemble Your Slab Pie
Preheat your oven to 375°F and line a large baking sheet with parchment paper. Roll out the larger dough rectangle on a floured surface, then drape it inside your baking sheet, letting the edges hang over. Keep the dough cold by chilling it briefly while you roll out the second piece for the top crust. Pour the apple filling evenly over the bottom crust, then cover with the top dough layer, sealing edges by pinching firmly together. Brush the top crust with heavy cream or egg wash to get that golden shine, and don’t forget to cut lots of slits to let steam escape—as tempting as it is to skip this, your pie will thank you for it!
Step 4: Bake and Cool
Bake your slab pie for 40 to 45 minutes until the crust is golden brown and the filling bubbles through the slits. Here’s a pro trick: place the pan on another large baking sheet beneath it to catch any juicy spills (lesson learned the hard way!). Once done, cooling is crucial—wait at least 45 minutes so the filling thickens and your pie slices cleanly. Resisting the urge to dig in hot is tough, but trust me, it’s better this way.
Pro Tips for Making Apple Slab Pie Recipe
- Keep Your Butter Cold: I learned that cold butter is essential for that perfect flaky crust, so keep it in the freezer right up until use.
- Don’t Overwork the Dough: Excess handling warms the butter and toughens the crust, so mix just until it comes together.
- Use a Mix of Apples: Combining tart and sweet apples balances the filling’s flavor, making every bite interesting.
- Cool Before Slicing: Cutting too soon is a common mistake—it makes a mess, so give your pie at least 45 minutes to set.
How to Serve Apple Slab Pie Recipe

Garnishes
I love serving this pie with a generous scoop of vanilla ice cream or a dollop of freshly whipped cream — the cold creaminess contrasts beautifully with the warm, spiced apples. Sometimes, I sprinkle a tiny pinch of cinnamon on top of the whipped cream for a little extra flair and aroma. It never fails to impress.
Side Dishes
For a cozy autumn dinner, I like pairing the Apple Slab Pie with simple, savory dishes like roasted pork loin or a sharp cheddar cheese plate. The sweet spiced pie is the perfect foil for rich mains or even a light salad with nuts and cranberries.
Creative Ways to Present
When I’ve served this pie for special occasions, I like to cut it into neat squares and place each piece on a pretty dessert plate with a drizzle of caramel sauce and a sprig of fresh mint. It instantly elevates the humble slab pie into something festive and extra inviting.
Make Ahead and Storage
Storing Leftovers
My best advice is to store leftover pie in the original baking pan, covered loosely with foil or plastic wrap, at room temperature if you plan to eat it the same day. If it’s going to linger, refrigerate it to keep the filling fresh. The crust might soften a bit in the fridge, but that’s easily fixed when reheating.
Freezing
I’ve successfully frozen both baked and unbaked versions of this Apple Slab Pie. To freeze, wrap tightly in plastic and aluminum foil, then thaw overnight in the fridge before reheating or baking. This is a lifesaver when prepping ahead for busy holidays.
Reheating
To reheat, pop your slice (or the whole pie if you want) into a 300°F oven for about 15-20 minutes, or until warmed through. I like to turn on the broiler for just a minute or two at the end to revive that golden, slightly crisp crust—but watch closely so it doesn’t burn!
FAQs
-
Can I use store-bought pie crust for this Apple Slab Pie Recipe?
Absolutely! While I recommend making the crust from scratch for the best flakiness and buttery flavor, you can use store-bought crust if you’re short on time. Just make sure to roll it out to the specified sizes and chill your dough well before baking, to help it stay flaky and golden.
-
What’s the best type of apples to use in this recipe?
I love using a combination of tart apples like Granny Smith and sweeter varieties such as Fuji or Honeycrisp. This balance gives a nice depth of flavor and keeps the filling from being too sweet or too bland.
-
How long can I store leftover slab pie?
Leftover pie will keep well covered at room temperature for about a day, and if refrigerated, up to 3 days. For longer storage, freezing is your best bet. Just reheat gently to avoid drying out the crust or filling.
-
Why does the pie filling sometimes turn out runny?
Runny filling usually means the thickener (in this case, cornstarch) wasn’t enough or didn’t have time to set. Make sure to measure cornstarch accurately and allow the pie to cool completely before slicing so the filling firms up nicely.
Final Thoughts
This Apple Slab Pie Recipe holds such a special place in my heart because it turns baking a classic dessert into something fun and approachable without any tricky steps. Plus, the way your kitchen fills with that sweet-spiced aroma is nothing short of magical. I really hope you try it soon—it’s a guaranteed way to make your family and friends feel right at home. Trust me, once you master this slab pie, it’ll become your go-to for celebrations and cozy nights in alike.
Print
Apple Slab Pie Recipe
- Prep Time: 45 minutes
- Cook Time: 45 minutes
- Total Time: 4 hours 15 minutes
- Yield: 12 servings 1x
- Category: Dessert
- Method: Baking
- Cuisine: American
Description
This Apple Slab Pie recipe features a buttery, flaky homemade crust filled with a cinnamon-spiced apple filling. Baked on a large sheet pan, this rustic yet elegant dessert is perfect for sharing and offers a delightful balance of sweet and tart flavors with a tender, golden crust and a perfectly bubbling apple filling.
Ingredients
For the crust:
- 3 ¾ cups (470 grams) all-purpose flour
- 1 ½ tbsp sugar
- 1 ½ tsp table salt
- 3 sticks (12 oz or 340 grams) unsalted butter, cubed and kept very cold
- ¾ cup very cold water
For the apple filling:
- 3 ½ to 4 pounds apples, peeled, cored and chopped into approximately ½-inch chunks (about 10 cups)
- Squeeze of lemon juice
- ⅔ to ¾ cup sugar (depending on sweetness preference and apple variety)
- 3 tbsp cornstarch
- 1 rounded tsp ground cinnamon
- ¼ tsp ground nutmeg
- ¼ tsp ground allspice
- ⅛ tsp table salt
To finish:
- 2 tbsp heavy cream or 1 egg beaten with 1 tbsp water
Instructions
- Make the crust: In a large, wide bowl, whisk together the flour, sugar, and salt. Add the cold butter cubes and toss to coat them in flour. Using your fingers, mash the butter into pea-sized pieces for a crumbly texture. Stir in ½ cup cold water with a rubber spatula until the dough begins to come together. Add more water, 1 tablespoon at a time, if still dry. Gather the dough into a soft ball, divide into two pieces (one larger), shape into rectangles about 1-inch thick, wrap in plastic wrap, and refrigerate for at least 2 hours.
- Prepare the filling: Toss the chopped apples with lemon juice in a large bowl. In a separate bowl, mix sugar, cornstarch, cinnamon, nutmeg, allspice, and salt. Sprinkle this mixture over the apples and toss well until evenly coated. Set aside to allow flavors to meld.
- Assemble the slab pie: Preheat the oven to 375°F. Line a 10x15x1-inch baking sheet with parchment paper. Roll out the larger dough piece on a floured surface into an 18×13-inch rectangle and transfer it to the pan, pressing gently into the corners and edges while allowing excess to hang over sides. Chill this base crust in the fridge or freezer while rolling out the smaller piece into a 16×11-inch rectangle for the top crust.
- Fill the pie: Remove the base crust from the fridge. Pour the seasoned apples and their juices evenly over it. Draping the second piece of dough over, trim edges so both crusts overhang about ¾-inch. Seal edges tightly by pinching with your fingers to enclose the filling completely.
- Prepare for baking: Brush the top crust with heavy cream or egg wash. Using a sharp knife, cut numerous 1-inch slits on top to vent steam during baking. Place the sheet pan on a larger baking tray to catch any spillover juices.
- Bake the pie: Bake for 40 to 45 minutes until the crust is golden brown and the filling bubbles visibly through the slits. Remove from the oven and transfer to a wire rack.
- Cool and serve: Allow the pie to cool at least 45 minutes before cutting. This cooling time lets the filling set for easier slicing and clean servings.
Notes
- Allow the pie to cool almost completely before serving to avoid a sloppy mess from hot filling.
- The pie is best eaten the day it’s made but can be prepared one day in advance and stored covered at room temperature or in a cool space.
- Reheat leftovers at 300°F for about 20 minutes until warmed, optionally finishing under the broiler for a crisp top crust—watch carefully to prevent burning.
- You can assemble the pie fully one day ahead and refrigerate before baking.
Nutrition
- Serving Size: 1 slice (1/12 of pie)
- Calories: 360
- Sugar: 28g
- Sodium: 210mg
- Fat: 18g
- Saturated Fat: 11g
- Unsaturated Fat: 6g
- Trans Fat: 0.3g
- Carbohydrates: 48g
- Fiber: 4g
- Protein: 4g
- Cholesterol: 45mg


Your email address will not be published. Required fields are marked *