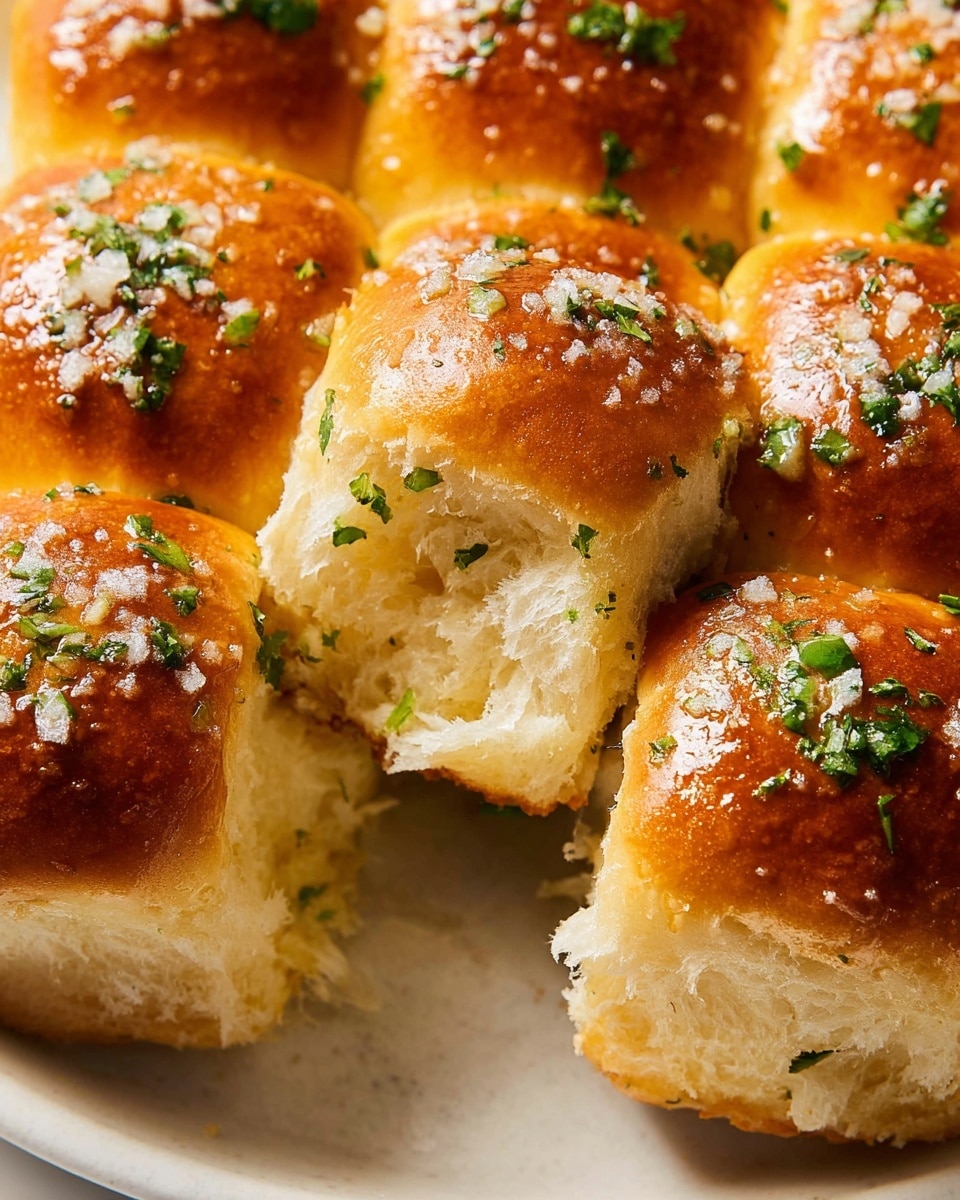
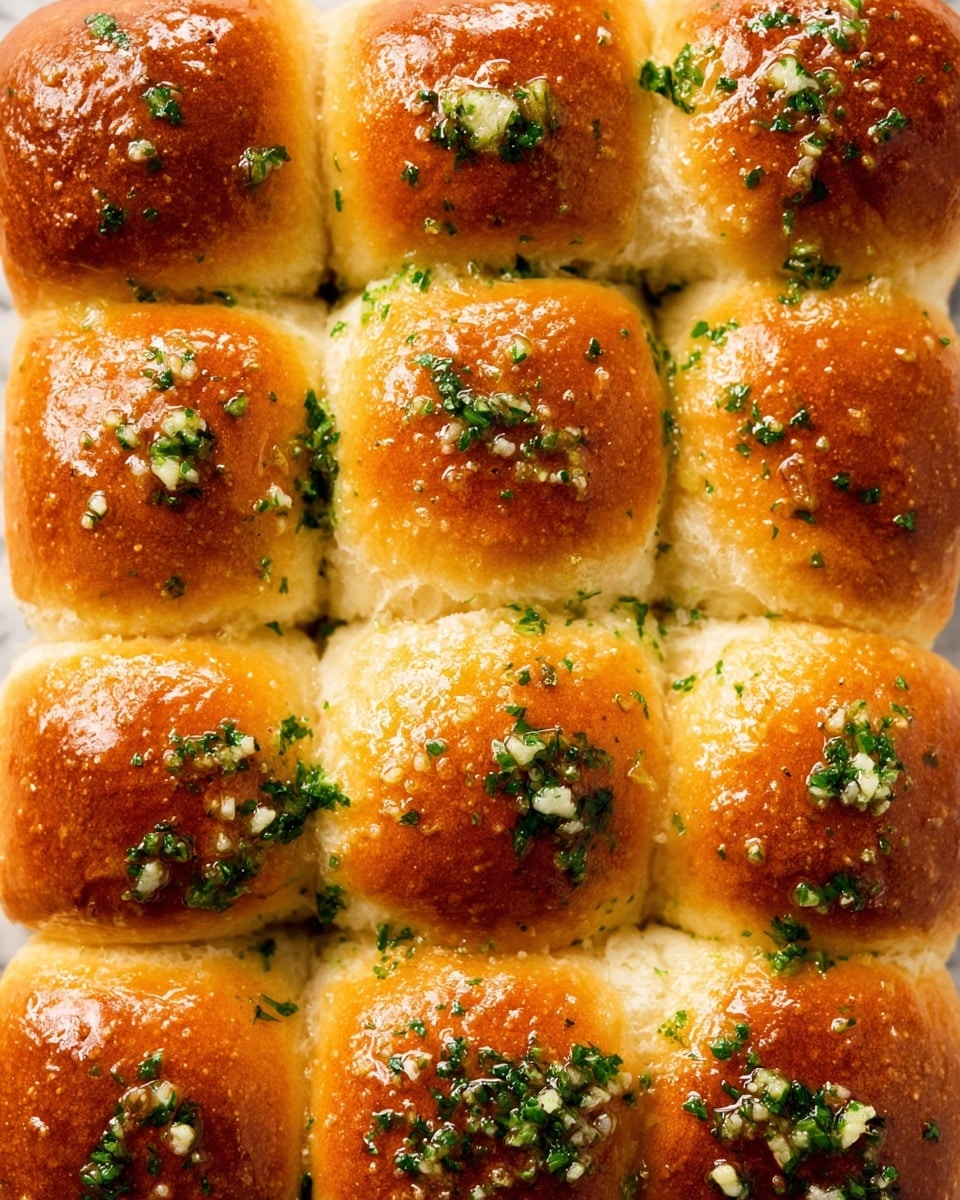
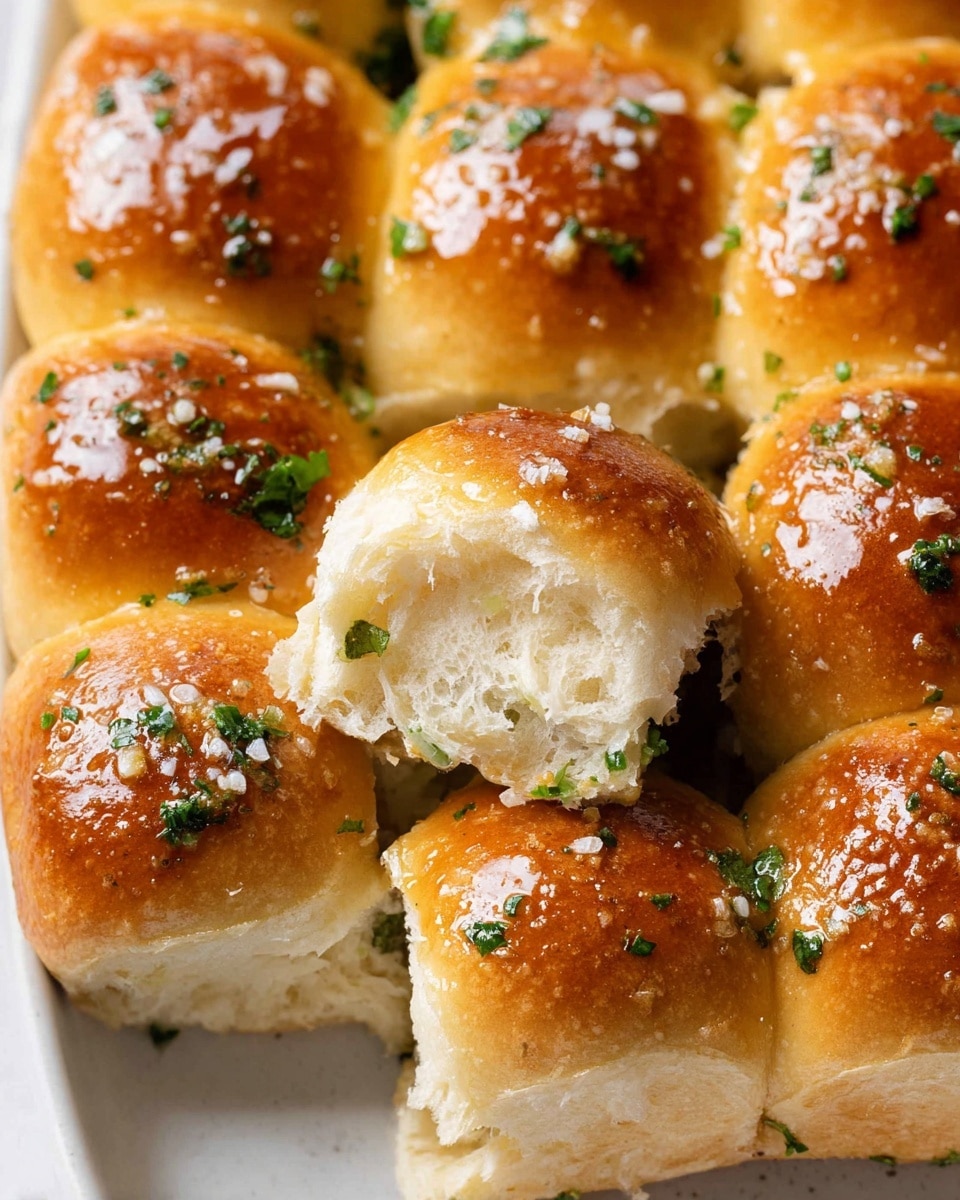
If you’re anything like me, you know there’s just something irresistible about freshly baked bread with garlic and butter. That’s why I’m so excited to share this Garlic Bread Rolls Recipe with you—it’s soft, fluffy, and packed with flavor, perfect for everything from weeknight dinners to holiday feasts. Trust me, once you try these rolls, they’ll quickly become a staple in your baking rotation. So grab your apron, and let’s get rolling!
Why You’ll Love This Recipe
- Soft, Buttery Texture: Each roll comes out perfectly soft with a rich, buttery garlic flavor that melts in your mouth.
- Easy to Make: I’ll guide you through every step so you avoid common pitfalls and end up with beautiful, golden rolls.
- Highly Versatile: These garlic bread rolls pair with anything from pasta to soups, and they’re fantastic on their own!
- Make Ahead Friendly: Shape your dough the night before for fresh rolls right when you want them.
Ingredients You’ll Need
The ingredients here are simple but thoughtfully chosen to work together for the best garlic bread rolls ever. Using fresh parsley and real butter really lifts the flavor beyond ordinary bread, and a little sugar helps the yeast work its magic. Bonus: I’ll tell you how to measure your flour like a pro for consistent results!
- Unsalted butter: I use unsalted so I can control the saltiness better, plus it gives a creamy texture to the dough and garlic butter.
- Minced garlic: Fresh garlic is a game changer here—it gives a bright, punchy flavor.
- All-purpose flour: Make sure to fluff and spoon, or better yet, use a kitchen scale for accuracy. This prevents dense rolls due to too much flour.
- Fresh parsley: It adds a wonderful fresh note and beautiful color.
- Granulated sugar: Just a little to feed the yeast so your rolls rise beautifully.
- Instant yeast: Makes the rise quicker and easier to manage. There’s a note below if you only have active dry yeast.
- Fine sea salt: Enhances all the flavors without being overpowering.
- Milk (whole or 2%): Warmed to about 110°F to wake up the yeast gently, creating soft dough.
- Large eggs: The egg in the dough adds richness, and the beaten egg wash gives the rolls that perfect shiny crust.
- Flaky sea salt: For sprinkling on top after baking—it adds a delightful crunch and pop of flavor.
Variations
One of the best things about this Garlic Bread Rolls Recipe is how adaptable it is. I love experimenting with different mix-ins or adjusting for dietary needs—it’s your playground! Here are a few of my favorite tweaks.
- Herb Mix Variation: I’ve tried adding fresh thyme, rosemary, or basil alongside parsley to change up the aroma and flavor profile, and it always delights guests.
- Dairy-Free Version: Swapping out butter for coconut oil and using almond milk works surprisingly well, especially with a bit of extra garlic.
- Cheese Stuffed Rolls: My family goes crazy when I stuff a small cube of mozzarella or cheddar inside each dough ball before rising—it’s like a little surprise inside!
- Whole Wheat Option: For a nuttier, heartier roll, substitute half the all-purpose flour with whole wheat flour—just expect a firmer texture.
How to Make Garlic Bread Rolls Recipe
Step 1: Prepare the Garlic Butter and Pan
Start by lightly buttering your 9×13 inch pan—it’ll keep the rolls from sticking and give the bottoms a nice golden crust. Then, gently melt 4 1/2 tablespoons of butter with 2 tablespoons of minced garlic just until fragrant (about 1-2 minutes). Be careful not to burn the garlic; burnt garlic ruins the flavor! Set this aside to cool while you measure the rest of your ingredients.
Step 2: Mix the Dry Ingredients and Add Wet
In a large mixing bowl or stand mixer, combine the flour, chopped parsley, sugar, instant yeast, and fine sea salt. Pour in the warmed milk (aim for about 110°F, warm but not hot), the egg, and the garlic butter mixture you prepared earlier. Using a dough hook on low speed, knead everything together. I’ve found this takes about 10-12 minutes and you’ll know it’s done when the dough gets smooth, soft, and slightly tacky to the touch.
If the dough feels sticky, don’t panic—just add flour one tablespoon at a time. I learned this trick early on to keep the dough manageable without drying out the rolls.
Step 3: Shape Your Rolls and Let Them Rise
Here’s a key moment: after kneading, divide your dough into 12 equal pieces (I use a kitchen scale for perfect portions—about 67 grams each). Roll each piece into a smooth ball, then pinch the bottom seam tight to keep them from opening up during baking. Place the rolls snugly into your buttered pan. Cover with plastic wrap or a clean towel and set somewhere warm (like your turned-off oven with the light on) to rise until doubled in size, about 1-2 hours.
Step 4: Bake to Golden Perfection
Preheat your oven to 350°F (180°C). Just before baking, give your rolls a quick brush with beaten egg—this helps them get that gorgeous golden sheen. Bake for 20-30 minutes or until the tops have that perfect golden brown color. If you’re unsure, tap the top gently—it should sound hollow when fully cooked.
Step 5: Finish With Garlic Butter and Serve Warm
While the rolls bake, melt 2 tablespoons butter with 1 tablespoon garlic and cook until fragrant (again, just 1-2 minutes). Stir in fresh chopped parsley and set aside. The moment your rolls come out from the oven, brush them immediately with this garlic butter. Don’t skip this step—that buttery garlic glaze on warm bread is what keeps everyone coming back for more! Sprinkle flaky sea salt on top if you want that little extra pop of flavor and crunch.
Pro Tips for Making Garlic Bread Rolls Recipe
- Perfect Flour Measurement: Using a kitchen scale to weigh your flour takes out all the guesswork and prevents dense rolls—a trick that instantly improved my baking results.
- Patience with Rising: Don’t rush your dough’s first rise; letting it double completely ensures light and fluffy rolls rather than dense ones.
- Garlic Butter Timing: Always brush on the garlic butter right after baking to lock in that fresh garlic flavor and buttery goodness.
- Don’t Overbake: I learned this the hard way—overbaking causes dry rolls, so aim for just golden and check early if your oven runs hot.
How to Serve Garlic Bread Rolls Recipe

Garnishes
I love adding a sprinkle of flaky sea salt on top right after brushing with garlic butter—it adds a beautiful texture and bursts of saltiness. Sometimes I also use finely grated Parmesan cheese for an extra savory touch. Fresh chopped parsley on top brightens the look and adds a fresh herb aroma that’s irresistible!
Side Dishes
These garlic bread rolls are fantastic alongside pasta dishes like spaghetti Bolognese or creamy Alfredo. They’re also perfect with soups, especially tomato basil or butternut squash. I even like serving them with a big green salad for a lighter meal. Honestly, they’re so good you might just want to eat them on their own!
Creative Ways to Present
For special occasions, I’ve arranged the rolls in a wreath shape on a large platter and added red pepper flakes and fresh rosemary sprigs between for a festive look. Another fun idea is to pull apart the rolls into a garlic cheesy pull-apart bread by adding mozzarella between each ball before baking—your guests will be amazed!
Make Ahead and Storage
Storing Leftovers
These garlic bread rolls are best enjoyed fresh but if you have leftovers, store them in an airtight container or a ziplock bag at room temperature. My family usually finishes them within 2-3 days, but I’ve found keeping them sealed tightly preserves their softness nicely.
Freezing
I often freeze these rolls after baking—just let them cool completely, then pop them in an airtight container or freezer bag for up to one month. When I want some fresh rolls, I thaw them overnight in the fridge or at room temperature for a few hours.
Reheating
To reheat, I cover the rolls with foil and warm them in a 350°F oven for 10-15 minutes until heated through, which refreshes that fresh-baked softness and garlicky aroma. You can also microwave them for about 20-30 seconds if you’re in a hurry—just be careful not to overdo it or they’ll get chewy.
FAQs
-
Can I use active dry yeast instead of instant yeast in this Garlic Bread Rolls Recipe?
Absolutely! If you only have active dry yeast, just dissolve it in the warm milk with a little sugar first and let it proof for about 5 minutes until foamy. Then proceed with the recipe as usual. This step ensures your dough rises properly.
-
What’s the best way to measure flour for the rolls?
The best method is to fluff your flour with a spoon, then lightly spoon it into a measuring cup without packing it down, and level it off with a knife. Even better, a kitchen scale takes the guesswork out and guarantees results. This helps avoid dense or dry rolls.
-
How do I get my garlic bread rolls super soft?
Use warm milk (not hot), don’t add too much flour, and be patient letting the dough rise and proof fully. Brushing the rolls with egg wash before baking and slathering them with garlic butter right after baking locks in moisture and softness.
-
Can I make these rolls ahead of time?
Yes! After shaping the rolls in the pan, cover them tightly and refrigerate overnight. The next day, just let them come to room temperature and double in size before baking. It’s a great way to have fresh homemade rolls ready when you want them.
-
How long do garlic bread rolls stay fresh?
Generally, they’re best eaten the same day or within 2-3 days stored in an airtight container at room temperature. After that, they may start to dry out but can be refreshed with oven reheating.
Final Thoughts
I absolutely love how this Garlic Bread Rolls Recipe turns out every single time—warm, buttery, and bursting with garlic goodness. It’s the kind of recipe I’m always eager to share because I know it will impress and satisfy everyone around the table. Whether it’s for a cozy dinner or a festive gathering, these rolls bring that extra homemade touch that guests remember. Give this recipe a try—I’m confident you’re going to love it just as much as I do. Happy baking, friend!

Garlic Bread Rolls Recipe
- Prep Time: 1 hour 30 minutes
- Cook Time: 20 minutes
- Total Time: 1 hour 50 minutes
- Yield: 12 servings 1x
- Category: Side Dish
- Method: Baking
- Cuisine: American
Description
These Garlic Bread Rolls are soft, fluffy, and loaded with rich garlic butter flavor. Perfect as a side for dinner or as a delicious appetizer, these homemade rolls combine the warmth of fresh herbs and a golden, buttery crust. Made with simple pantry staples, they are sure to elevate any meal.
Ingredients
Dough
- 4 1/2 tablespoons unsalted butter
- 2 tablespoons minced garlic
- 3 1/2 cups + 1 tablespoon all-purpose flour
- 3 tablespoons chopped fresh parsley
- 1 tablespoon granulated sugar
- 2 1/4 teaspoons instant yeast
- 1 teaspoon fine sea salt
- 1 cup whole or 2% milk, warmed to 110°F
- 1 large egg, room temperature
- 1 beaten egg, for brushing the tops
Garlic Butter Topping
- 2 tablespoons unsalted butter
- 1 tablespoon minced garlic
- 1 tablespoon chopped fresh parsley
- Flaky sea salt for finishing
Instructions
- Prepare the pan: Lightly butter the bottom and sides of a 9×13 baking pan and set it aside for later use.
- Make garlic butter for the dough: In a small pot, melt the 4 1/2 tablespoons butter and add 2 tablespoons minced garlic. Cook for 1-2 minutes until fragrant, then remove from heat and allow to cool slightly.
- Combine dry ingredients: In a stand mixer bowl, mix together the 3 1/2 cups + 1 tablespoon flour, chopped parsley, sugar, instant yeast, and salt.
- Add wet ingredients and garlic butter: Pour in the warmed milk, room temperature egg, and cooled garlic butter mixture into the dry ingredients.
- Knead the dough: Using the dough hook attachment, knead on low speed for about 10-12 minutes until the dough is smooth, soft, and tacky. If too sticky, add flour one tablespoon at a time until workable.
- Shape the rolls: Divide the dough into 12 equal parts (about 67 grams each). Shape each portion into a smooth ball, pinching the seam at the bottom to keep it tight. Place the dough balls evenly spaced in the prepared baking pan.
- First rise: Cover the pan with plastic wrap or a clean kitchen towel and let the rolls rise in a warm spot until doubled in size, about 1-2 hours.
- Preheat oven: Set the oven temperature to 350°F (180°C).
- Brush with egg wash: Lightly brush the risen rolls with the beaten egg to give them a golden sheen when baked.
- Bake: Bake the rolls for 20-30 minutes until the tops are golden brown and cooked through.
- Prepare garlic butter topping: While baking, melt 2 tablespoons unsalted butter in a small pot. Add 1 tablespoon minced garlic and cook for 1-2 minutes until fragrant. Remove from heat and stir in the chopped parsley.
- Finish and serve: When rolls come out of the oven, immediately brush them generously with the prepared garlic butter. Sprinkle flaky sea salt over the tops if desired and serve warm.
Notes
- Measure dry ingredients accurately using the spoon-level method or a kitchen scale for best results.
- If using active dry yeast instead of instant yeast, activate it in warm milk with sugar for 5 minutes until foamy before mixing.
- Store baked rolls in an airtight container at room temperature for 2-3 days.
- For longer storage, freeze cooled rolls in an airtight container for up to one month.
- You can make ahead by refrigerating shaped rolls overnight covered with plastic wrap, then allow to rise at room temperature before baking.
- To reheat, cover rolls with foil and warm in a 350°F oven until heated through or microwave briefly for 20-30 seconds.
Nutrition
- Serving Size: 1 roll
- Calories: 180
- Sugar: 2g
- Sodium: 210mg
- Fat: 7g
- Saturated Fat: 4.5g
- Unsaturated Fat: 2g
- Trans Fat: 0g
- Carbohydrates: 25g
- Fiber: 1g
- Protein: 4g
- Cholesterol: 40mg


Your email address will not be published. Required fields are marked *